
FS-1184 | November 2021
Soil Sampling for Optimizing Agricultural Production in Maryland
Soil sampling and analysis are an integral part of the nutrient management planning process. Soil samples provide information about a field’s soil fertility status, including pH, organic matter content, and availability of macronutrients and micronutrients. Combined with crop and production goals, soil test information is used to generate nutrient and lime recommendations to optimize crop production, minimize environmental degradation, and maximize farm profitability by not wasting money on applying excess nutrients. However, nutrient recommendations are only as good as the soil test on which they are based. This means that a proper soil sampling technique is essential to collect reasonably representative soil samples based on the grower’s field management.
When to Sample
Soil samples should be collected at least once every three years, more often if possible. You can collect soil samples anytime throughout the year, given the following considerations.
- For each new round of soil sampling, consider collecting samples in the same month of the year to reduce seasonal effects and associated variability. For example, if fields were sampled in October three years ago, collect updated samples in October of this year. In addition, sampling in the fall after harvest but before any nutrient applications is recommended. This also allows time for lime applications to adjust pH before the next growing season and may avoid possible sampling and laboratory analysis delays in the spring. Fall sampling also allows additional time to review soil test results, develop a nutrient management plan, and plan fertilizer purchases and application logistics over the winter season.
- Do not collect soil samples within a minimum of six weeks of fertilizer or manure applications to reduce the risk of more variable and non-representative results.
- Avoid wet field conditions. If it is too wet for tillage, it is too wet for soil sampling.
Where to Sample
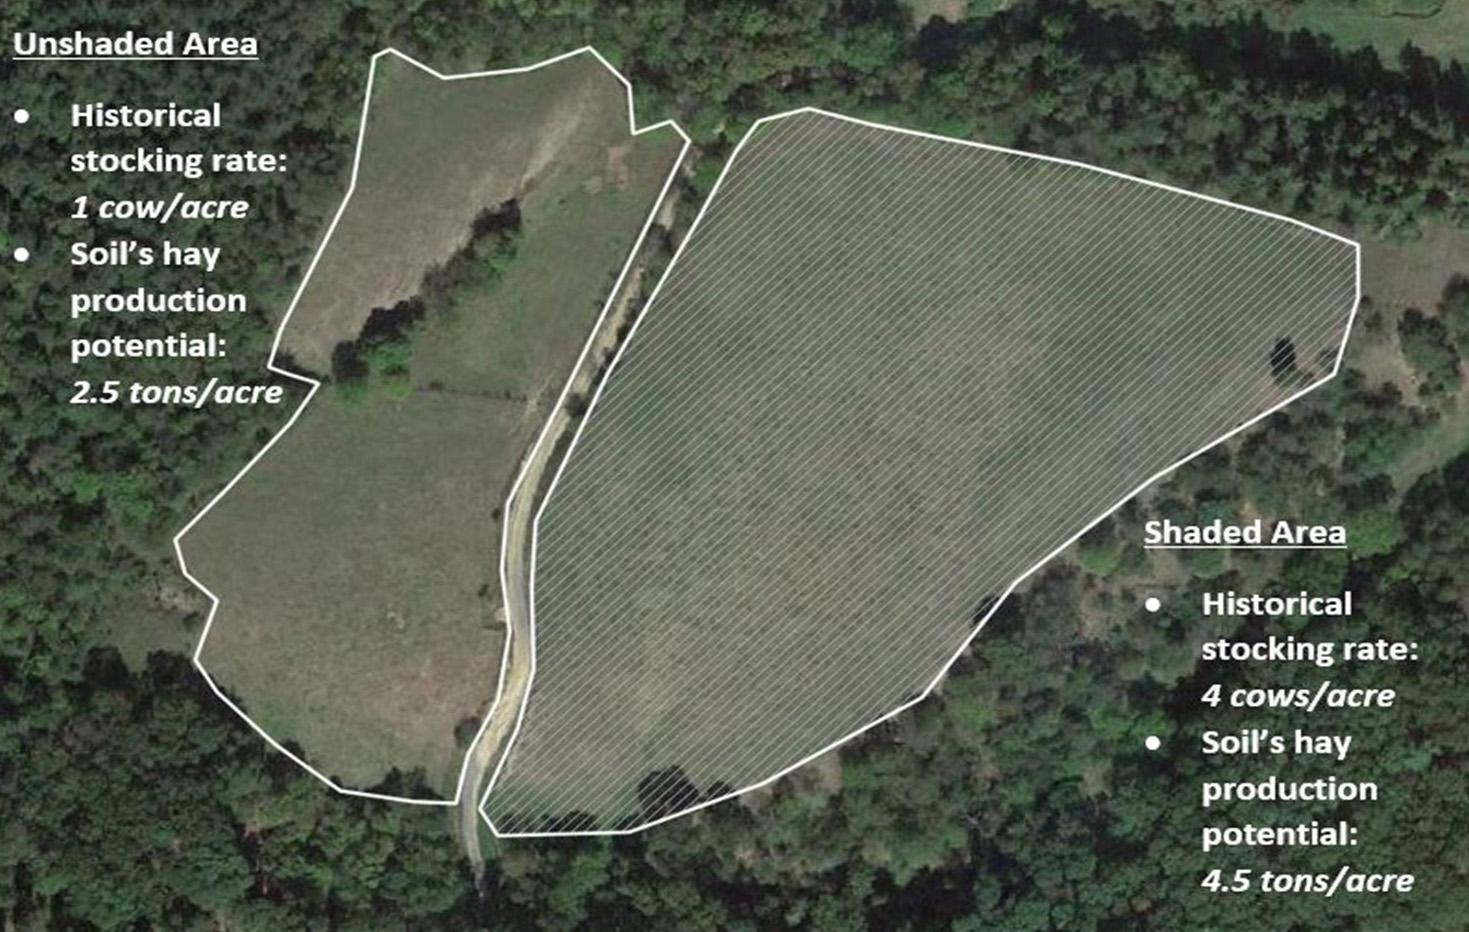
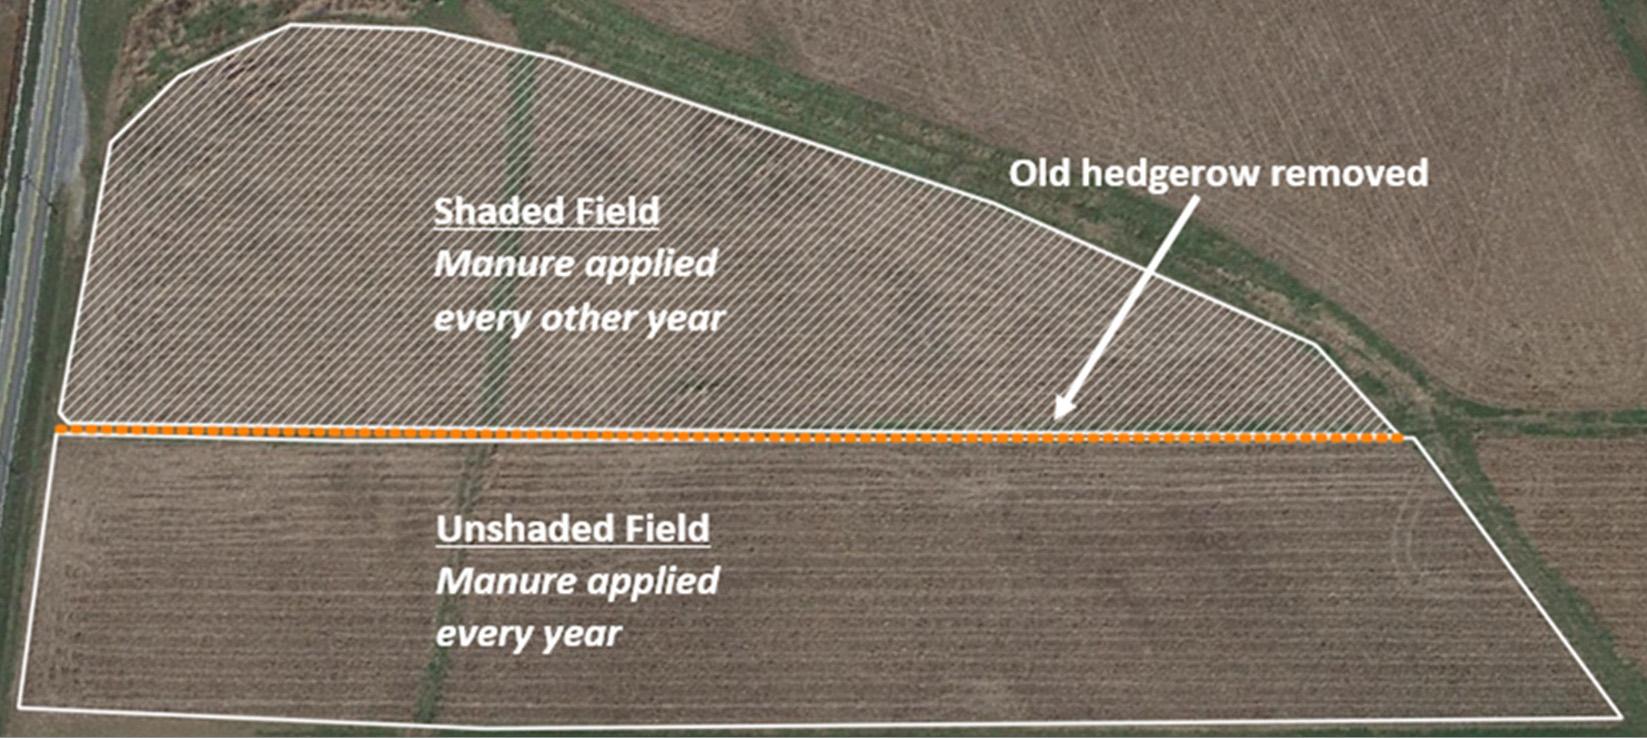
It is always a best practice to start by identifying management units in a field. A management unit is an area that you will manage separately from other areas. Sample and manage field areas that contain differences in soil types, past cropping or fertilizer/manure application histories and/or production potential separately (see Figures 1 and 2). When sampling, carefully account for previous adjustments to field boundaries and associated differences in management. If you cannot manage different areas separately, treat them as one management unit.
Grid- or zone-based precision soil sampling may be appropriate when considering intended farm management, equipment capabilities, and field features. Grid sampling may also be helpful to understand the variation across a field and identify management units. Zone soil sampling can account for known variations in the field, such as electrical conductivity or yield data. Consider your ability to incorporate and implement grid- or zone-based nutrient recommendations into your farm’s nutrient management plan before collecting these types of samples. For more information on precision soil sampling, see the University of Maryland Extension (UME) fact sheet FS-1046.
How to Sample
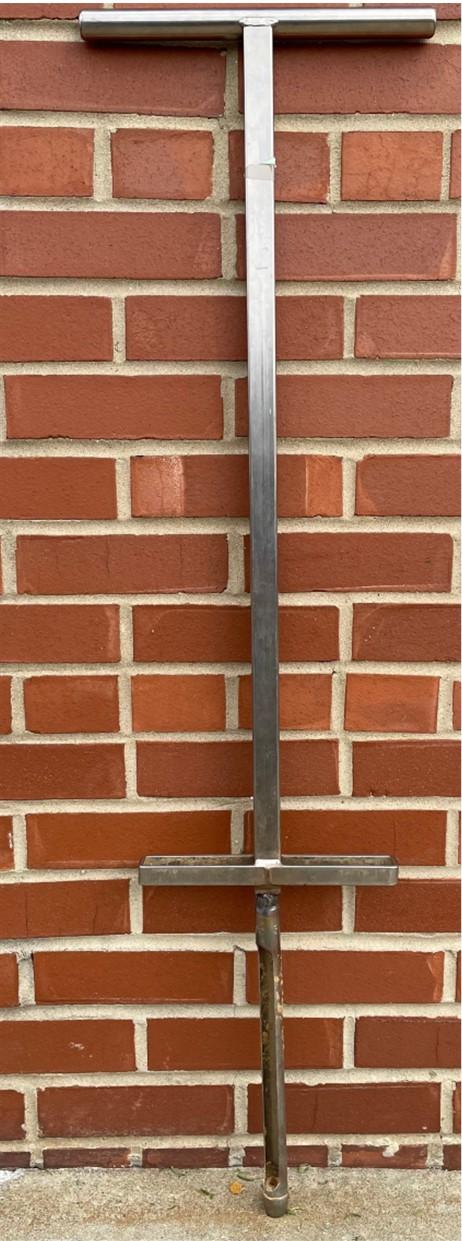
A clean, rust-free stainless steel soil probe (Figure 3) is the best tool for collecting soil samples. Do not use brass or galvanized tools and containers because they can contaminate the samples. An auger may be useful in gravelly or compacted soils. You can use a spade, but it is less efficient and precise than a soil probe. If using a spade, dig a hole with a vertical face and shave off a uniform layer of the soil profile. Tractor, truck, or ATV-mounted hydraulic probes dramatically increase the efficiency of soil sampling.
Sample a management unit by pulling individual soil cores randomly throughout the entire management unit and mixing those cores into one sample for analysis. Scrape away surface residue present on top of the soil and use the soil probe to collect samples from the appropriate depth.
Collect a minimum of 15 to 20 soil cores from field management units that are ~20 acres or less. At least one soil core per acre is recommended for management units that are 20 to 30 acres. A sampling intensity of less than one soil core per acre is acceptable for management units exceeding 40 acres. Remember that the goal of pulling enough soil cores is to collect a representative soil sample so that you can have tailored and accurate soil fertility recommendations.
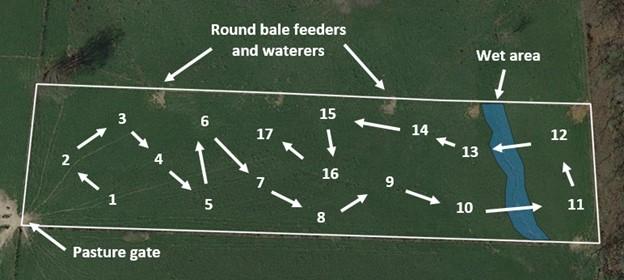
When it is time to sample, collect individual soil cores randomly throughout the management unit. To decrease unintentional bias, consider using a field map to randomly select sample points within the field before sampling (see an example in Figure 4). Avoid sampling in persistently wet areas, pasture areas where animals congregate for feeding/watering, past manure or lime piles, fertilizer bands or manure injection slots, turn row areas, severely eroded areas, and windbreaks or old fence lines.
Soil Sampling Depth
- For soil fertility assessment of cropland and pasture fields and the Fall Soil Nitrate Test (FSNT), sample to a depth of 0 to 8 inches (see Figures 5 and 6). For more information on the FSNT, see UME Extension brief EBR-15.
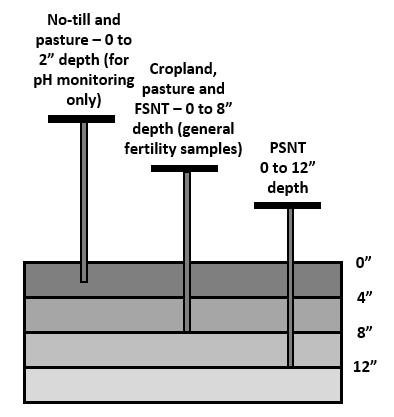
Figure 5: For pH determination in no-till and pasture fields, take samples from 0 to 2 inches depth. For soil fertility samples in cropland and pasture fields and the FSNT, take samples from 0 to 8 inches. For PSNT, take samples from 0 to 12 inches. 
Figure 6: A soil probe showing a soil core collected from 0 to 8 inch depth. Photo Credit: Patricia Hoopes, UME - For pasture and continuous no-till cropland fields, a second sample to a depth of 0 to 2 inches is recommended to be taken and analyzed for pH only. Timely determination of topsoil pH is essential in no-till systems where liming material cannot be incorporated. In these situations, lime can take longer to react beyond the top few inches of soil. Sampling protocol as outlined above should be followed (e.g., 1 core per acre).
- For the Pre-Sidedress Nitrate Test (PSNT), which is done in late spring/early summer, sample to a depth of 0 to 12 inches. For more information on the PSNT, see the UME publication SFM-2.
Sample Preparation
Thoroughly mix individual soil cores in a clean bucket. Break up samples that are hard or composed of strong soil aggregates before mixing. If you can’t bring or mail a moist sample to the laboratory right away, air-dry the collected sample overnight or store it in a refrigerator. DO NOT heat the soil in an oven or microwave.
Once composite soil cores have been thoroughly mixed, put approximately one pint (about 1 pound), or the amount specified by the soil testing laboratory, into an appropriately labeled soil sample bag. Fill out the laboratory’s information sheet as completely as possible and submit it along with soil samples. A list of regional soil testing laboratories suitable for nutrient management planning in Maryland can be found at the University of Maryland Agricultural Nutrient Management Program’s (UM-ANMP) website.
For More Information, Consult These Resources
- List of regional soil test laboratories suitable for nutrient management: UM-ANMP’s website.
- Precision soil sampling: UME Fact Sheet FS-1046: Precision Soil Sampling Helps Farmers Target Nutrient Application
- The Fall Soil Nitrate Test: UME Extension Brief EBR-15: Fall Soil Nitrate Test (FSNT)
- The Pre-Sidedress Nitrate Test: UME Publication SFM-2: Making Decisions for Nitrogen Fertilization of Corn Using the Pre-Sidedress Nitrate Test (PSNT)
- Converting regional soil test lab results to Maryland Fertility Index Values: UME Publication SFM-4: Converting Among Soil Test Analyses Frequently Used in Maryland
| BRIAN KALMBACH bkalmbac@umd.edu DR. GURPAL TOOR gstoor@umd.edu This publication, Soil Sampling for Optimizing Agricultural Production in Maryland (FS-1184), is a part of a collection produced by the University of Maryland Extension within the College of Agriculture and Natural Resources. The information presented has met UME peer review standards, including internal and external technical review. For help accessing this or any UME publication contact: itaccessibility@umd.edu For more information on this and other topics, visit the University of Maryland Extension website at extension.umd.edu University programs, activities, and facilities are available to all without regard to race, color, sex, gender identity or expression, sexual orientation, marital status, age, national origin, political affiliation, physical or mental disability, religion, protected veteran status, genetic information, personal appearance, or any other legally protected class. |