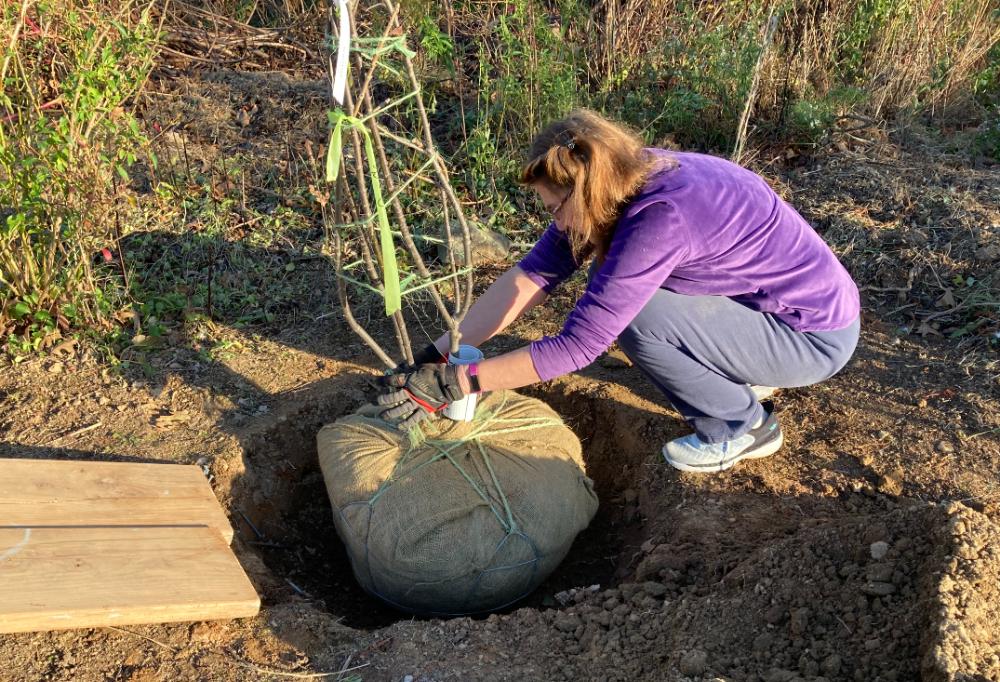
Rootball problems with B&B and container-grown plants
In many cases, trees and shrubs are sold with their roots and trunk already covered with too much soil. This leads to future problems, including possible decline and death, especially when they are planted too deeply in the landscape. Even trees planted by professional landscapers can be planted too deeply leading to poor establishment and growth. The use of too much mulch can then exacerbate the problem, especially if it buries the trunk.
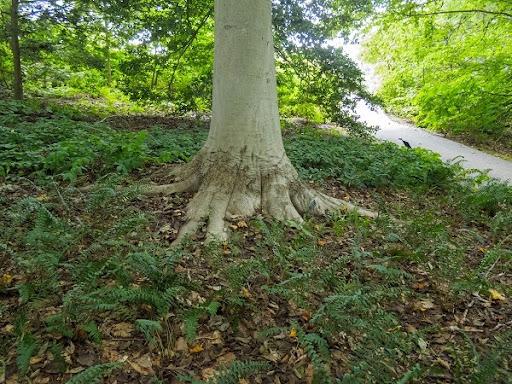
What happens when trees and shrubs are planted too deeply and the root flare (photo below) is not visible or is mulched too deeply?
The location on the trunk base where roots begin to emerge is called the root flare or root collar. At that junction, trunk bark cells change into root system cells. A buried flare can hide and promote the development of girdling roots and deprive roots of oxygen, especially in wet soils. And bark that stays moist can permit the entry of wood-damaging insects or diseases.
What can be done to help correct this?
Before planting, see if you can locate the root flare. Some tree species have a more prominent root flare than others, and older trees generally have more noticeable flares than younger trees. If needed, gently remove any excess soil that is covering the trunk base. Also, remove extra soil across the top of the root ball so the top of the root ball is flat and level. Plant according to the recommendations below, and add mulch correctly.
In horticulture circles “root washing” is a topic of debate as a means of correcting root problems at the time of planting. For details, visit Linda Chalker-Scott’s information. She is an Extension Urban Horticulturist at Washington State University and has long promoted root washing.