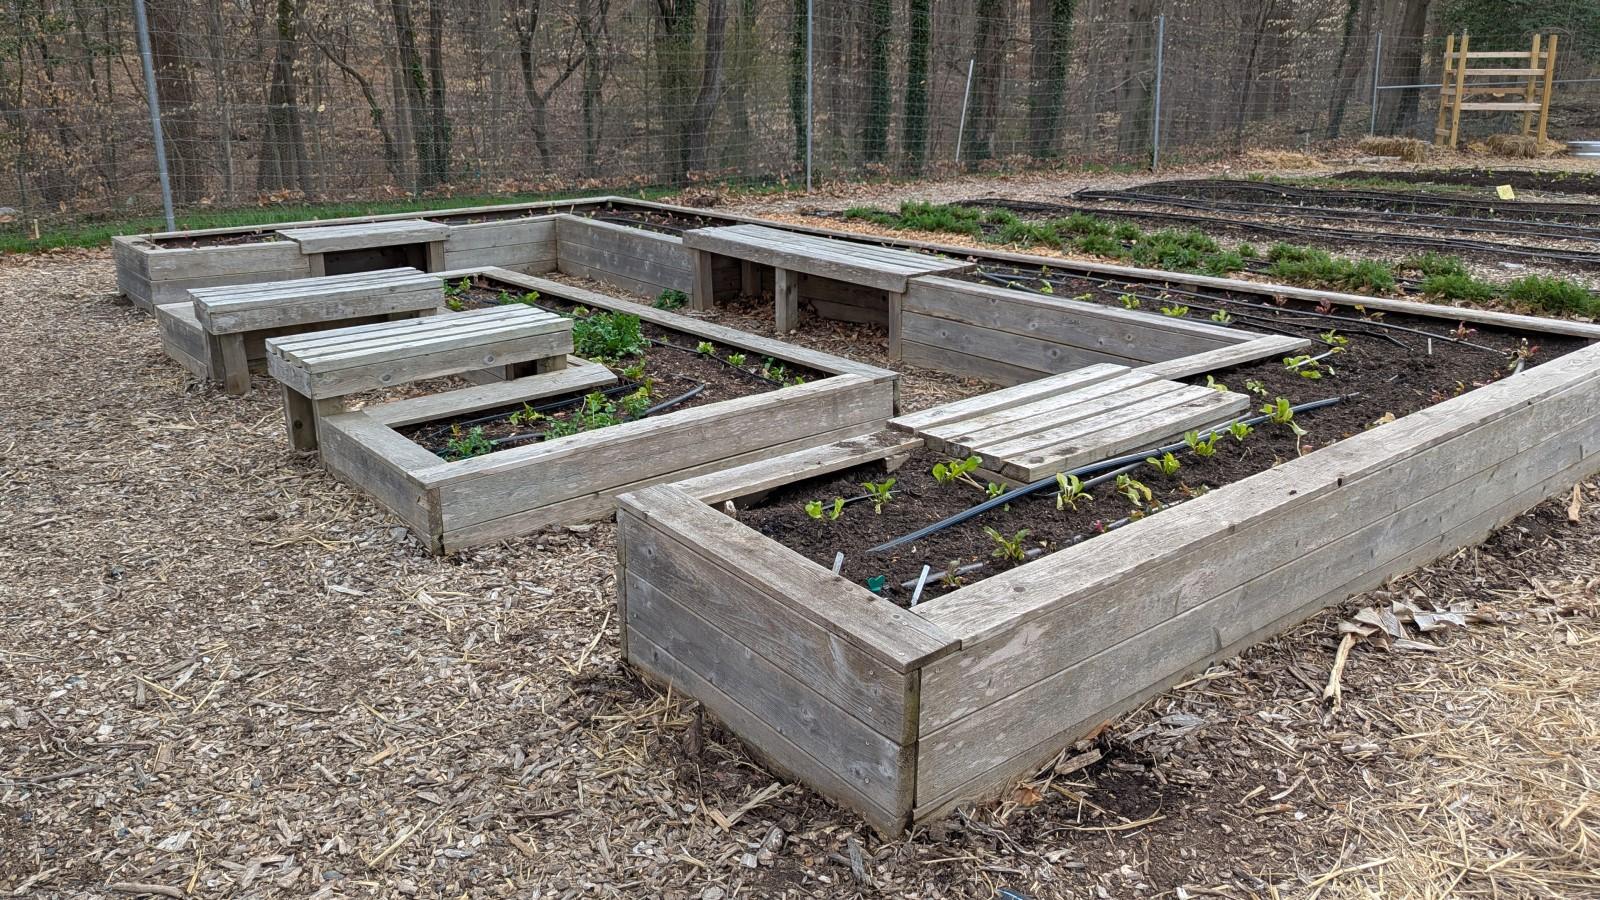
Raised beds with built-in seating and drip irrigation lines in the U.S. National Arboretum Youth Garden in early spring. Photo: Miri Talabac, University of Maryland Extension
Updated: March 26, 2026
Raised beds are improved areas of soil elevated above ground level and often surrounded and contained with boards or other rigid materials. They are usually 2 to 4 feet across, 2 to 12 inches tall/high, and as long as desired. When raised beds are placed on top of the ground, plant roots grow through the raised bed soil into the soil below. In this sense, raised beds are in-ground gardens, although they can also be used on top of hard surfaces like pavement.
Advantages and disadvantages of raised beds
Compared to growing plants in the ground, there are pros and cons to using raised beds.
Advantages
The soil warms up more quickly in spring than ground-level soil.
Due to its looser texture and raised grade, the soil drains well, reducing the risk of waterlogging and root rot.
The added depth increases the available rooting area, boosting plant growth and harvest yields. The looser soil of raised beds is especially beneficial for deep-rooted crops like carrots.
Less soil compaction and erosion occur because the planting area isn’t being walked on.
Disadvantages
There is added cost for building materials and installation labor.
Faster soil drying requires more monitoring and irrigation, especially when the weather is hot and dry.
The structure is relatively permanent, so a garden must be planned around the raised bed's dimensions and configuration.
Materials degrade over time, so the bed enclosure material must be maintained and replaced periodically if it starts to fall apart.
Raised beds are often bordered by permanent paths covered in turfgrass, wood chips, or another type of mulch. Using pathways as places to stand or kneel when working in the beds avoids soil compaction around the plants, which helps keep planting at peak productivity.
Materials for building raised beds
Raised beds can be custom-built or purchased as a kit to assemble. The following are commonly used materials for making do-it-yourself (DIY) raised beds.
Wood (lumber)
Untreated wood
Dimensional lumber: untreated SPF (spruce, pine, fir) is less expensive than pressure-treated wood
Decay-resistant lumber: cedar, black cherry, oak (bur, chestnut, post, or white), black locust, Osage orange, or redwood (Source: U.S. Department of Agriculture Forest Products Lab)
Rough-cut lumber (not kiln-dried, with a more rustic aesthetic) from local sawmills: oak, poplar, or locust
Pressure-treated wood
Micronized Copper Azole (MCA) is currently the most widely-available pressure-treated lumber for residential use. It is considered to be low in toxicity.
For information on the health risks associated with MCA-treated wood, refer to the National Pesticide Information Center Wood Preservatives page.
Research from Oregon State University showed that MCA pressure-treated lumber increases soil copper concentrations by a minor amount, but only within 1 inch of the raised bed edge. Their study found no increase in copper concentration in plants grown in raised beds made with the lumber.
If you have concerns about using MCA-treated wood for raised beds, paint or stain the wood before building or planting the bed, or use an alternative building material, such as stones or bricks.
Chromated Copper Arsenate (CCA) is an older type of wood preservative that contains arsenic, copper, and chromium. Its use for outdoor residential structures was discontinued in 2004.
Barriers for treated wood and preserving untreated wood
Several DIY options for preserving wood can be used for a raised bed vegetable garden, and for limiting soil contact with any treated wood surfaces.
Coat the wood with exterior latex paint. (Source: Oregon State University Extension)
Treat the wood with a preservative, such as a semi-transparent oil-based stain. (Source: USDA Forest Products Lab)
Cover the inside of the bed’s frame with a heavy-duty plastic liner before filling the bed with soil. Allow for soil drainage by creating drainage holes in the liner’s base, or by not laying the liner across the bottom of the bed (only line the sides). (Source: Iowa State University and the Massachusetts Department of Environmental Protection)
Personalizing wooden raised beds
Sealing wood with paint gives you the opportunity for creativity using color. Photo: Jon Traunfeld, University of Maryland Extension
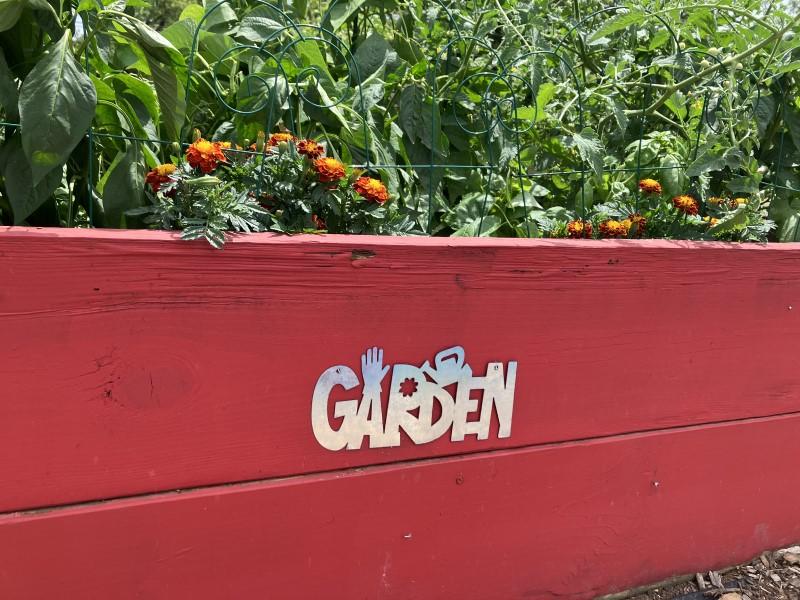
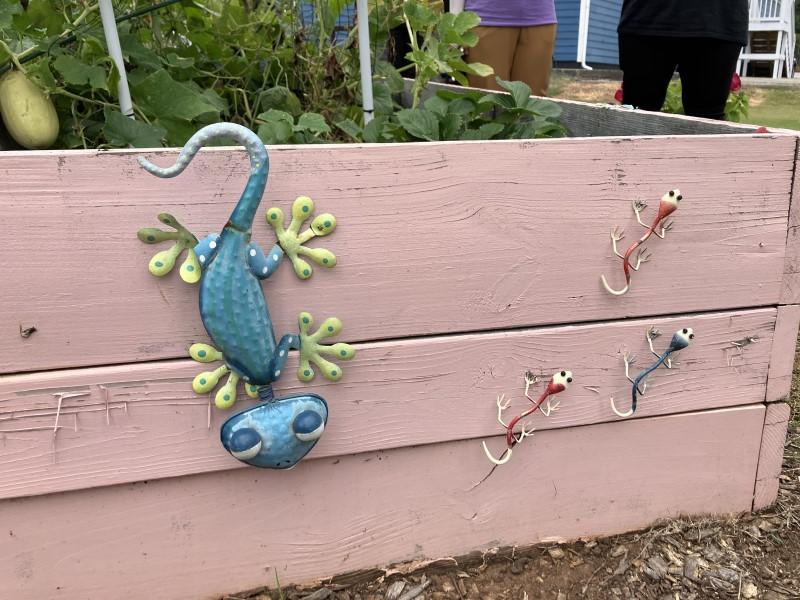
The sides of a raised bed can be personalized with decorative elements. Photo: Jon Traunfeld, University of Maryland Extension
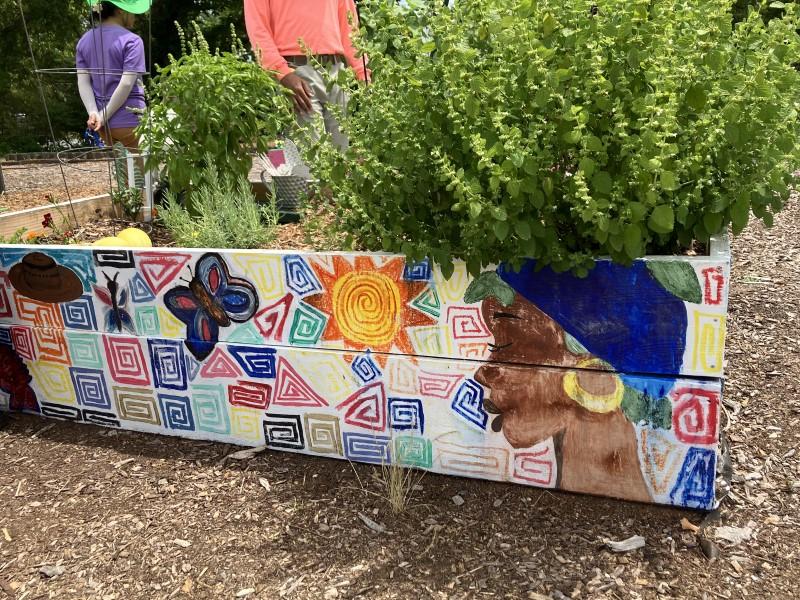
The sides of a raised bed can be a canvas for artistic expression. Photo: Jon Traunfeld, University of Maryland Extension
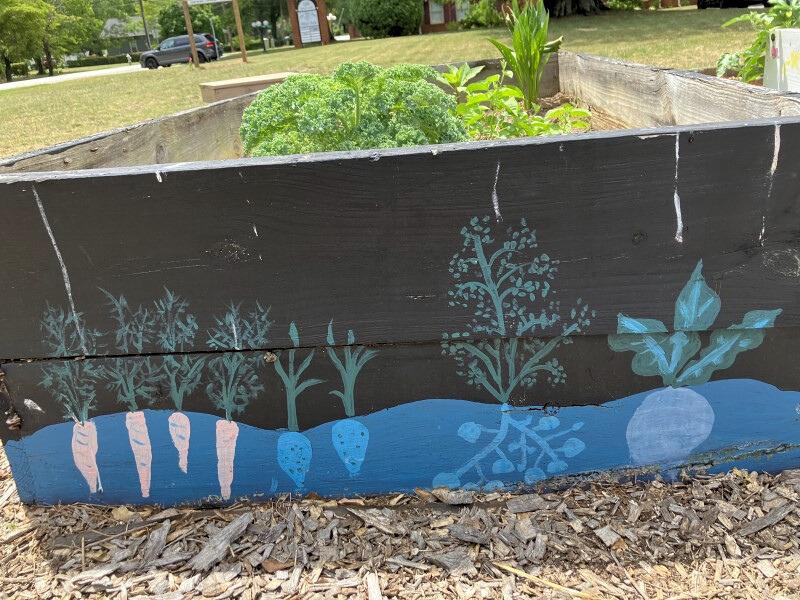
Raised bed decorations painted on the sides can portray the types of crops being grown in the garden. Photo: Jon Traunfeld, University of Maryland Extension
Non-biodegradable materials
Decay-resistant materials generally last longer, although they give raised beds a different aesthetic and may be harder to customize for a bed’s size, shape, and decorative elements.
Galvanized steel (rust-resistant)
Permeable garden fabric or felt supported by a wood, aluminum, or polyvinyl chloride (PVC) frame
Rigid, recycled composite plastic
Pavers or stone
Concrete blocks made with cement and fine aggregates such as sand or small stones. Fly ash is also often included, which is a byproduct of burning coal that contains heavy metals and other hazardous waste.
Product labels do not provide detailed information on specific aggregates used or the manufacturing process. Little research-based information exists on this topic.
Concrete blocks are considered generally safe for food gardening as long as they remain intact and are not broken or crushed. (Heavy metal content won’t easily leach out of the blocks, even if broken, and the amount of metals present in the blocks is relatively small.)
Ultimately, this is a personal choice based on your comfort level. If you plan to use blocks as a raised bed material – many gardeners do – and you are concerned about potential risks, you could seal the blocks with polymer paint. Otherwise, choose another material to build the bed walls.
Examples of raised bed materials
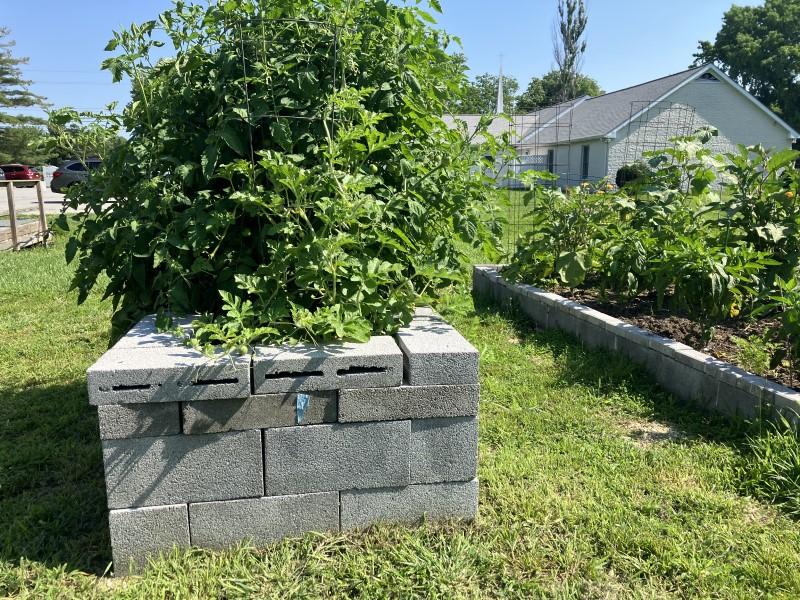
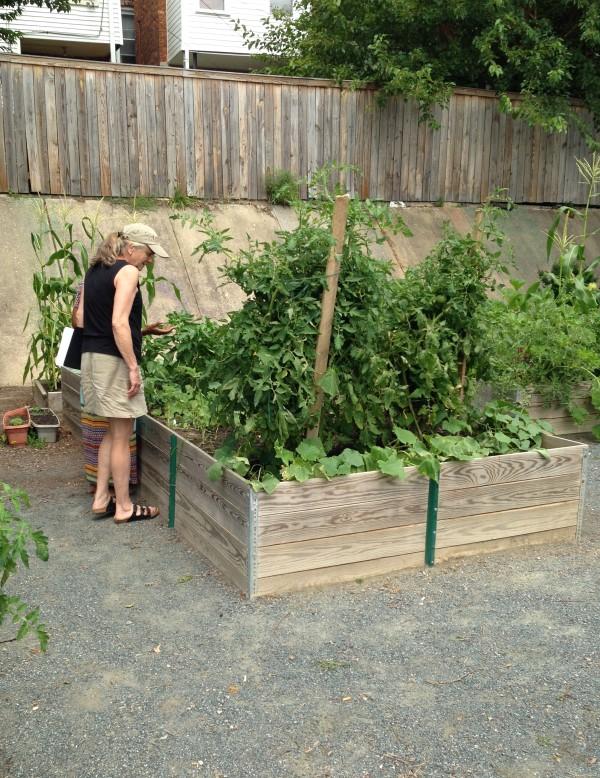
Raised beds in a community garden built with concrete blocks. The tall bed is 24 inches deep; the short bed is 10 inches deep. Photo: Jon Traunfeld, University of Maryland Extension
Terraced raised bed built with stacked decorative concrete blocks. Photo: Jon Traunfeld, University of Maryland Extension
Raised bed built with 8-inch high fiberglass boards. Photo: Jon Traunfeld, University of Maryland Extension
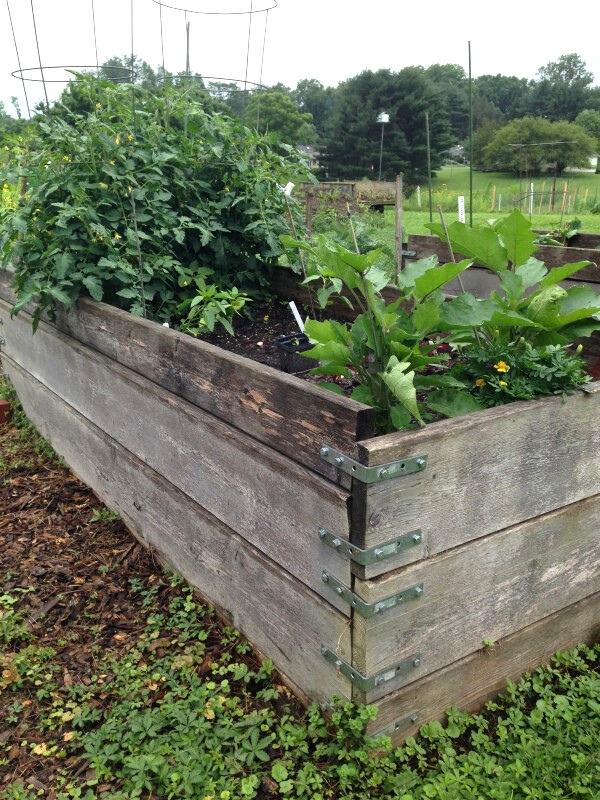
30-inch deep raised bed constructed with salvaged lumber and braced with metal brackets. Photo: Jon Traunfeld, University of Maryland Extension
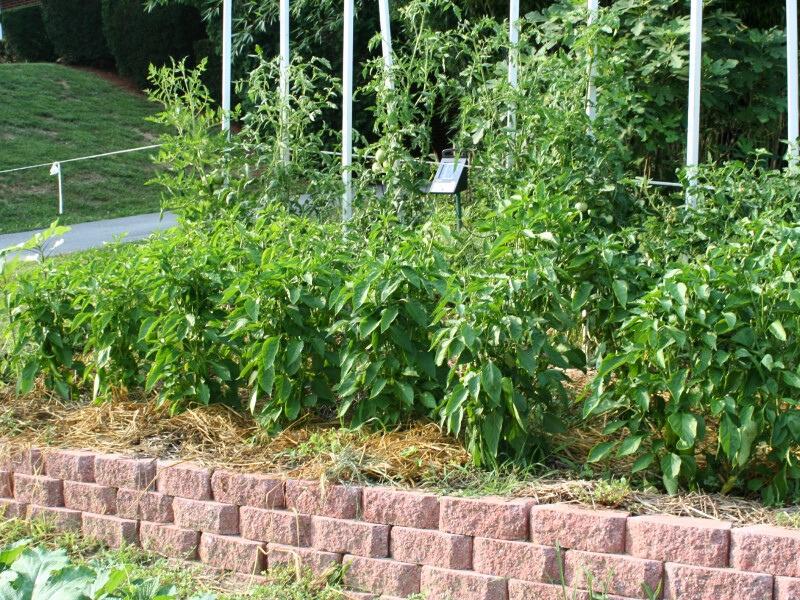
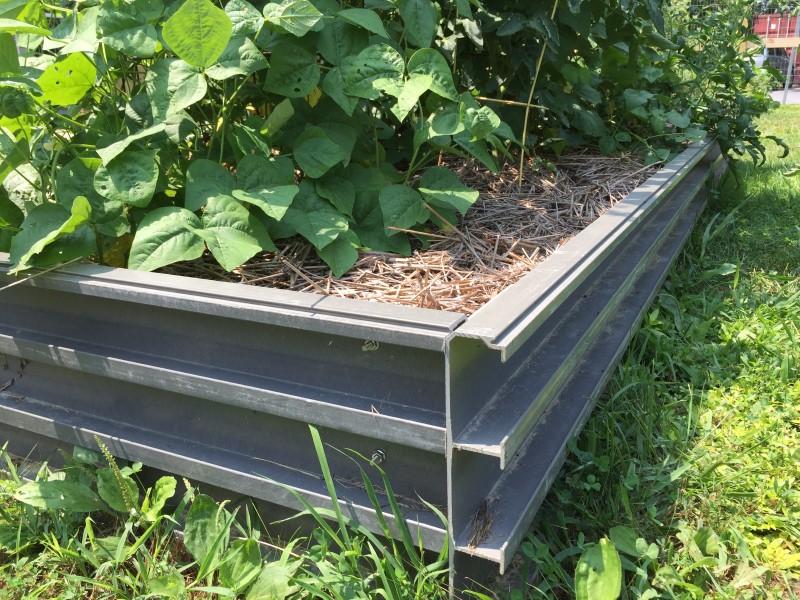
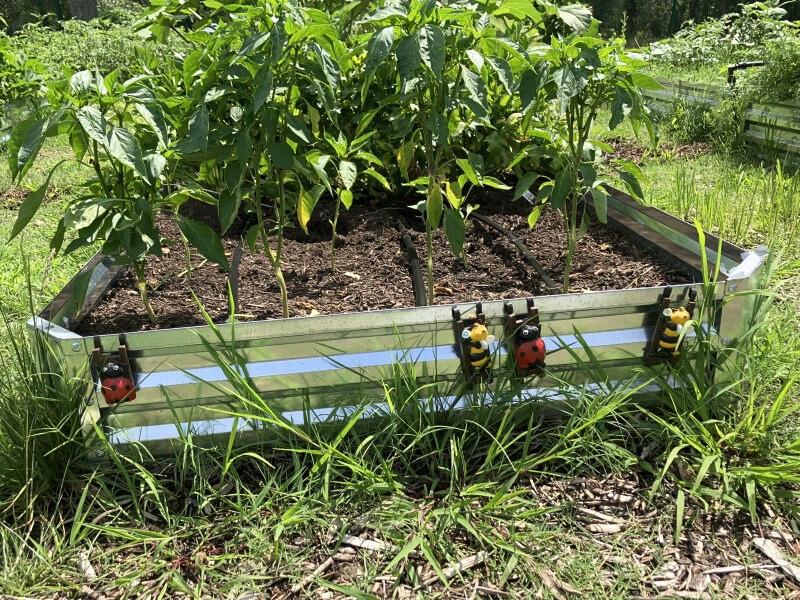
Pepper plants in a 1-foot-deep raised bed kit made from galvanized metal. Photo: Jon Traunfeld, University of Maryland Extension
Raised beds without an enclosure
Create a raised bed of mounded soil without containment walls if you want to skip the expense and hard work of building an enclosure. Slope or round off the sides to reduce erosion. This approach is more difficult with sandy soils.
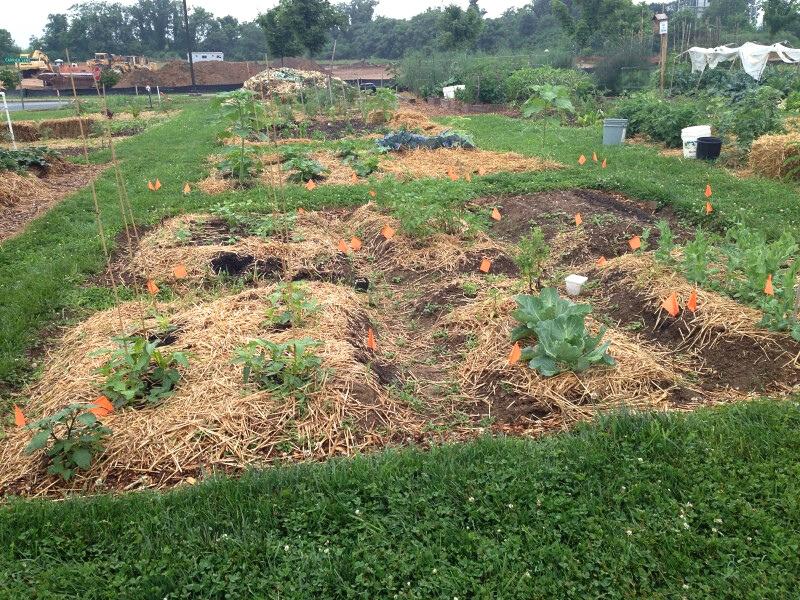
Raised beds can be made as stand-alone mounds without walls to contain the soil. Photo: Jon Traunfeld, University of Maryland Extension
Filling raised beds
Healthy soil will help you produce healthy plants in your raised bed. Soil provides plants and soil-dwelling microbes with water, air, and nutrients. Ideal garden soil is loose, deep, and crumbly. It retains some water for root absorption and allows excess rainfall to percolate downward quickly.
The organic matter (OM) content in a raised bed that contains garden soil (soil from the ground) should be 25% to 50% by volume or 5% to 15% by weight (as measured by a soil testing lab).
The best location for a raised bed is sunny, level ground with good drainage. Once the area is chosen, assess the soil quality to decide whether to add topsoil, compost, and perhaps soilless potting mixes to raise the grade. The greater the soil disturbance from mixing in amendments, the more weed seeds can be brought to the surface, where they can germinate. Aim for a no-dig or low-dig raised bed.
Refer to the following common situations regarding the initial site conditions to develop an approach that works best for you. Whenever a raised bed is placed on top of existing soil, the first step should be to take a soil sample from the area and submit it to a soil testing laboratory before any changes to the soil are made. (Lab tests are more accurate and detailed than DIY at-home test kits or soil probes.)
Select the basic soil test when submitting the sample. The lab will provide test results (soil pH, nutrient levels, etc.) and recommendations for appropriate fertilizers and soil amendments.
The ideal soil pH range for most garden vegetables, herbs, and ornamental plants is 6.2 to 6.8. Productive raised beds with high organic matter content often have a soil pH of 6.8 to 7.2, which is fine and does not require adjustment.
Have the lab test the soil for lead if you plan to grow food in the raised bed. A background soil lead level of 10 to 50 ppm (parts per million) is typical. Don’t plant vegetable crops in soils with a total lead level over 400 ppm.
Prior to planting, you can add any fertilizers and soil amendments (such as lime or sulfur) that are recommended by the lab.
Converting lawn areas
If the area chosen for the raised bed has turfgrass and/or weeds, and the soil seems suitable:
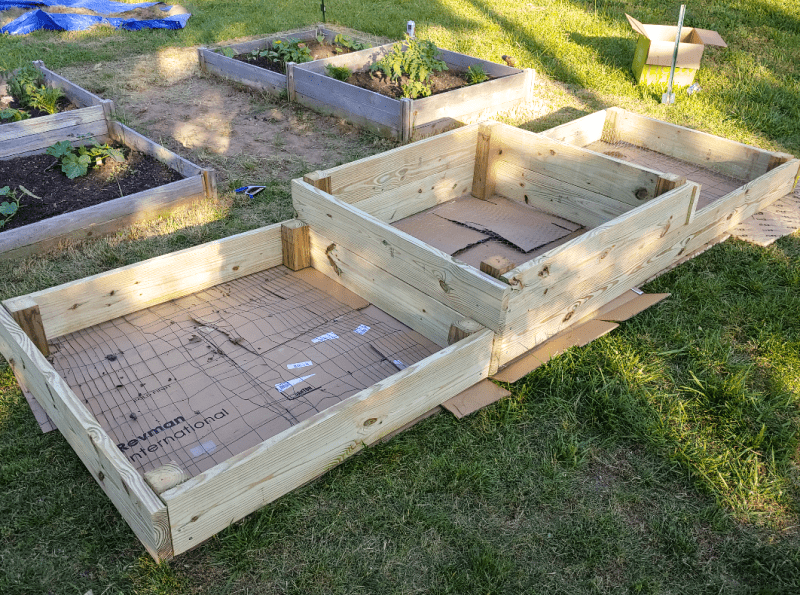
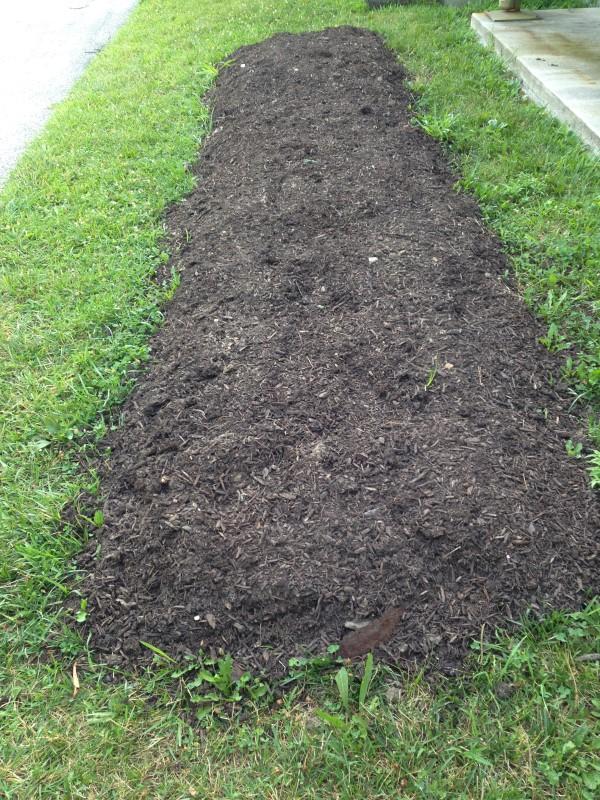
Converting lawn to a food gardening space by smothering the grass with cardboard underneath the wooden bed frames. Photo: Dan AdlerGarden bed created by smothering vegetation with cardboard and spreading an 8-inch layer of compost on top. Photo: Ask Extension
Kill the vegetation: In autumn or early spring, smother the turfgrass/weeds by covering them with plain cardboard (non-waxed with tape removed) or multiple overlapping layers of newspaper. Spread 2 to 4 inches of compost on top to hold the cardboard or paper in place. The vegetation will die in 8 to 12 weeks and decompose in place, along with the cardboard or newspaper, adding organic matter to the soil.
Non-biodegradable cover material options include a tarp or weed barrier fabric, secured with landscape staples/pins, bricks, or rocks. Remove the material when the vegetation is dead, then spread the compost.
Prepare the soil: Two options to improve the soil, if needed, are:
No-dig: Do not disturb the soil below. Plant seeds and transplants directly into the compost. Plant roots will grow through the decomposing vegetation into the underlying soil. This approach will reduce the number of weed seeds that germinate in the bed.
Minimum-dig: Prior to installing the raised bed frame, drive a garden fork or spade into the soil and rock it back and forth. Move the tool 6 to 8 inches and repeat until the entire raised bed footprint is worked. (Do not lift and flip the soil over.) This will help loosen the soil and gently mix in the compost. You can also add and mix in soil from pathways dug around the bed to increase the bed’s soil depth (refer to the following adding pathway soil to a raised bed section).
Converting areas with minimal vegetation and poor or compacted soil
If not much vegetation is growing and the soil is hard to work due to compaction and/or a high percentage of clay:
Clear the site: Hand-pull any vegetation or cut it off at ground level with a hoe or spade.
Loosen the soil: Drive a garden fork or spade into the soil and rock it back and forth. Move the tool 6 to 8 inches and repeat until the entire raised bed footprint is worked. (Do not lift and flip the soil over.) This will help loosen the subsoil to improve drainage and aeration.
Amend the soil: Add a mixture of compost and purchased topsoil, in a 1:2 or 1:1 ratio of compost:topsoil, to the top of the bed. Some businesses and municipalities sell topsoil pre-mixed with compost. Alternatively, fill the bed with a 1:1 mix of compost and soilless growing media. A minimum of 8 inches of a compost-topsoil or soilless media-compost mixture should be spread on top of existing soil. You can also add and mix in soil from pathways dug around the bed to increase the bed’s soil depth (refer to the following adding pathway soil to a raised bed section). Over time, the quality of the soil beneath the raised bed will improve through the incorporation of organic matter and the root growth of crops.
Adding raised beds to existing gardens
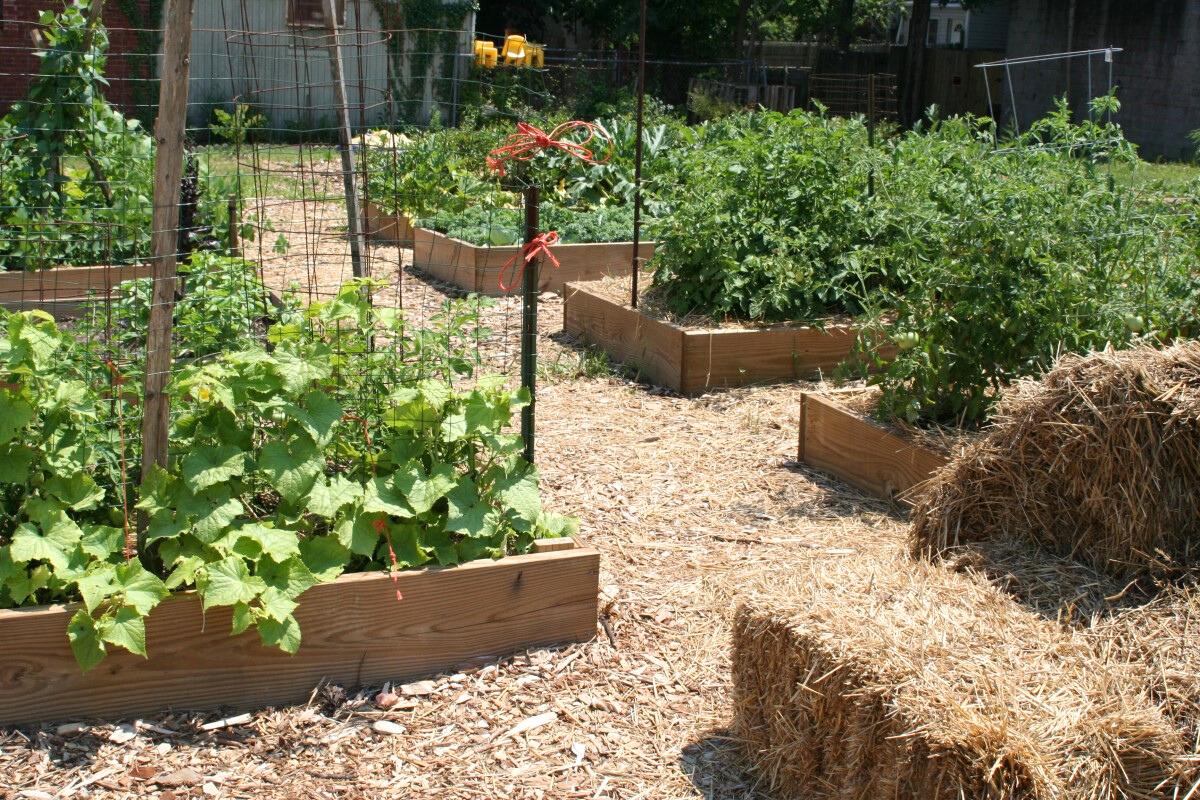
Raised beds growing vegetables surrounded by straw-covered pathways. Photo: Jon Traunfeld, University of Maryland Extension
If the raised bed will be placed in an existing garden area:
Amend the soil: Assuming the soil is in good condition (not compacted, well-drained, and with topsoil present), add a layer of 2 to 4 inches of compost (homemade or purchased) and work it into the top 4 inches of the soil with a garden fork or spade. You can also add and mix in soil from pathways dug around the bed to increase the bed’s soil depth (refer to the following adding pathway soil to a raised bed section).
Monitor for weeds: Be prepared to identify and manage weeds right away because any soil disturbance will bring weed seeds to the surface where they can germinate.
Hard surfaces
If the raised bed will be placed on a hard, impermeable surfaces like pavement or concrete:
A 20 inch deep raised bed built on a hard surface of crushed stone. Excess water drains easily from its base. Photo: Jon Traunfeld, University of Maryland Extension
Create beds deep enough for the crops being grown: Raised bed gardens placed on hard surfaces are fine if they are at least 8 inches deep for leafy greens, beans, and cucumbers; and 12 to 24 inches deep for peppers, tomatoes, and squash. These beds will dry out more quickly because plant roots can’t access water in soil below the raised bed; they are entirely dependent on the moisture within the confines of the raised bed. Plants may also be subject to extra stress from absorbed and reflected sunlight and heat from the surrounding surfaces. Check the soil regularly for signs of dryness, and water as needed to maintain a moist root zone.
Fill the bed: Use compost and a soilless growing mix in a 1:1 ratio. Topsoil can be added (up to 20% of the mix by volume) to beds that are at least 16 inches deep.
Adding pathway soil to a raised bed
Use existing soil from between raised beds to increase the depth of soil inside the beds:
Remove vegetation from the paths: Cover 2-foot-wide pathways around the raised beds with newspaper or weed barrier to smother and kill the vegetation (allow 8 to 12 weeks for vegetation decomposition). Alternatively, strip off the vegetation by slicing it horizontally with a spade to uproot and remove it, and compost that material.
Remove soil from the paths: For areas cleared by smothering, dig up the top 2 to 4 inches of soil and dead vegetation and add it to the raised beds. For areas where the vegetation was stripped away, slice and remove the top 2 inches of soil and add it to the raised beds. Blend the new material with the soil that was already in the bed so you do not have layers of different soil types.
Protect the paths: Permanent paths should be covered with a sturdy mulch to discourage weeds and prevent erosion. Mulch options include wood chips, shredded bark, bricks or pavers, or heavyweight synthetic landscape fabric.
Buying topsoil
Topsoil is the uppermost layer of soil that develops over long time spans from broken-down organic matter mixed with the mineral soil (clay, silt, and sand particles). During home construction, topsoil is often lost due to regrading of the site.
Topsoil sales are not regulated in Maryland. When buying topsoil in bulk, visit a reputable nursery or topsoil dealer and request soil test results and information on the soil's origin and on-site mixing and storage. Examine the soil before purchase or delivery. Topsoil should be dark and crumbly with an earthy smell. Do not purchase soil that is very high in sand or clay; is foul-smelling; or has grayish mottling or a chalky, sticky, or rough texture. Some suppliers offer a blend of topsoil and compost, which can make an excellent growing medium for raised beds.
Bags of “organic soil” you may see for sale typically don’t actually contain mineral soil. Instead of soil, these products contain various combinations of wood processing waste, such as wood fiber and fine-grade bark chips, compost, peat moss, and other organic materials. Some of these products are certified by the Organic Materials Review Institute (OMRI) and can be used by farmers participating in the USDA organic certification program.
Author: Jon Traunfeld, Extension Specialist (retired), Home/Community Food Gardening, Spring 2019. Revised March 2026.
Originally reviewed by Neith Little, Extension Agent in Urban Agriculture, 2019. Revision reviewed by Miri Talabac, Lead Horticulture Coordinator, HGIC, March 2026.
Copy editing by Nancy Klein, Maryland Master Gardener, March 2026.