A tray with multiple young vegetable seedlings growing in labeled rows under grow lights.

Vegetable seedlings growing in cell packs under grow lights. Photo via Adobe Stock.

Updated: June 30, 2026

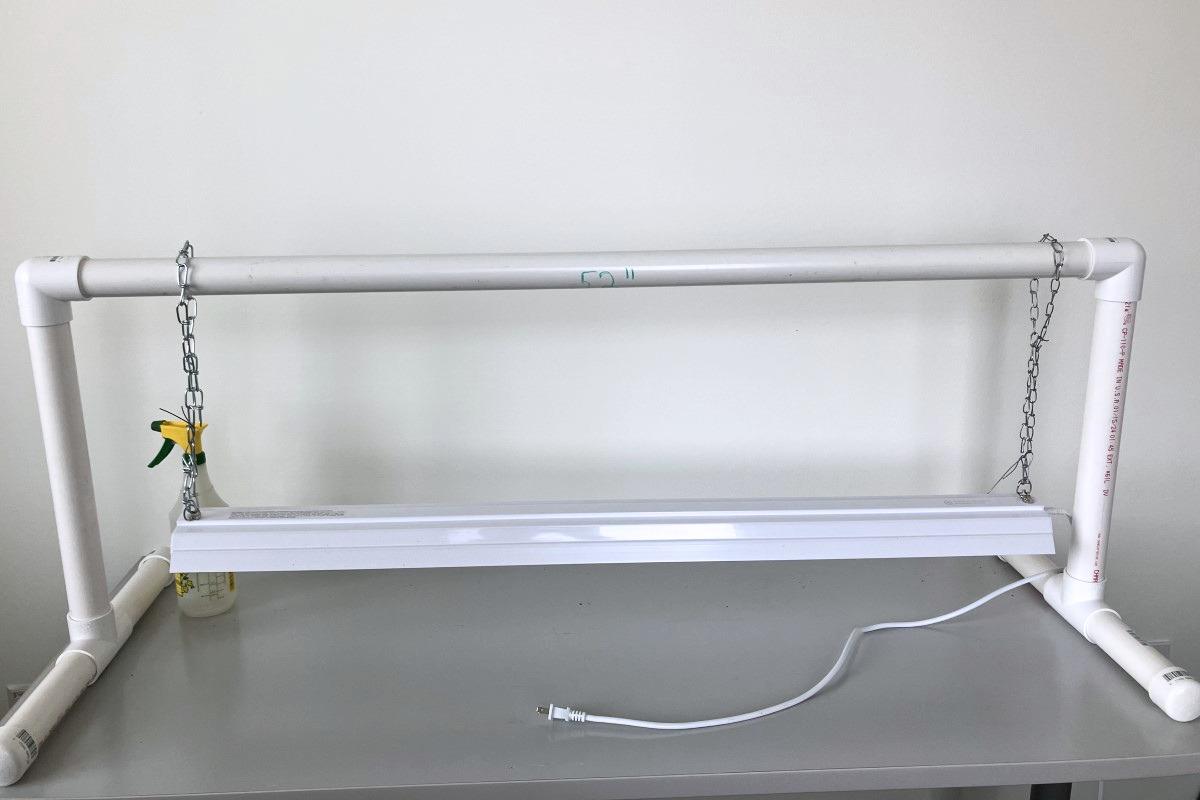
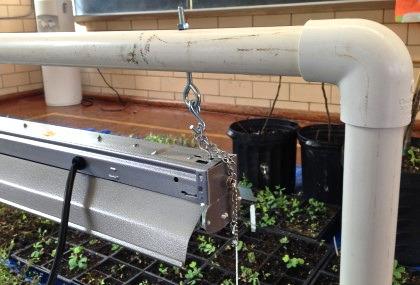
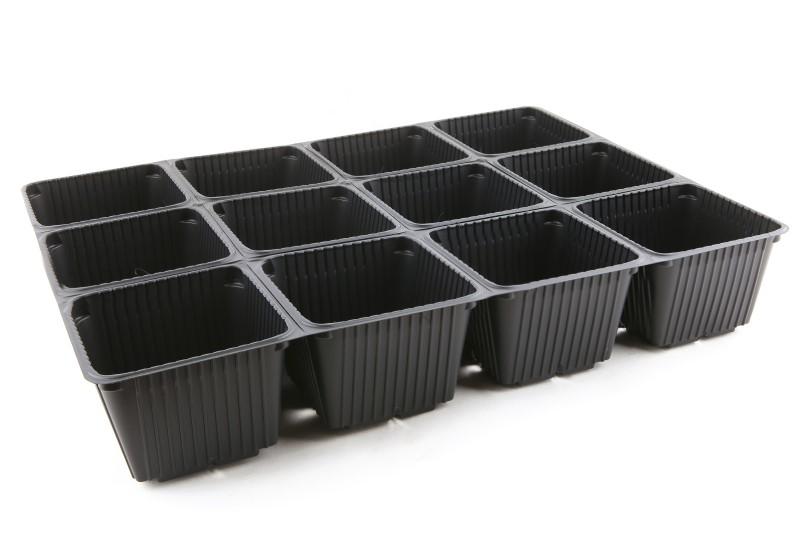
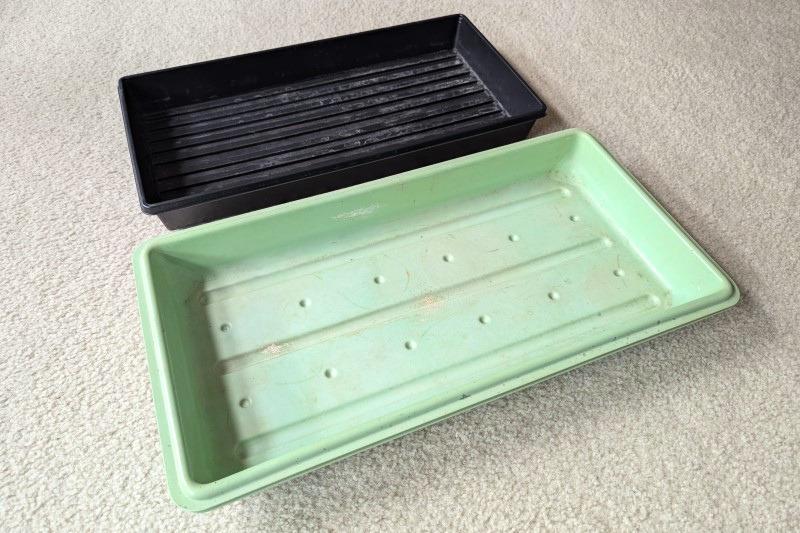
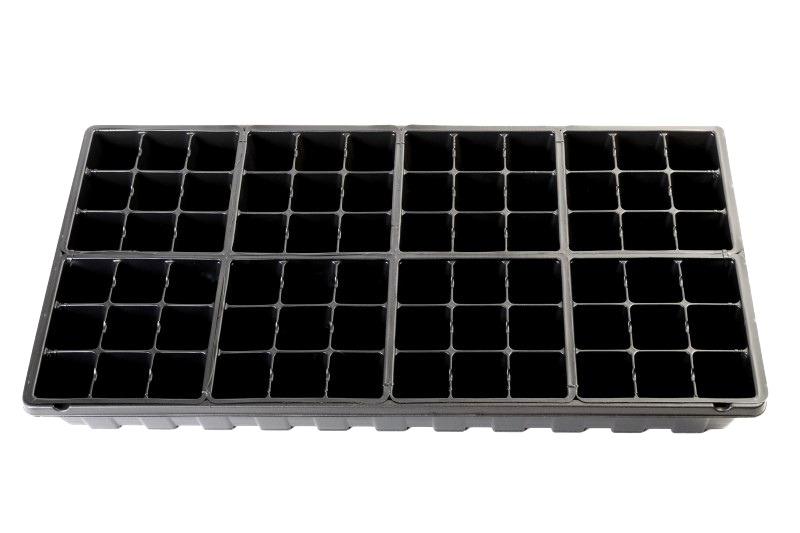
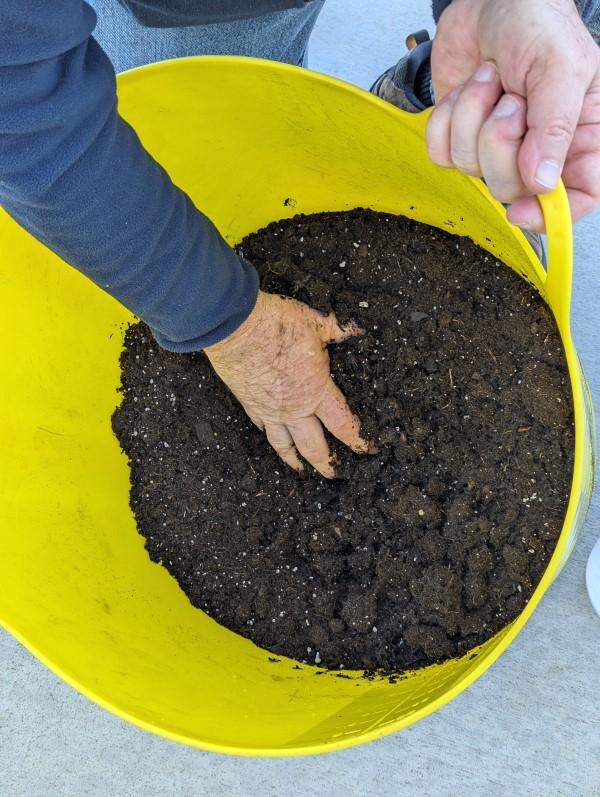
Many gardeners start vegetable crops indoors and later transplant them outside into containers or garden beds. With a small investment in materials and a bit of space, you can grow hundreds of healthy transplants. All of the supplies you need can be found at home (such as reused food containers) or purchased locally. Seeds can be started in a basement, kitchen, dining room, or bedroom with an LED or fluorescent grow light.

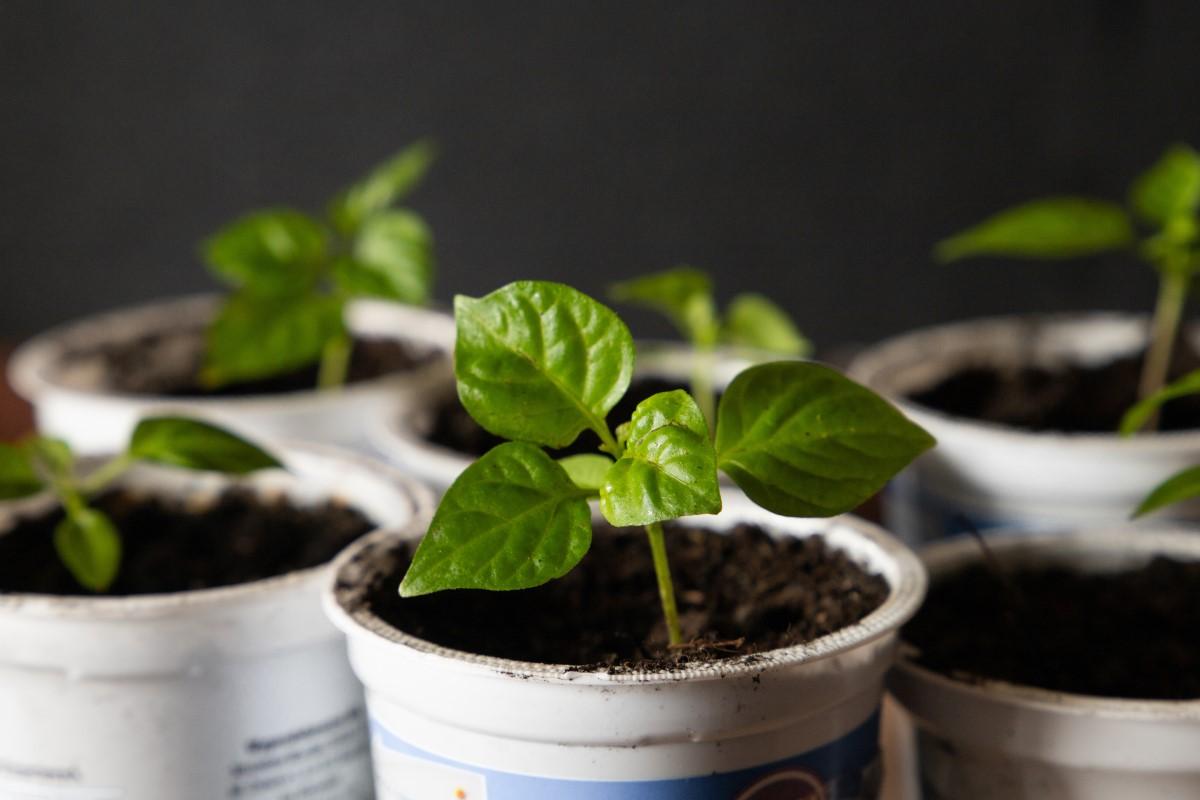
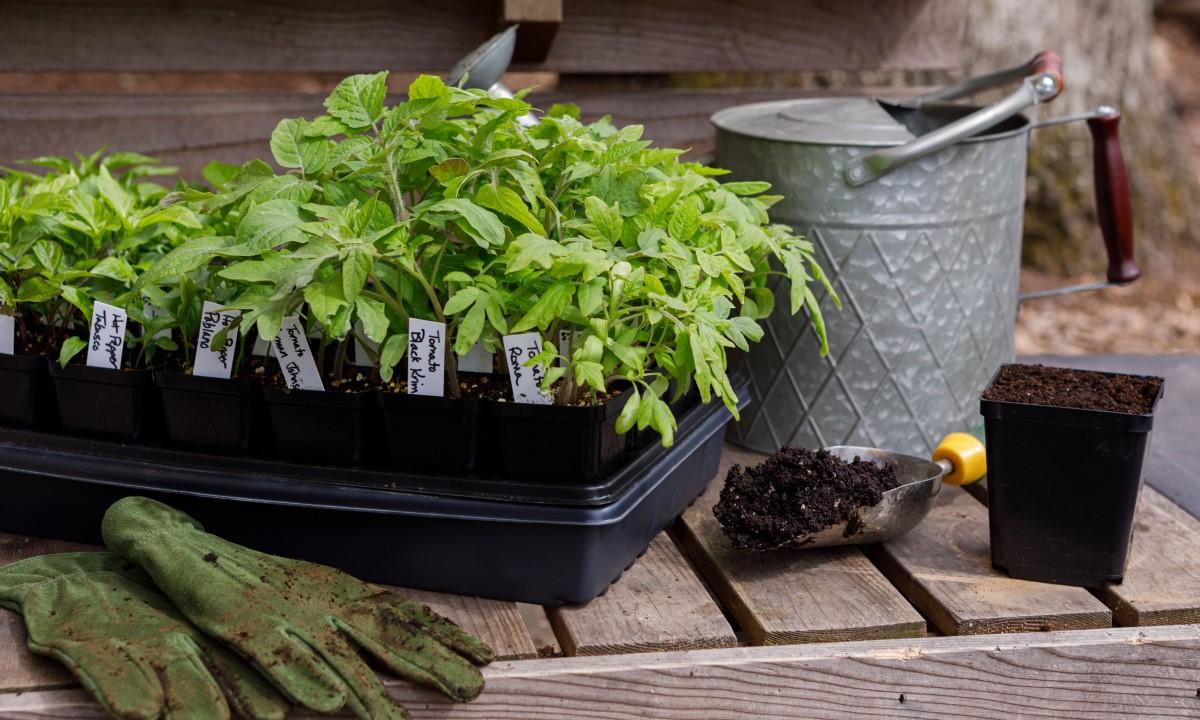
A wide variety of vegetable transplants (also called “starts”) can be grown from seed sown indoors.

  • Cool-season crops that need to mature before being stressed by summer heat benefit from the head start of indoor sowing. Examples include cabbage, broccoli, cauliflower, and lettuce.
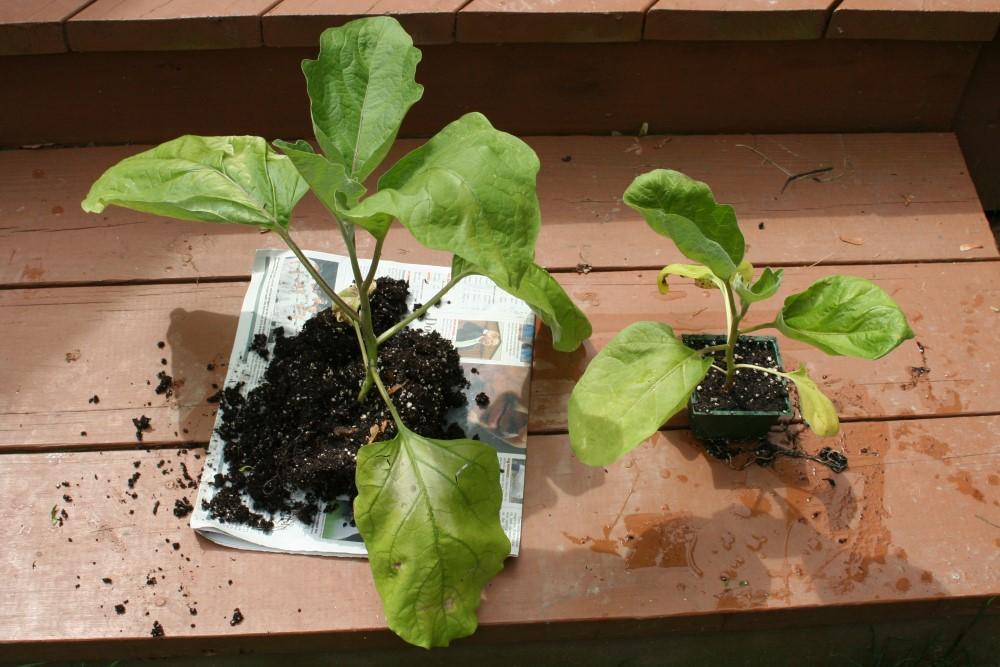
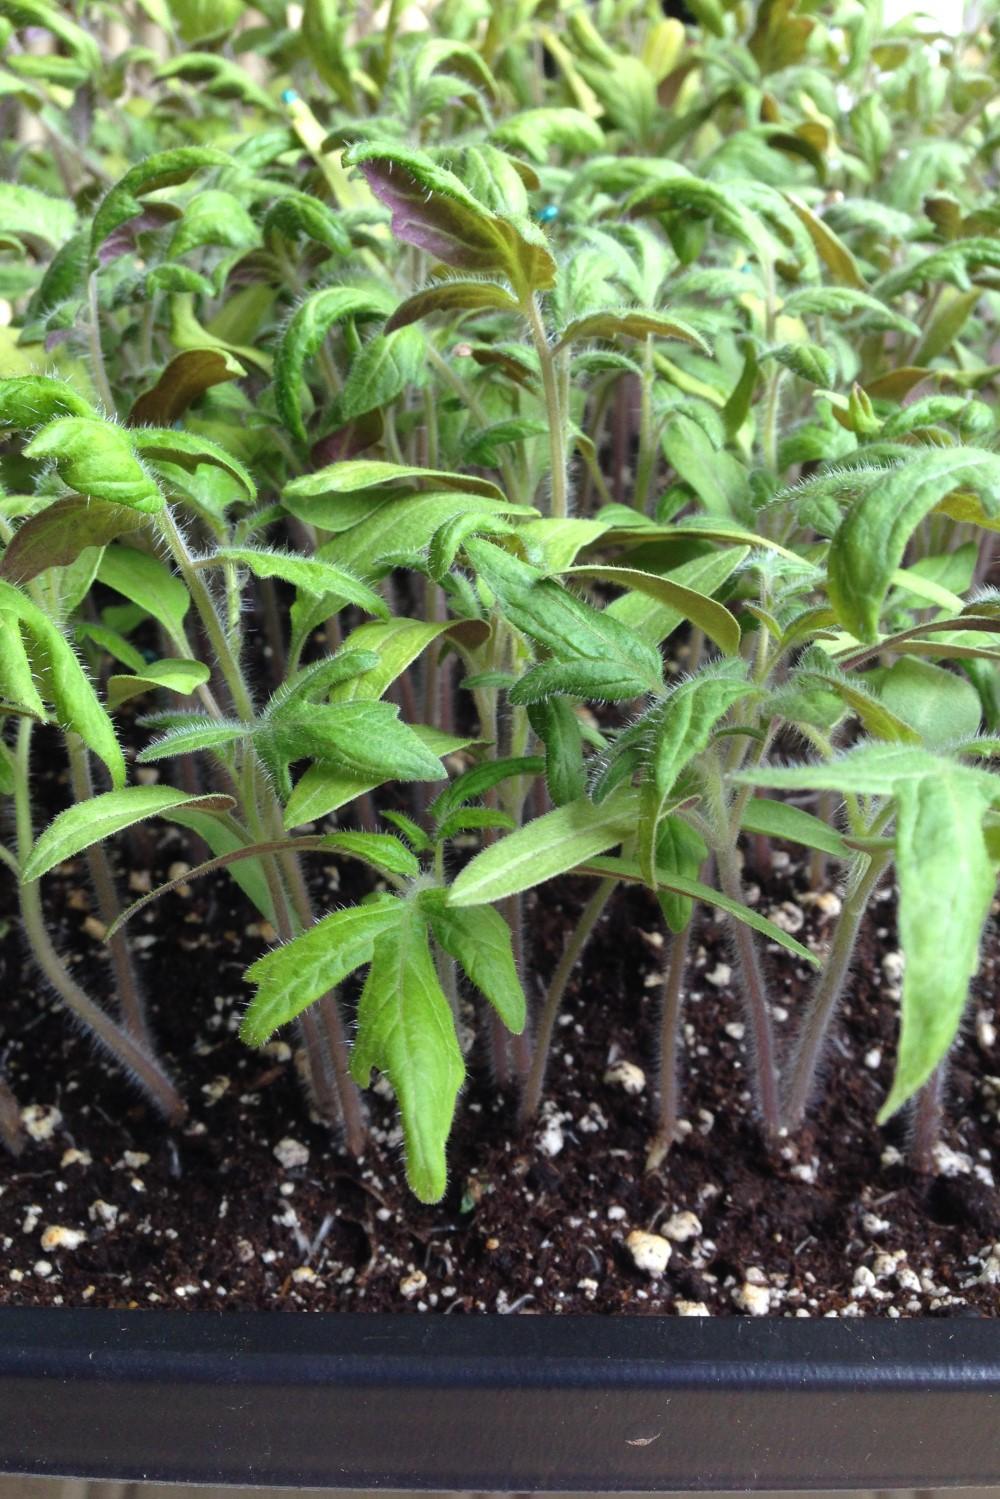
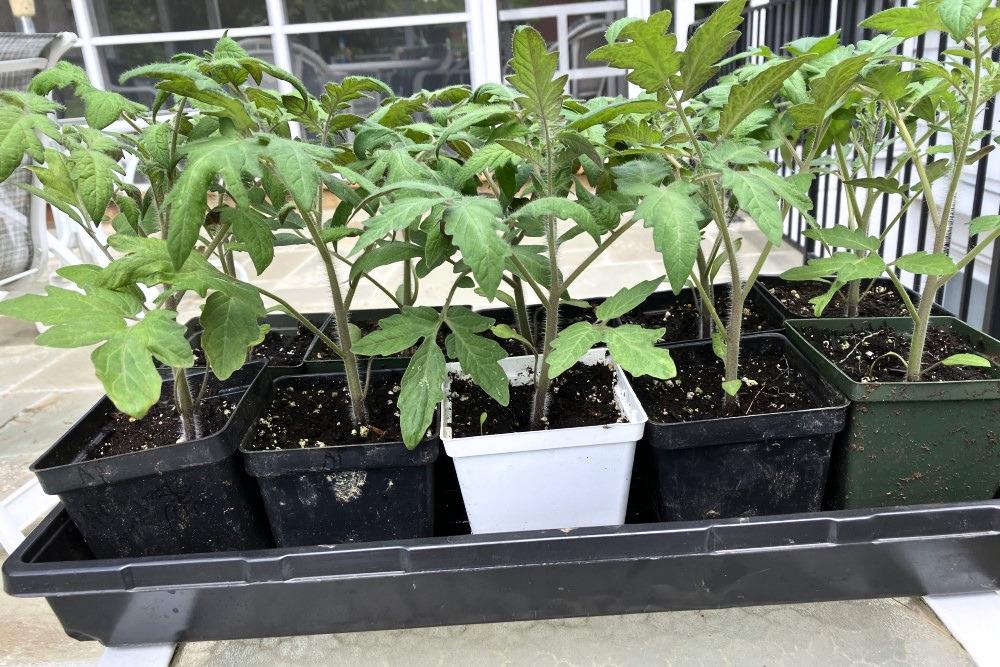
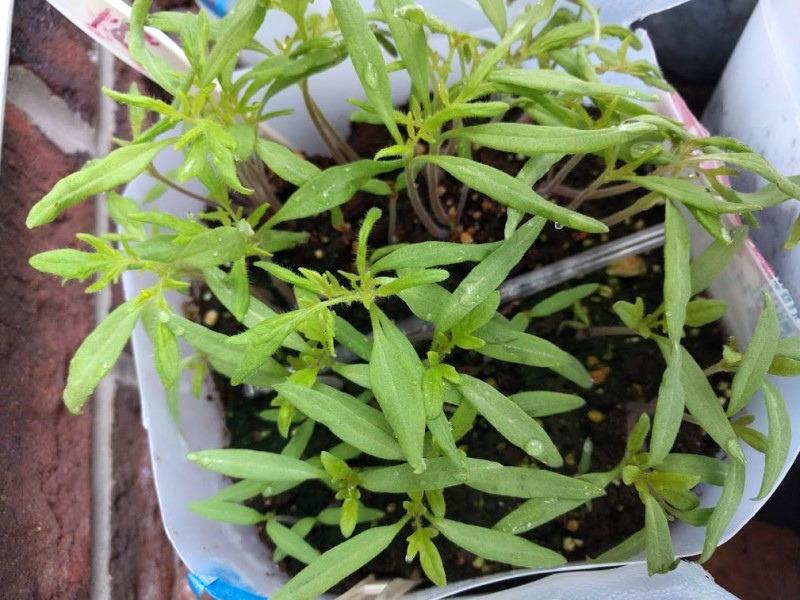
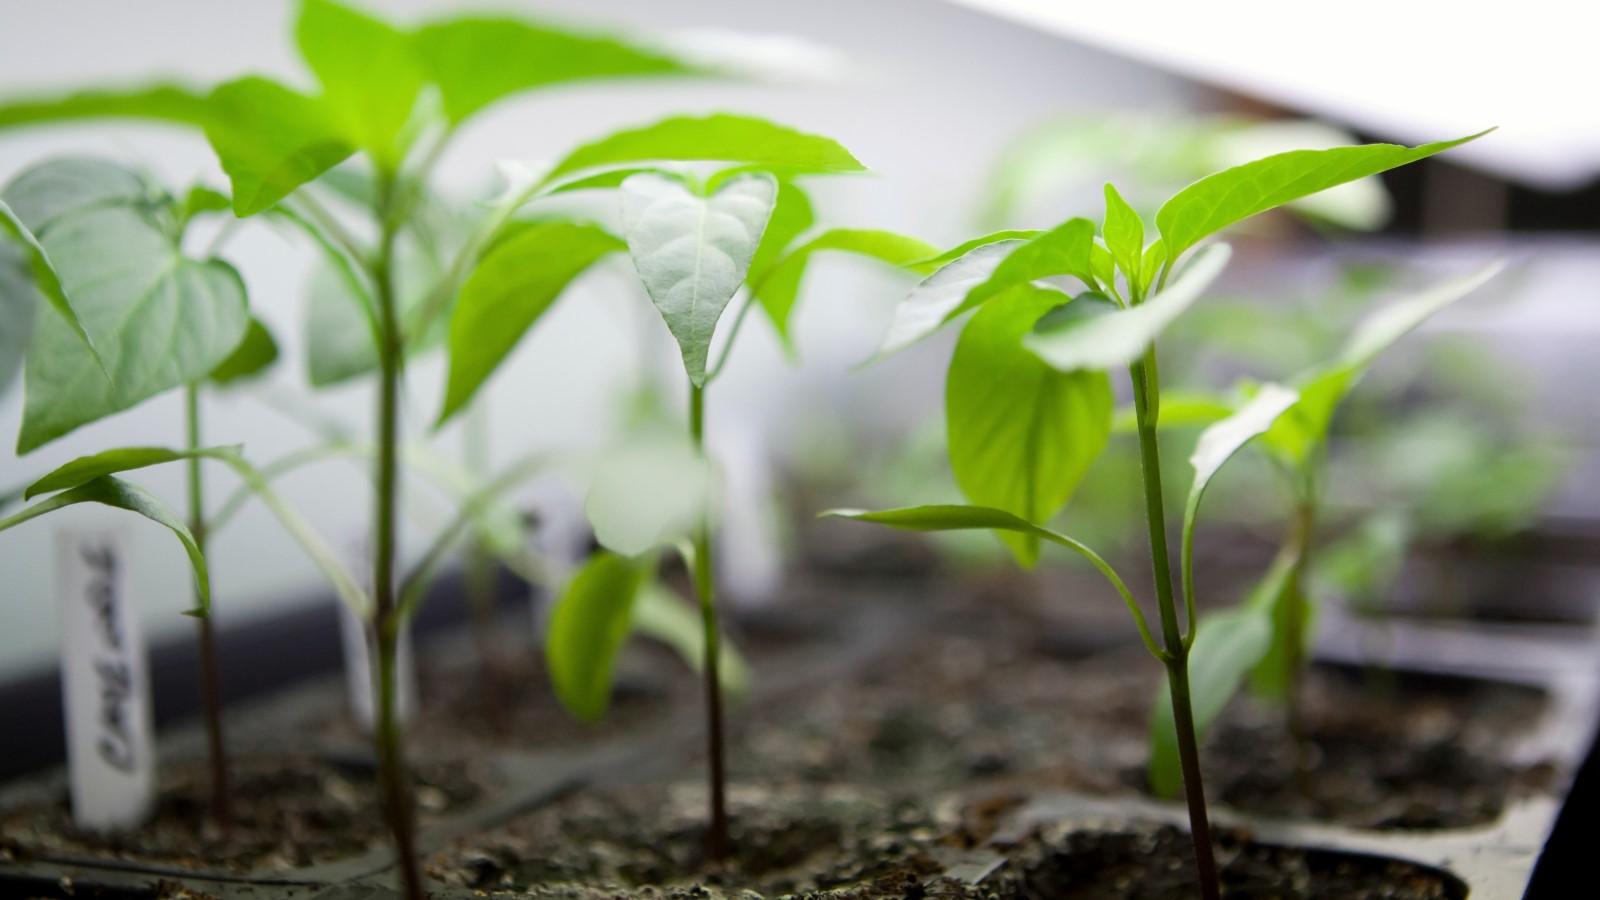
  • Warm-season crops may not have time to produce a harvest if planted from seed directly outdoors once temperatures stay warm enough. Examples include tomato, pepper, and eggplant.
  • Cucurbit crops like squash, cucumber, and melon can be started indoors or direct-seeded in the garden.
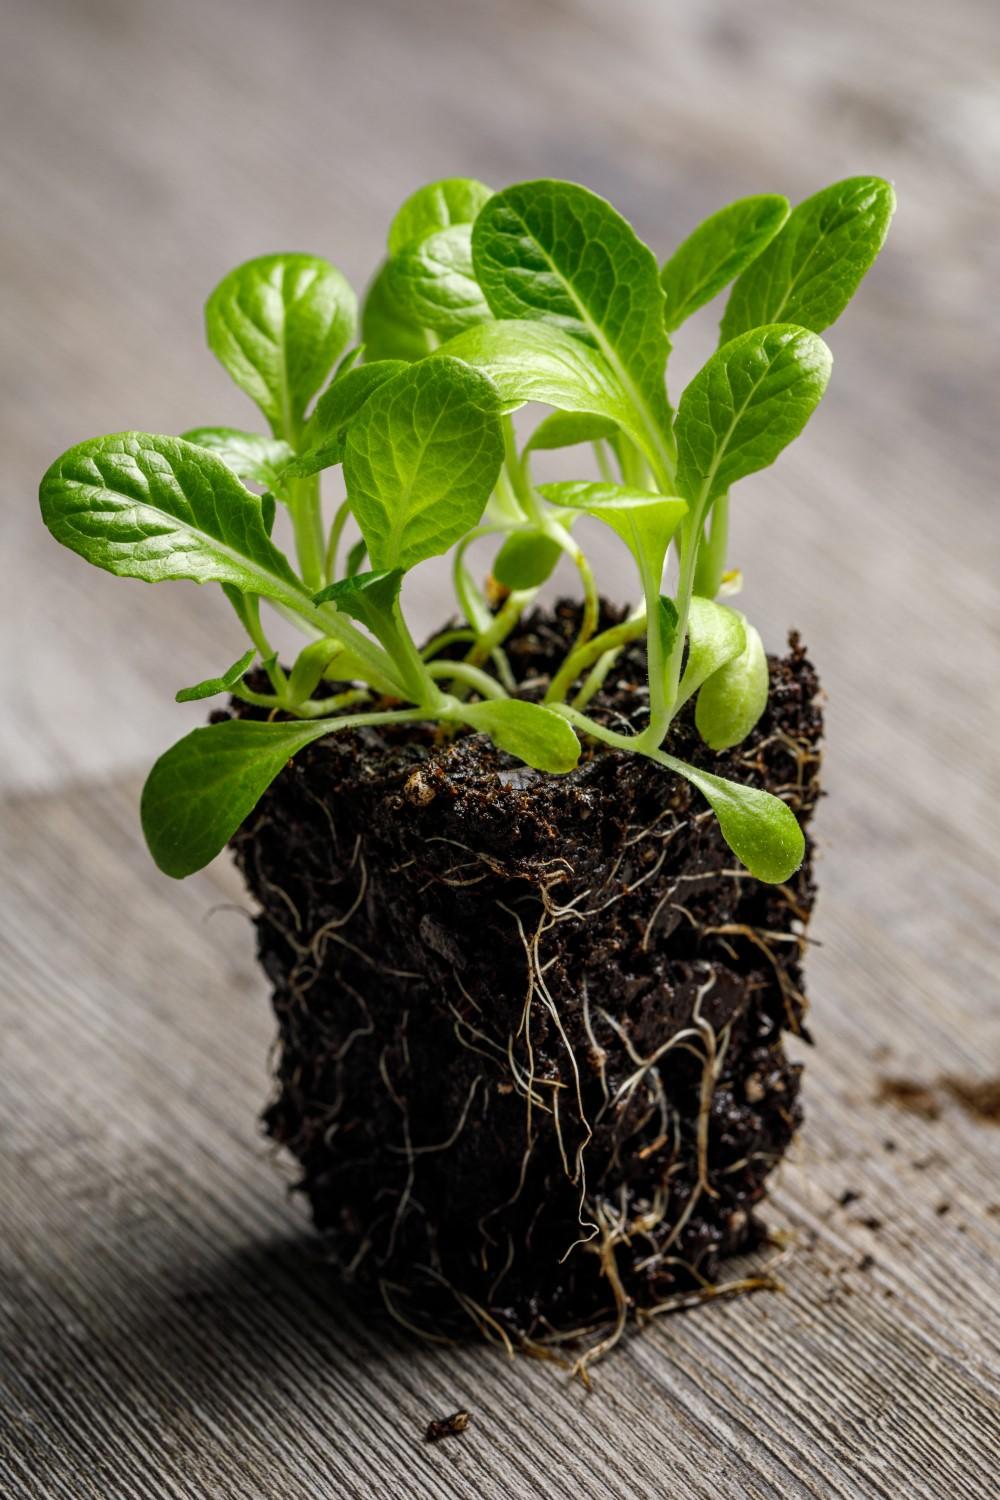
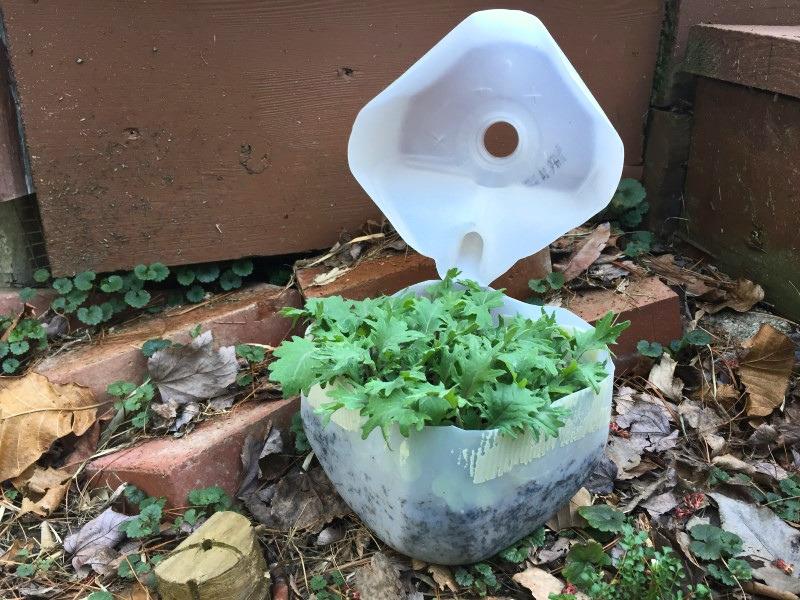
  • Leafy greens, such as spinach, Swiss chard, kale, mustard, arugula, mizuna, tatsoi, and bok choy
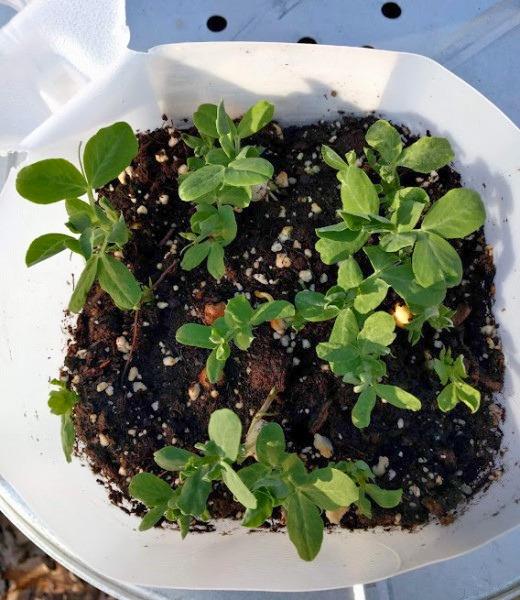
  • Onions, beans, peas, and sweet corn

Transplants, whether started yourself or purchased, provide several benefits for successful vegetable gardening:

  • Grow the varieties you want, and have them ready when it’s time to plant
  • Get a head start on the growing season
  • Increase garden output, with quicker harvests compared to direct-seeding in the garden
  • Eliminate the need to thin out extra seedlings
  • Reduce pest and disease problems because the plants spend part of their growth cycle sheltered indoors
  • Can save you money over time, even with the upfront cost of a grow light

When to start seeds indoors

The timing of seed sowing depends on the recommended planting date for a specific crop, the speed of germination, and the rate of transplant growth. The following is a guide for the approximate amount of time needed to grow transplants indoors before they are transitioned outside:

  • Leafy greens: 2 to 4 weeks
  • Cabbage, broccoli, and cauliflower: 4 to 6 weeks
  • Cucumber, squash, and melons: 3 to 5 weeks
  • Tomato: 5 to 6 weeks
  • Pepper, eggplant, and onion: 8 to 10 weeks

A common mistake is to sow seeds too early, resulting in tall, root-bound plants that do not perform well in the garden. Use fresh seed or properly-stored seed from last year. Surplus seeds should be stored in a cool, dry place, such as a refrigerator. (Storage at room temperature may result in a shorter viability time than chilled storage. A freezer can work as long as the seeds are dry enough for storage and don’t freeze and thaw repeatedly.)

You can also stagger sowing times to produce midsummer, late summer, and early fall transplants to keep your garden productive. It’s difficult to find vegetable transplants in stores beyond mid-June.

Light sources for indoor seedlings

Light is measured by its intensity (closeness and brightness), duration (length of time the light is available, also called a photoperiod), and quality (including blue and red wavelengths within the visible color spectrum).

Natural light from a window is seldom enough for strong seedling growth. Plant stems usually stretch and lean towards the light, which can result in weak plants (having poor vigor and sturdiness). Acceptable plant growth usually only occurs in south-facing bay windows or sun rooms that receive ample direct sunlight.

“Grow light” is a general term for any light fixture specifically designed to promote plant growth. They typically use fluorescent or light-emitting diode (LED) lamps. Although human eyes are most sensitive to light intensities in the yellow-green portion of the light spectrum, plants mainly utilize the red and blue portions of the spectrum. Light sources that look relatively white to our eyes might have different amounts of light in each part of the spectrum, which can affect plant growth.

Broad-spectrum LED grow lights that mimic daylight, and fluorescent light fixtures with cool-white tubes (6500K color temperature), are good options for growing transplants indoors. More expensive full-spectrum fluorescent grow lights produce a balance of “warm” (redder wavelengths) and “cool” (bluer wavelengths) light, which enhances foliar growth and produces thicker stems than cool-white fluorescent tubes and which is needed for producing flowers on indoor plants. Some gardeners use one warm-white tube and one cool-white tube in a two-tube fixture to gain the same effect. Similarly, LED grow lights may combine warm-white and cool-white diodes in the same fixture.

Learn more about grow light options and how to interpret the technical specifications listed on the package in the four-part Maryland Grows blog series: An Introduction to Gardening Under Lights

Make your own light stand

Sections of plastic 1.5-inch diameter pipe assembled into a footed stand 4 feet long. A light fixture about 3 feet long is suspended by adjustable chains from the top bar.
An LED grow light hangs from a homemade light stand made with PVC pipe and pipe couplings.
Photo: Jon Traunfeld

You can make a lightweight polyvinyl chloride (PVC) light stand that can be taken apart and stored when not in use. The pieces fit together snugly and securely. If desired, you can use PVC primer and cement to seal the joints for a light stand that cannot be disassembled.

PVC stand materials

To hang a standard-size (4-foot long) fluorescent or LED grow light fixture, the following materials build a stand that has one bar for hanging the light and two stabilizing feet. The light fixture should include a power cord, on/off switch, and means to suspend it from the frame (such as a metal chain and S-hooks).

  • One 10-foot long, 1½-inch diameter PVC pipe
  • Two 1½-inch slip (not threaded) T-shaped PVC pipe couplings
  • Two 1½-inch 90º elbow PVC pipe couplings
  • Four 1½-inch PVC pipe end caps
Seven pieces of PVC pipe in 3 different lengths arranged on the ground along with four PVC end caps, two elbow joints, and two T joints.
PVC pipe fittings and a 10-foot section of 1½-inch diameter PVC pipe cut into seven pieces with a hacksaw.
Photo: Jon Traunfeld

PVC stand construction steps

  1. Use a ruler and marker to divide the 10-foot PVC pipe into 7 pieces: one 52 inches long; two 18 inches long; and four 8 inches long, which will leave no leftover pipe. Use a hacksaw to cut the pipe on the measurement markings.
  2. Assemble the stand’s support legs:
    1. Push two 8-inch pipe pieces (as the stabilizing feet) and one of the 18-inch pipe pieces (the upright leg) into one of the “T” couplers.
    2. Repeat to build the other leg.
    3. Put the 4 pipe caps over each of the open ends of the leg feet.
  3. Insert the top of each leg into an elbow coupler.
  4. Insert the remaining long PVC piece into each elbow coupler.
  5. Use metal chains wrapped around the stand’s top bar and S-hooks to suspend the light fixture.
A person inserts a piece of PVC pipe into the center socket of a T-shaped joint that already has two shorter pipe pieces inserted into the side sockets.
Stand leg assembly: a T coupling with an 8-inch section of pipe inserted on each side and an 18-inch section of pipe in the center socket.
Photo: Jon Traunfeld
A person puts an S-hook into the links of a metal chain that is wrapped around a PVC pipe.
A metal chain is wrapped around the support bar to hang the light. S-hooks help you adjust the hanging height of the light.
Photo: Jon Traunfeld
A person holds an assembled PVC stand leg, shaped like an upside-down T for added stability. The leg is composed of a T coupling with short PVC pipe pieces on either side and a taller PVC pipe piece with an elbow coupling on top.
A stand leg inserted into an elbow coupler, with caps placed on the ends of the “feet.”
Photo: Jon Traunfeld
An eye hook inserted into a section of PVC pipe. A nut threaded onto the bolt secures the eye hook, and a light fixture hangs from an S-hook and length of chain.
Another hanging hardware option is to drill a hole in the PVC pipe support bar and insert an eye hook secured with a nut threaded onto the end. To remain adjustable, the light fixture can hang by chain and S-hooks.
Photo: Jon Traunfeld

Containers for indoor seedlings

Almost any clean container can be used for seed starting, provided it allows for good drainage and is at least 2 inches deep. Save money by reusing cottage cheese and yogurt containers, milk cartons, aluminum pans, and clear plastic food container clamshells.

Young vegetable seedlings growing in yogurt cups filled with potting mix.
Seedlings growing in repurposed yogurt cups with drainage holes in the bottom.
Photo via Adobe Stock

You can buy standard (10-inch by 20-inch) plastic greenhouse trays (“flats”) with or without drainage holes. Flats without holes act like a saucer to contain drips from individual pots or flats with drain holes. Care must be taken to avoid overwatering undrained flats.

Seeds are typically sown in a tray of connected small pots (called cells): the connections make moving the plants around as a group easier, and the individual cells keep roots from tangling with neighboring plants as they grow. Cell packs (also called inserts or market packs) are square or rectangular and come in several configurations (frequently 4-packs or 6-packs); they are usually designed to fit into a standard flat. Cell packs are often made of flexible plastic, but in some cases can be biodegradable (such as peat or coconut coir fiber). Depending on the cell size, 10 to 120 plants can be grown per flat. Plastic cell packs and greenhouse flats can be reused for several years if handled carefully (flimsier plastic may tear).

A large plastic cell pack unit with 12 cells arranged in 4 rows of 3 cells.
Cell pack flat inserts can be sold in various sizes and configurations.
Photo via Adobe Stock.
Pale brown peat moss-based cell pack unit with 12 cells arranged in 4 rows of 3 cells.
Seed-starting cell packs can be made from biodegradable materials like peat moss fibers.
Photo via Adobe Stock.

Recommended individual cell sizes

  • Lettuce, beets, spinach, kale, and other greens – 3 to 6 square inches
  • Squash, cucumber, broccoli, and cabbage – 4 to 9 square inches
  • Tomato, eggplant, and pepper –  9 to 16 square inches

Peat pots and other biodegradable seed-starting containers (dehydrated manure, coconut coir fiber, etc.) can be planted directly in the garden, but they may decompose slowly. Remove the pot base and any rim above the soil line, and cover the pot completely with garden soil. Removing the pot base helps roots establish without waiting for the pot to decay fully. Removing the rim prevents desiccation: if the edge of the pot sticks up out of the soil, it acts as a wick for soil moisture and dehydrates the transplant’s root zone.

Two designs of similar-sized sturdy plastic trays with no drainage holes.
A standard greenhouse flat (top) and a heavy-duty plastic tray (bottom) with no drainage holes. Both require careful watering to prevent drowning seedling roots.
Photo: Miri Talabac, University of Maryland Extension
Eight 9-well cell packs fit into a standard plastic greenhouse flat with no leftover space.
Cell packs are typically made to fit into a standard plastic greenhouse flat. Pictured are 9-well cell packs; 4- and 6-well packs are also commonly used.
Photo via Adobe Stock.

Soil blocker tool

Some gardeners and small-scale commercial growers use soil blockers to produce transplants with less or no plastic. The tool takes moist potting mix and compresses and forms it into individual blocks that can be planted with seeds or seedlings.

A metal frame with five side-by-side upright square channels inserted onto a tray of potting mix. The tool is lifted to deposit five cubes of potting mix.
A soil blocker tool creates five 2-inch cube blocks of potting mix at a time, similar to the volume of a large-sized cell pack.
Photo: Jon Traunfeld
Numerous tomato transplants growing in open-air blocks of potting mix.
Tomato transplants growing in individual potting mix blocks made with a soil blocker tool. The roots of each plant are air-pruned, which encourages new roots to grow inside the block.
Photo: Jon Traunfeld

Potting mix (growing media) for starting seeds

Growing media for seed starting has three main functions: supply roots with nutrients, air, and water; allow for maximum root growth; and physically support the plant.

Growing media have many alternate names, often marketed as “potting soil,” “planting/potting/transplant mix,” and “container substrate.” Media should not be confused with true soil, which contains mineral components like sand, silt, or clay. Since container media do not contain soil (despite “potting soil” being a widely-used product label), they are categorized as “soilless.” Special “seed starter” media have a finer texture, which helps germinate very small seeds, but they are not essential for general vegetable seed starting.

Soil is too dense (approximately 75 pounds per cubic foot) to allow for good air and water movement around roots when used in a container. Soil also may contain weed seeds and plant pests or pathogens. Soils hold water very well in their small pore spaces, which can drown roots, especially in shallow containers like those used for starting seeds.

High-quality soilless media are lightweight (approximately 10 pounds per cubic foot) and fluffy (not easily compacted). They retain nutrients and hold water very well while having excellent drainage due to large pore spaces that allow excess water to drain easily. This high porosity promotes quick and extensive root growth. When fresh, they are also generally free of weeds, insects, and pathogens.

A potting mix combines several ingredients and is formulated to promote uniform plant growth. Common components include sphagnum peat moss, coconut coir, perlite, vermiculite, composted bark, compost, and rice hulls. Avoid heavy, dense potting mixes that contain “forest products.”

Soilless growing media often contains a small amount of fertilizer, enough to support plants for 6 to 8 weeks after germination. Potting mixes certified organic by the Organic Materials Review Institute (OMRI) differ from conventional products by using organic fertilizers and natural wetting agents like yucca extract. (Wetting agents help naturally water-repellent ingredients like peat moss to absorb moisture.)

Seed sowing and seedling care

Fill the containers

  • Thoroughly moisten dry media before filling pots, especially if the media contains peat moss (most potting mixes do). Peat moss is hydrophobic when dry (it repels water), where water sprinkled on it will bead up and be more likely to roll off of the pot than soak in.
    • Place dry growing medium into a bucket or tub. Pour lukewarm tap water in slowly and work it into the growing medium by hand or with a tool like a scoop or hand cultivator. It should be as moist as a wrung-out sponge, not sopping wet.
  • Fill the containers to within one inch of the top with the moistened media.
  • Firm the media lightly with fingers or a block of wood to provide a uniform, flat surface.
Water is poured from a pitcher into a garden tub holding potting mix. One hand is used to churn potting mix into the stream to wet it.
Add water to a container large enough to allow for mixing.
Photo: Miri Talabac, University of Maryland Extension
Using fingers to comb through and stir the potting mix to distribute the wet areas with dry mix until it’s uniformly moist.
Stir the potting mix to evenly distribute moisture throughout the media.
Photo: Miri Talabac, University of Maryland Extension
Scooping potting media by hand from a mixing tub into an empty container.
Moistened media is ready to be put into containers.
Photo: Miri Talabac, University of Maryland Extension

Sow seeds

  • How many seeds to sow in each tray or container depends on the crop. Transplants needing more space to grow, such as tomato, pepper, and eggplant, are often started singly (one seed per cell or pot) and later moved into larger individual containers 2 to 3 weeks after germination.
  • Seedlings grown in rows are easier to label and handle at transplanting time than those started by broadcasting seeds randomly. You can make shallow rows for small-to-medium size seeds, ⅛ to ¼ inch deep, and 1 to 2 inches apart, using a rigid straight edge (such as a rigid ruler) or a finger.
  • Sow the seeds thinly and uniformly in the rows by gently tapping the packet of seed as it is moved along the row. Lightly cover the seeds (lettuce seeds can be left on the surface, uncovered or very lightly covered) with growing media and press down gently to ensure good contact between the seed and the media.
  • A suitable planting depth is typically about twice the seed’s diameter. For example, a seed ⅛ inch wide can be planted ¼ inch deep.
  • Cucumber, squash, melons, corn, and beans are grown for 2 to 4 weeks as transplants before planting in the garden. There’s no need to pot them up into larger containers. Sow two or three seeds per container or cell. After germination, keep the strongest individual in the cell and remove the others.

Temperature, humidity, and light

  • Seeds need a warm, moist growing medium to germinate. Generally, a potting mix temperature of 65° to 75°F is good for germinating most vegetable seeds.
  • Seed germination begins with water absorption, and an adequate and continuous supply of moisture is essential. A dry period will cause the death of the embryo once germination has begun.
  • Spray some water from a mist bottle on the growing medium as needed to keep it moist.
  • To increase humidity and temperature, cover the container with a piece of clear plastic (like commercially-sold seed-starting domes), or put the container into a plastic bag after sowing. The cover should not be in contact with the growing medium. Remove the cover as soon as sprouts appear.
  • A seedling heat mat will speed up germination. Alternatively, drape clear plastic over a grow light fixture to create a warmth-trapping tent. The cover should rest on the frame holding the fixture and not on the fixture itself. Heat from the grow light’s fluorescent ballast or LEDs will be trapped inside the plastic tent and keep the temperature at 70º to 75º F.
  • The top of a refrigerator is another warm location to hasten germination.
  • After germination, seedlings can be given somewhat cooler conditions, with a 55 to 60°F night temperature and a 65 to 70°F day temperature.
  • Keep fluorescent and LED light fixtures 2 to 6 inches above plants and lit for 14 to 16 hours a day using an outlet timer. Adjust as needed to keep plants stocky (not stretched and leggy). Tomato and cabbage family plants are prone to stretching toward the light.
  • Attaching a thin chain or wire to either end of your light fixture will allow you to raise and lower the tubes to accommodate plant growth.
A cabbage seedling with two purplish-green heart-shaped cotyledons and two true leaves that recently emerged.
Two heart-shaped seed leaves and two true leaves on a Chinese cabbage seedling. This is the correct stage of growth for harvesting microgreens.
Photo: Erica Smith, UME Master Gardener

Water and fertilizer

  • Water as needed to keep the growing media moist, but not wet. The goal is to keep the root system supplied with water and oxygen. (Too much water in the potting mix displaces oxygen.)
    • Wait until the top of the media is nearly dry before watering.
    • Top-down watering: apply water to the surface of the media and let it seep fully down into the pot and drain out of the bottom drain holes.
    • Bottom watering: allow the media to wick up water through the bottom drain holes by putting the containers into an undrained tray, pan, greenhouse flat, or other container with a shallow layer of water in the bottom.
  • Common problems with seedling care are related to root moisture: a lack of uniform watering, overwatering, and letting the containers dry out.
    • Roots will stop growing and die due to a lack of oxygen when the growing media is saturated with water.
    • Fungus-like pathogens called “water molds” (Pythium, Phytophthora, and Rhizoctonia) cause root rot and damping-off disease that can quickly kill a container of seedlings if the growing media is kept too wet. If an infection occurs, dispose of the plants and growing medium, wash containers and tools to remove any debris, soak them for 1 to 2 minutes in a solution of 1 part chlorine bleach to 10 parts water, and rinse with clean water.
  • Wait to fertilize: most potting mixes contain enough fertilizer to grow a seedling for at least 6 weeks without the need for more nutrients. When nutrients are becoming depleted and it’s time to supplement, use a water-soluble fertilizer and follow label dosage directions for indoor plants or transplants.
  • Rinse off any liquid fertilizer that contacts foliage. Young seedlings are easily damaged by too much fertilizer, especially if they are under any stress from drying roots.

Potting-up seedlings to larger containers

A table top with a soil-filled trowel, watering can, garden gloves, and a tray containing dozens of vegetable seedlings in 2-inch pots. A 4-inch pot filled with potting mix sits next to the tray and trowel.
Tomato and pepper seedlings ready to be moved into larger pots.
Photo via Adobe Stock.

If plants have not been seeded in individual containers, they must be potted-up (also called “pricking out” or “transplanting up”) into a larger individual container to give them proper growing space.

  • One of the most common mistakes gardeners make is leaving seedlings in the seed flat too long. Crowded seedlings compete with each other for resources, and their intermingling roots are harder to disentangle for transplanting without significant damage.
  • The ideal time to transplant young seedlings is when they are small and can quickly recover from transplant shock. This is shortly after the first “true leaves” appear above or between the cotyledons (the “seed leaves” that first appear during germination).
  • Carefully dig up the small plants from the seedling flat or container using a tool like a butter knife, chopstick, or popsicle stick. Gently tease them apart in small groups to make it easier to separate individual plants.
  • Handle small seedlings by their leaves, not their delicate stems.
  • Make a hole in the growing medium into which the seedling will be planted. Set the seedlings so that the leaves and growing point are only slightly above the soil line (most of the stem can be buried).
  • Firm the media around each plant and water gently.
  • Continue to provide light for 14 to 16 hours per day, keeping the tops of the transplants 1 to 2 inches from the grow lights so they aren’t damaged.
  • Gently brushing the tops of tomato transplants with your hand or a wooden stick will help control their height and increase stockiness. The overall dimensions of an ideal transplant is as wide as it is high (as opposed to tall and lanky/floppy).
  • Sow tomatoes 5 to 6 weeks before you expect to plant them outside. You will end up with stocky 8- to 10-inch tall plants. If tomato transplants get very tall, you can dig a trench and lay the stems horizontally into it, leaving only 2 or 3 sets of leaves above ground. The buried portion of the stem will grow roots.
A group of several young lettuce plants removed from a pot or cell pack. Root growth is visible on the outer edges of the soil block, and the leaves are starting to overlap each other as they become crowded.
Romaine lettuce seedlings that should be separated before their roots become more intertwined.
Photo via Adobe Stock
Two eggplant seedlings removed from their pots. The seedling on the left, with a larger root mass, is roughly twice the size of the seedling in a smaller pot on the right.
Comparison of two eggplant seedlings from different container sizes. More space for root growth allows seedlings to grow larger.
Photo: Jon Traunfeld
A soil-filled tray of crowded tomato seedlings several inches tall.
Closely-spaced tomato seedlings ready to be gently “pricked-out” and planted in individual containers, 9 to 16 inches square in size.
Photo: Jon Traunfeld
A tray of 10 tomato transplants, each about 8 inches tall and growing in 4-inch square containers, sitting on a table outdoors.
Stocky, 6-week-old tomato transplants, grown in 4-inch pots, ready to be transplanted into the garden.
Photo: Jon Traunfeld

Winter sowing

Winter sowing is a technique that allows you to get a jump on the growing season by growing transplants outdoors. Transplants for cool-season and warm-season crops are started outdoors in one-gallon milk jugs and other plastic containers and bags with adjustable openings for temperature and humidity control. The seedlings get light from the sun instead of grow lights. You’ll need to experiment with seeding times, container types, and location. Successful winter sowing requires close attention to the weather and needs of the seedlings.

Closely-spaced young tomato seedlings growing in the bottom half of a one-gallon milk jug.
Tomato seedlings started outdoors in a milk jug in late March. They were thinned to leave 5 strong seedlings that were transplanted into the garden in May.
Photo: UME Master Gardener volunteer
Small pea seedlings grown outdoors in a plastic container with a hinged lid.
Winter-sown pea plants, which will be transplanted to the garden in late March or early April.
Photo: UME Master Gardener volunteer
Several dozen kale seedlings, about 6 inches tall, growing in the base of a milk jug cut most of the way around its circumference to form a hinged top.
‘Red Russian’ variety kale seedlings started in a hinged milk jug in March. Plants can be harvested as baby greens or transplanted with wider spacing in the garden.
Photo: Jon Traunfeld

Author: Jon Traunfeld, Extension Specialist (retired), Home/Community Food Gardening, May 2026.

Copy editing by Nancy Klein, Maryland Master Gardener, May 2026.

Still have a question? Contact us at Ask Extension.