Potato plants growing in three five-gallon fabric bags with handles.

Potato plants growing in fabric bags. Photo: Adobe Stock

Updated: March 23, 2026

Container gardening is a fun, fast, and easy way to start growing some of your own food at home. It reduces barriers to gardening and has several advantages compared to planting in the ground:

  • Small scale: The smaller size and portability of containers help to lower material costs and fit plants into small spaces.
  • Accessibility: Containers are easier to adapt to meet the needs of gardeners of all ages and abilities.
  • Customization: The flexibility of container type and its aesthetics (color, shape, size, and material) let you express your creativity and choose the best match for your site conditions.
  • Greater control: The portability of containers and the ability to adjust factors such as container size, potting mix type, and light exposure give you greater control over the plant’s growing conditions. Fine-tuning conditions to meet plant needs helps them to resist pests and diseases.
  • Convenience: The smaller scale of containers makes weeding, watering, and plant care simpler to monitor and manage.

This resource focuses on vegetables and herbs; for tips on growing fruits in containers (strawberry, blueberry, etc.), refer to Starting a Home Fruit Garden.

Locations for a container vegetable garden

A healthy cherry tomato plant growing in a hanging basket attached to the bottom outside edge of a deck.
A single cherry tomato plant growing in a hanging basket attached to the underside of a deck.
Photo: Jon Traunfeld, University of Maryland Extension

Containers can be placed on any level surface — decks, balconies, driveways, and sidewalks. You can also set them on bare ground and allow the plant roots to grow down into the soil, or place them on top of a mulched area. Edible plants can also be grown in hanging baskets and window boxes.

Choosing a location

  • Sun intensity: Southern and western exposures will be sunnier and warmer, while northern and eastern exposures will be shadier and cooler. There are gardening apps and websites that map shade and sun for your garden space. Pots can be moved for more or less sun exposure.
  • Sun duration: You’ll need 6 to 8 hours of direct sun for warm-season crops (tomato, pepper, eggplant, squash) and 3 to 5 hours of direct sun for cool-season crops (lettuce, spinach, Asian greens).
  • Water source: Easy access to water is crucial. Some containers will need daily watering when the weather is hot and dry.
  • Temperature: Some hard surfaces – brick, stone, concrete, blacktop, decking, metal – reflect or absorb and release solar radiation, increasing air temperature and causing heat stress in plants. Early in the growing season, extra warmth may benefit plants by accelerating growth or protecting them from chilly nights.
Several pepper plants in containers placed close to a brick wall.
Pepper plants in containers next to a brick wall. Walls can reduce air circulation but provide protection from strong winds.
Photo: Jon Traunfeld, University of Maryland Extension
A medley of lettuce and kale plants in a rectangular window box attached to the edge of a balcony.
Self-watering window box with kale and leaf lettuce attached to a balcony.
Photo: Steph Pully, University of Maryland Extension
A newspaper-lined laundry basket sitting on a deck bench. Two sweet potato plants have grown stems spilling out of the basket.
Two sweet potato plants growing in a plastic laundry basket on a deck bench.
Photo: UME Master Gardener
14 sweet potatoes of varying sizes harvested at the end of growing season from two plants grown in a plastic laundry basket.
Sweet potato harvest from a plastic laundry basket.
Photo: UME Master Gardener

Containers for vegetables

Containers can be temporary or permanent, practical and utilitarian or artistic and whimsical, and expensive or free. When selecting containers, use your imagination and creativity, and learn how much room your crops need to grow to their full potential. You’ll also need to decide where and how to store containers that are portable and used only during the growing season. Containers should be large enough to keep plants stable in the potting mix.

Drainage is important

  • All containers need adequate holes or slits to drain excess water, preventing plant roots from drowning and rotting. Drainage also allows excess fertilizer salts to be flushed out.
  • Additional drainage holes may be added, depending on the container's material.
  • To help with drainage, use bricks or scrap lumber to raise pots off the ground. Garden centers sell ceramic or plastic “pot feet” that similarly raise containers an inch or two off the ground.
  • Adding rocks, gravel, or broken pot shards to the bottom of a container will not improve drainage. It can raise the water table, leading to waterlogging of the potting mix and killing plants.

Additional considerations

  • Water stains and wear-and-tear: Containers may scratch or mark surfaces, and the water they drain could stain concrete and wood decking. Self-watering containers that don’t have drainage holes, or saucers placed under a pot to catch drained water, avoid this problem. Saucers can also be helpful if you are gardening above a neighbor’s balcony. Empty saucers regularly so the collected water doesn’t encourage root rot or serve as a mosquito breeding site.
  • Weight: The lighter weight of empty large plastic containers may seem to be easy to move. However, a 20-inch diameter container filled with moist potting mix and plants can weigh 100 pounds. Plant caddies (wheeled low platforms) can be bought or built to make heavy containers more portable.
  • Balance: Tall plants in relatively small, lightweight containers can be blown over or become top-heavy and topple unless well-anchored.
  • Root stress: Dark container colors can raise potting mix temperatures, potentially injuring tender roots and preventing the full development of a plant’s root system.
  • Drying rate: Containers made from porous materials (clay, ceramic, concrete, and wood) will dry out more quickly than containers made from plastic, resin, fiberglass, or metal.
  • Food-safe plastics: Repurposed plastic containers should be rated “food-grade.” Avoid plastics with a #3 recycling code (polyvinyl chloride, PVC). You can safely use #2 plastic (high-density polyethylene, HDPE); #4 plastic (low-density polyethylene, LDPE); and #5 plastic (polypropylene, PP).
  • Contamination: Avoid containers that previously held detergents, paint, adhesives, or chemicals. To clean and reuse food-grade containers: wash with soap and rinse with water; soak for 10 min in a 10% bleach solution, repeat wash and rinse, and air dry.
  • Breakdown over time: Plastic containers not made for outdoor use can become brittle from exposure to the elements. Cracked, degraded plastic containers release microplastics and possibly toxins and should not be planted with edible crops. Ceramic containers (especially unglazed terra cotta) may absorb moisture in winter and crack from freeze-thaw cycles.

Video: Container Gardening: An Easy Way to Grow Your Own Food

Container types and sizes

Gardeners can purchase a wide variety of commercially produced from garden centers and mail-order catalogs. Many everyday objects can be recycled or transformed into suitable containers: food-grade plastic buckets and storage containers, hypertufa troughs, wooden crates, whiskey barrels cut in half, plastic kiddie pools (non-PVC), and repurposed nursery pots.

Fabric bags (also called “grow bags”) are relatively inexpensive, reusable, lightweight, portable, and come in many sizes and styles. They are made from natural or synthetic (petroleum-based) materials, or a combination of the two. Bags improve plant growth through the “air pruning” of roots: when roots reach open air at the edge of the bag, they stop growing in length and branch into a denser, fibrous root system that stays within the potting mix as opposed to hitting a solid wall (in a non-porous pot) and continuing as a single root.

Match container size to plant size, taking both the top growth and the root system into consideration. Don’t squeeze large plants into small containers. If you restrict root growth too much, your plants won't grow well. It’s useful to consider both the depth and total volume of your containers. For example, a 5-gallon container that is wider than tall will be less top-heavy and more stable in a breeze compared to the same volume of container that is taller than wide.

Tall tomato plants growing in two 25-gallon pots on a sunny deck.
Indeterminate tomato plants growing in 25-gallon pots. Although they can be grown in smaller containers, they will grow larger and produce more fruit as container size increases.
Photo: Kent Phillips, UME Master Gardener
Minimum container size for common vegetables
Vegetable typeMinimum container volume
Beans (bush)2 gallon
Beets½ gallon
Carrots2 gallon
Cabbage5 gallon
Cucumbers5 gallon
Eggplant5 gallon
Lettuce (leaf)½ gallon
Peppers5 gallon
Radishes1 pint
Squash (summer)10 gallon
Swiss chard2 gallon
Tomatoes (cherry)2 gallon
Tomatoes (standard)5 gallon
  • Vegetable varieties listed as bush, dwarf, or compact can be grown in smaller containers than those used for their full-size counterparts.
  • Large-statured herbs (rosemary, bay leaf, sage, parsley, lavender, dill, and fennel) require 5-gallon or larger pots.
  • Small-statured herbs (basil, cilantro, thyme, mint, oregano, tarragon, and marjoram) will grow well in 2- to 5-gallon pots.

Examples of homemade container gardens

A tomato plant growing in a laundry basket whose slotted sides are lined with row cover fabric to keep the soil contained.
Tomato plant growing in a laundry basket lined on the interior with row cover fabric to contain the potting mix.
Photo: Jon Traunfeld, University of Maryland Extension
Mesh cylinder made from stiff plastic fencing lined on the interior with finer-meshed produce bags. Vegetable transplants are grown in cutouts on the sides of the sack.
Tower or sack garden (about 4½ feet tall and 2 feet wide) at Asawana Farms. It is made from plastic mesh fencing lined with repurposed produce net bags and filled with compost. Holes cut in the sides allow for planting.
Photo: Jon Traunfeld, University of Maryland Extension
An old metal wheelbarrow filled with potting mix and plants.
An old wheelbarrow upcycled into a container garden.
Photo: Jon Traunfeld, University of Maryland Extension
A freestanding wooden container with three offset trough-like tiers, planted with bush cucumbers and dwarf tomatoes.
A three-tiered wooden container with bush cucumber and dwarf tomato plants makes good use of vertical space.
Photo: Erica Smith, UME Master Gardener
Multiple plastic milk crates with plastic trash bags lining their insides, filled with potting mix and carrot plants.
Milk crates can house root crops like carrots.
Photo: Jon Traunfeld, University of Maryland Extension

Self-watering containers

Self-watering containers are an excellent choice for growing edible plants. Instead of drainage holes in the bottom, these containers have an overflow hole (usually on one side) where extra water can be poured out. The potting mix sits on a perforated platform directly above a water reservoir. Plant roots grow through the potting mix and perforations into the water, which has sufficient oxygen to support root growth. Water is also wicked up from the reservoir into the mix.

This technique can be seen as a hybrid between hydroponic gardening (plant roots growing in nutrient-enriched water) and conventional container gardening. Self-watering containers reduce maintenance by conserving water and nutrients. A number of commercially-available container designs are available, or you can make your own with materials like 5-gallon plastic buckets.

Top view of an empty EarthBox planter, showing a perforated plastic plate that separates the potting mix area from the water reservoir in the base.
A perforated separator divides the potting mix from the water reservoir in the base of an EarthBox. An overflow drainage hole opens on the side of the container.
Photo: Jon Traunfeld, University of Maryland Extension
Abundant light-colored roots growing through drainage plate perforations inside the base of an EarthBox container.
Plant roots in self-watering containers like an EarthBox typically grow into the water reservoir at the bottom of the container, where they receive enough oxygen to continue growing.
Photo: Jon Traunfeld, University of Maryland Extension
Two pairs of 5-gallon plastic buckets set up as self-watering planters. Each 2-bucket set contains one mature pepper plant.
Pepper plants (one per bucket) with maturing fruits growing in self-watering mini gardens.
Photo: Kent Phillips, UME Master Gardener
Two plastic 5-gallon buckets nested inside each other. A short plastic tube inserted near the bucket base forms a spout to a one gallon milk jug, which is holding runoff water.
Self-watering 5-gallon bucket mini garden. The excess water and nutrients are collected in the milk jug and returned to the inner bucket, creating a closed system that conserves water and fertilizer.
Photo: Jon Traunfeld, University of Maryland Extension

Convert buckets into mini gardens

A mature broccoli plant growing in a standard 5-gallon plastic bucket.
A healthy broccoli plant, ready to harvest, growing in a 5-gallon food-grade bucket.
Photo: Kent Phillips, UME Master Gardener

The ubiquitous 5-gallon plastic bucket is considered by some to be the most useful tool on Earth, particularly in economically disadvantaged countries. In the U.S., thousands of such buckets are buried in landfills or burned daily. Thrifty gardeners rescue them from local businesses and use them to carry water and tools; spread compost; make compost tea; and harvest, store, and protect crops.

Suitable types of plastic

Side-by-side minimalist outlines of a wine-style glass and a fork surrounded by a square frame.
Standard food grade logo.

Plastic recycling code #2 (HDPE) is common and the recommended plastic type for food storage. Materials using #2 plastic include milk jugs, juice containers, and many food-grade bulk pails.

Plastic recycling code #5 (PP) is another food-safe option, common in yogurt tubs and medicine bottles.
Look for a container label like "food grade” or “FDA Approved,” or the international food safe symbol of a glass and fork.

Plastics to avoid

Since they are generally not recommended for food storage, avoid plastics with recycling codes #3 (PVC), #6 (polystyrene, PS), and #7 (polycarbonate, bioplastics, bisphenol A [BPA], and others).

Used buckets: Any bucket that held chemicals (like paint or cleaning agents) is no longer food-safe, even if it is made from #2 HDPE plastic. As an alternative, buy new buckets specifically sold as food-grade that are intended for storing food.

Adapt a bucket for planting

Long, healthy white roots growing through holes drilled into the bottom of a 5-gallon plastic bucket.
Tomato roots that grew through the drain holes into the water reservoir (not shown) of a bucket-in-bucket mini-garden.
Photo: Jon Traunfeld, University of Maryland Extension

You can make a simple bucket mini garden by drilling holes in the bottom of the bucket, filling it with potting mix, and planting. Covering the bottom with fiberglass window screening before filling the bucket will keep the mix from falling through the holes.

You can also make a self-watering “bucket-in-bucket” garden with a pair of buckets that form a closed system. The plant is grown in potting mix in the top bucket, which drains into the second bucket. Any overflow of water and nutrients from the second bucket’s reservoir is collected by a milk jug, which can be reused to water/fertilize the plant.

Refer to the following illustrations and instructions for guidance.

Screenshot of a PowerPoint slide about making and planting a bucket garden.
Design shared by Kent Phillips, University of Maryland Extension Master Gardener.

Learn how to make a simple self-watering container using two 5-gallon buckets. View and download instructions (PDF)

Video: Make and Plant a Bucket Garden

A cutaway diagram of a plastic bucket modified into a self-watering container.  A perforated disc is laid on top of short sections of corrugated pipe that hold it above water in the bottom of the bucket. A short piece of tubing inserted into a port drilled in the bucket's side allows surplus water to drain into a milk jug positioned partially below the level of the bucket, which is placed on top of a cinder block.
A diagram of one type of interior setup of a self-watering bucket.

Short pieces of corrugated drain pipe prop a perforated disc above the water collection area in the bucket base. A short piece of tubing inserted into a hole drilled low on the bucket's side allows surplus water to empty into a milk jug next to the bucket. Placing the bucket on a concrete block lets water drain into the milk jug below. A slender screw or nail driven through the tubing prevents it from being pulled out of the bucket. The water and leached nutrients that collect in the jug can be re-used the next time the container needs watering.

A cutaway diagram of a plant growing in a bucket, which is sitting atop a concrete block. Roots reach the bottom of the bucket, and a short tube connects the bottom side of the bucket to the upper side of a milk jug placed next to the concrete block. The jug holds extra liquid from the bucket until it’s used to water the plant.
A diagram of one method of setting up a self-watering bucket planter.

This simplified diagram (with only one bucket drawn) shows how a self-watering bucket garden is a closed system that recycles water and nutrients. Roots grow down into the water-nutrient reservoir. Overflow liquid is collected by gravity into the milk jug, which rests below the level of the bucket setup.

Salad Tables™ and Salad Boxes™

Do you love the idea of eating fresh, homegrown salads? The University of Maryland Salad Table, developed by University of Maryland Extension in 2009 and adopted by many gardeners nationwide, lets you grow flavorful greens close to your back door without digging in the ground.

A Salad Table is essentially a shallow frame with a large surface area and a mesh bottom that allows water to drain. The frame is filled with potting mix and planted, and as roots begin to grow through the mesh, the exposure to open air stops their growth (air pruning). In response to the limited depth, the plants produce more roots within the potting mix; a larger root system can support more leaf growth. A Salad Box is a smaller-scale version of a Salad Table designed to sit on flat surfaces.

Salad Tables are typically made from readily available lumber and have four legs. You can attach legs of any length, or set a legless table top or Salad Box on top of sawhorses or other supports. They are portable, versatile, inexpensive to build, and work for gardeners of all ages and abilities. The Salad Table can be positioned to give plants enough direct sun in spring and fall, and moved to avoid too much direct sun and high heat in summer. Best of all, you can garden comfortably at a height that works for you and avoid problems with rabbits and groundhogs.

The top of a Salad Table filled with a variety of red and green lettuce plants ready for harvest.
A Salad Table with a variety of lettuces ready for harvest.
Photo: Jon Traunfeld, University of Maryland Extension
Fine white roots begin to grow through the mesh bottom of a Salad Box.
Plant roots are air-pruned when they reach the mesh bottom, which stimulates new root and leaf growth.
Photo: Jon Traunfeld, University of Maryland Extension

Salad Table standard size

  • The frame is 58 inches long, 33 inches wide, and 3 ½ inches high; and is divided into three sections. The frame is supported by four legs and stands 36 inches tall from the ground to the top of the table. Table dimensions and leg heights can be easily adjusted to meet individual needs.
  • The frame has a total surface area of 11.1 square feet and a volume of 2.8 cubic feet (equivalent to 22 gallons of potting mix).

Salad Box standard size

Painted wooden Salad Box with mitered corners and three wooden runners attached to the bottom, filled with a variety of salad greens ready for harvest.
Painted Salad Box with mitered corners and three wooden runners attached to the bottom.
Photo: Jon Traunfeld, University of Maryland Extension
  • The box is 21 inches long, 15 inches wide, and 3 ½ inches high.
  • The box has a total surface area of 2.2 square feet and a volume of 0.5 cubic feet (holding 3.75 gallons of potting mix).

How long will it last?

If built out of wood, decay resistance will vary based on the lumber type or treatment:

  • untreated SPF (spruce, pine, fir) – 4 to 8 years
  • painted or stained SPF – 8 to 12 years
  • STK (select tight knot) Western red cedar – 12 to 15 years
  • treated MCA (micronized copper azole) – 15 to 20 years

How much can I grow?

  • A typical growth cycle for salad greens (from sowing seeds to removing plants for harvest) is about 8 weeks. Lettuce and other greens can be cut twice each growth cycle: you can get two harvests from a plant before it needs replacing.
  • For a standard-size Salad Table, harvest yields have ranged from 1 to 2 pounds per table per harvest. The 2026 store value of this amount of pre-cut, bagged salad greens at $0.50 per ounce is $16 to $32 per table per 8-week growth cycle. It’s possible to plant one Salad Table three times each year in Maryland, producing a total value of $48 to $96 annually.
  • A standard-size Salad Box produces 3 to 6 ounces of salad greens per cutting.

Building the original Salad Table

Finished dimensions: 58 inches long, 33 inches wide, 36 inches tall

Materials

  • Untreated framing lumber
    • three 2x4s, each 10 feet long
    • one 2x4, 12 feet long
  • 2½-inch galvanized deck screws
  • ⅜-inch staples
  • 1 pound of 1-inch roofing nails
  • 3-foot x 5-foot roll of aluminum window screen
  • 3-foot x 5-foot roll of ½-inch mesh hardware cloth (galvanized wire mesh that comes in a roll); ¼-inch mesh hardware cloth is more expensive but easier to manipulate

Tools

  • Hand saw
  • Wood rasp
  • Woodworking/carpenter square
  • Hammer
  • Tin snips
  • Drill with ⅛-inch drill bit
  • Staple gun
  • #2 Phillips-head screw bits
  • Tape measure
  • Leather gloves
  • Safety goggles

Cut the wood to size

Wooden boards laid on the ground in a group of different lengths, ready for assembly and into a finished table frame.
Wood cut for assembly into the frame of a Salad Table.
Photo: Jon Traunfeld, University of Maryland Extension
  • To make the long sides of the table, cut (2) 58-inch sections from a 10-foot 2x4. There will be 4 inches of leftover (scrap) wood.
  • To make the cross pieces, cut (4) 30-inch sections from a 10-foot 2x4. This cuts the 2x4 into four even pieces; there will be no leftovers.
  • To make the inside support part of the legs, cut (4) 29 ½-inch sections from a 10-foot 2x4, which will leave 2 inches of leftover wood.
  • To make the outside support part of the legs, cut (4) 33-inch sections from the 12-foot 2x4, which will leave 12 inches of leftover wood.
  • Use a wood rasp to smooth any rough edges after cutting your wood pieces.

Assemble the pieces

  1. Assemble the frame for the table top.
    1. Attach the 58-inch-long frame sides to the 30-inch frame crosspieces using 2 screws per crosspiece. Drill pilot holes with the drill bit before driving in the galvanized screws.
    2. The two interior cross pieces are attached on center at 19 9/16 inches from each end of the long pieces. This divides the table into three equal sections, each measuring 30 inches by 17 5/16 inches.
  2. Attach the window screen to the table top's underside.
    1. Center the window screen on the outside bottom of the frame.
    2. Have two people stretch it taut and staple it to the frame's bottom and sides with a staple gun.
  3. Attach the hardware cloth over the window screen.
    1. Center the hardware cloth on top of the window screen, pull it taut, and staple it to the bottom of the frame.
    2. Nail roofing nails along the wire edges around the frame for added support – the wide nail head can help secure the wire mesh.
    3. Use tin snips to make a diagonal cut from each corner of the hardware cloth to the table frame. This enables you to fold the excess material up and onto the ends of the frame, where it can be stapled and nailed. (It will be difficult to attach the legs properly if the hardware cloth and window screen are folded and bunched on the sides where the legs attach.)
  4. Assemble the legs.
    1. Each leg is made from two pieces of wood: a long and a short piece attached to each other.
    2. Build the four legs by screwing each 29 ½-inch leg piece to a 33-inch leg piece, lining up the ends so they are even. This flush end is what sits on the ground or where you can later attach a wheeled caster.
  5. Attach the legs to the table frame.
    1. The tabletop will rest on the shorter inner portion of each 2-piece leg.
    2. Attach each leg, 8 inches inset from each of the four corners, by driving three 2 ½-inch screws through the top of each leg and into the long side of the frame.
  6. Coat the Salad Table with latex paint or an acrylic stain to resist decay.
Diagram side view of how a Salad Table frame rests on the shorter inner piece of the two-piece legs.
Side view diagram of a Salad Table. Diagram by Emily Clark Waterson
Close-up of the outside of a Salad Table frame, showing two bolts attaching the leg and a bracket used to anchor a piece of pipe.
Removable bolts attaching a leg to a Salad Table frame. A pipe bracket is an optional feature used to anchor an arch of flexible pipe to support frost cover or insect-blocking mesh to protect the plants.
Photo: Miri Talabac, University of Maryland Extension
A close-up of bolts anchoring a leg to a Salad Table frame, as seen from inside of the table top.
Removable bolts anchoring a leg to a Salad Table frame. Removable legs helps with out-of-season storage and table transportation.
Photo: Miri Talabac, University of Maryland Extension
Close-up view of the base of a two-piece Salad Table leg, showing the board ends flush with each other. A lockable wheel is attached to the base of the leg.
The two pieces of wood forming each Salad Table leg are aligned flush with each other at the bottom end, which enables you to attach a wheel underneath.
Photo: Miri Talabac, University of Maryland Extension
Close-up view of a Salad Table frame with an optional pipe bracket and two wide-headed nails anchoring the wire mesh wrapped over the frame's underside.
A painted Salad Table frame with wide-headed nails helping to anchor the wire hardware cloth mesh to the sides of the frame. An optional pipe bracket is also used to anchor arched supports for holding a woven or mesh cover above the plants.
Photo: Miri Talabac, University of Maryland Extension

Alternative Salad Table construction methods

  • A Salad Table can be made any width and length as long as the weight of the moist potting mix and plants can be supported.
  • A lumber yard or hardware store can make the required lumber cuts for you.
  • Substitute 2x6-sized boards for larger-growing salad greens and bush beans, or 2x8 or 2x10 boards for peppers, determinate-type tomatoes, and bush cucumbers.
  • Make legs from 1x4 or 4x4 boards, or set the frame on two sawhorses or other supports instead of fixed legs.
  • Attach sturdy casters to the legs for easier mobility.
  • Substitute 4-inch lag bolts for screws for attaching the legs (2 bolts per leg). This allows the legs to be easily removed if you need to break down the Salad Table for storage or transport.
  • Attach three 1x4 boards, each 58-inches long, over the hardware cloth on the table bottom to prevent it from sagging.
  • Make the frame with one internal division instead of two.
  • Cover the edge of the window screen and hardware cloth on all four sides with molding or batting to prevent fraying and cuts from sharp metal edges.

Examples of customized salad tables

Salad Tables can be customized to make them sturdier or more versatile. Modifications include:

  • Adding wheels or casters
  • Incorporating supports and anchor points for covers (such as clear plastic, row cover, or insect mesh)
  • Adding stabilizing cross braces for the legs
  • Adding handles and tool storage
  • Building the table to a smaller scale
  • Increasing the depth for larger crops
Salad Table with casters on all four legs, positioned next to a deck railing under an overhang. One extra crosspiece is attached near the base of the legs on each side.
Casters on a senior center Salad Table make it easier to move for more or less sun exposure. Added cross pieces brace the bases of the legs.
Photo: UME Master Gardener
A painted Salad Table with wheels on one pair of legs and handles built into the other pair of legs.
Salad Table with handles built into one set of legs and wheels attached to the opposite legs for easy moving.
Photo: anonymously shared with UME
Salad Table with a deeper planting area and three metal arches attached to the frame, covered in translucent plastic.
Salad Table built with several more inches of planting depth, added leg bracing, and supports for a plastic cover for plant protection.
Photo: anonymously shared with UME
Salad Table augmented with straight and angled cross braces and wheels at one end.
Modified Salad Table with cross-bracing and two wheels for easy placement in sun or part shade.
Photo: anonymously shared with UME
Small Salad Table with no internal divisions and casters added to shortened legs on one end.
Small-scale Salad Table with one pair of casters, built for pre-schoolers.
Photo: anonymously shared with UME

Building the original Salad Box

Finished dimensions: 21 inches long, 15 inches wide

Materials

  • Pine or cedar lumber: one 1x4, 6-feet long
  • 1¼-inch galvanized deck screws
  • ⅜-inch staples
  • Aluminum window screen
  • ¼-inch mesh hardware cloth (galvanized wire mesh that comes in a roll)
  • Handles (optional)

Tools

  • Hand saw
  • Woodworking/carpenter square
  • Hammer
  • Tin snips
  • Drill with ⅛-inch drill bit
  • Staple gun
  • #2 Phillips-head screw bits
  • Tape measure
  • Leather gloves
  • Safety goggles

Cut the wood to size

  • To make the sides of the box, cut the lumber into 4 sections: 2 sections that are 15 inches long and 2 sections that are 21 inches long, which leaves no leftover wood.
  • Use a wood rasp to clean up rough edges after cutting your wood pieces.

Assemble the pieces

A table-sized Salad Box with casters on its base, sitting on a large sunny deck near a garden hose.
Large Salad Box with casters on the bottom. The gardener can move the box to different deck locations depending on the plants’ sunlight needs.
Photo: anonymously shared with UME
  1. Use the screws to attach the 21-inch long sides to the 15-inch short sides to form a rectangle. Drill pilot holes with the drill bit before driving in the galvanized screws.
  2. Lay the window screen over the box with a bit of overlap along the long sides. Cut the screen so that it is even with the short sides and extends 3 inches beyond the edges of each long side. Staple it securely to the frame's bottom and sides using a staple gun.
  3. Repeat the same procedure with the hardware cloth, except cut it so it extends only 2 inches up each long side. Staple it to the frame's bottom and sides. Fold the window screen overhang down over the hardware cloth edge to create a seam and staple it securely.
  4. Coat the Salad Box with latex paint or an acrylic stain to resist decay.

Alternative Salad Box construction methods

  • Use finishing nails instead of screws to build the box, or use a combination of the two.
  • Add handles to the ends for easy lifting and moving. (The box weighs about 12 to 15 pounds when filled with moist potting mix and plants.)
  • Nail or screw two 21-inch pieces of wood to the long sides of the bottom of the box to raise it off the ground.
  • Use 1x6 wood for a deeper box and greater rooting area. This increases the box’s expense and weight, but allows crops to grow larger.
  • Cover the edge of the window screen and hardware cloth on all four sides of the frame with wood molding, batting, duct tape or another material to prevent fraying and cuts from sharp metal edges.

Planting and harvesting Salad Boxes and Salad Tables

Salad greens grow best with maximum sunlight during the cooler spring and fall months and less sunlight during the hottest summer months. You can plant your Salad Table and Salad Box 3 to 4 times each year with leafy greens.

  1. Select a sunny location for April through mid-June, where the plants will get 4 to 8 hours of direct sun.
  2. Move the table or box to a mostly shady spot from mid-June through mid-September, where the plants will get up to 3 hours of direct sun (or only indirect sun).
  3. Move the table or box back to a sunny spot for mid-September through November, where the plants will get 4 to 8 hours of direct sun.
A variety of salad greens at different stages of growth in a Salad Table on a home deck.
A well-tended Salad Table on a deck with a variety of salad greens at different growth stages.
Photo: Marjorie Poling
Salad greens growing in a narrow Salad Table, located on a shaded porch in summer.
Salad greens in a narrow Salad Table, growing in a shady porch location in mid-summer. Lettuce will germinate and grow in 100% indirect sunlight during the summer months. The mesh shelf on the bottom is useful for storage or starting new plants. 
Photo: Jon Traunfeld, University of Maryland Extension

The ability to move to shadier and sunnier spots will increase the amount of food you can grow. You can also build two tables, one for a sunny location and one for a shady location, or cover the plants growing in a sunny location with shade cloth in summer to reduce their heat stress.

Try these crops in Salad Tables and Salad Boxes:

  • all types of lettuce
  • endive
  • many members of the Brassicaceae (cabbage) family, such as arugula, kale, mustard greens, broccoli raab, mizuna, komatsuna, and radish
  • spinach or its relatives, leafy amaranth and Swiss chard
  • small-statured herbs like parsley, cilantro, and basil
  • bush beans
  • dwarf tomato, pepper, bush cucumber in a 9- to 10-inch deep frame

Create rows of shallow furrows in the potting mix 4 inches apart. In each row, plant seeds 1 to 2 inches apart from each other. Gently brush the ridges of growing mix from either side of the furrow to cover the seeds about ¼” deep. Lightly press down on the row to give the seeds good contact with the potting mix.

Members of the cabbage family will germinate the fastest (2 to 4 days after sowing). Lettuces germinate 6 to 10 days after sowing. Spinach, chard, basil, and cilantro will take 7 to 10 days to germinate. Germination will be slower when the potting mix temperature is below 50°F or above 80°F.

Harvested bush beans that were grown in a Salad Table frame built with 2x4 lumber. A 1-gallon-sized bag of harvested pods sits on the front of the table.
Bush bean harvest from a Salad Table frame built with 2x4 lumber.
Photo: Jon Traunfeld, University of Maryland Extension
Side view of bush bean roots growing throughout the potting mix that filled a Salad Table to a 3-inch depth.
The root system at the end of the harvest period of a crop of bush beans grown in a 3-inch-deep Salad Table.
Photo: Jon Traunfeld, University of Maryland Extension

Thin the seedlings as needed to reduce crowding; pull the extras out by hand, or, to avoid disturbing delicate roots, cut them down with garden snips. After a period of growth, harvest salad greens in the “baby greens” stage (with leaves 4 to 8 inches in height). Cut the greens about 1 inch above the potting mix. New leaves will grow and be ready for a second harvest in 25 to 30 days. (In some cases, a third harvest may be possible.) This is known as “cut-and-come-again” harvesting. Alternatively, you can allow individual plants to reach larger sizes by thinning out more young plants, giving the keepers more room to grow.

Lettuce growing in a Salad Table that has been harvested with scissors and put into two 1-gallon plastic zip-top bags. An inch or two of the base of the plant is left in the planter to regrow.
Cut-and-come-again harvesting: young salad greens are cut close to the base of the plants, given time to regrow, and harvested again.
Photo: Jon Traunfeld, University of Maryland Extension

When the plants become weak, bitter-tasting, and unproductive (no longer regrowing well), they can be “turned under” (churned into the potting mix to decompose) or pulled out and composted. Add slow-release granular fertilizer to the Salad Table and loosen the potting mix with a hand cultivator before replanting.

Potting mix for your container garden

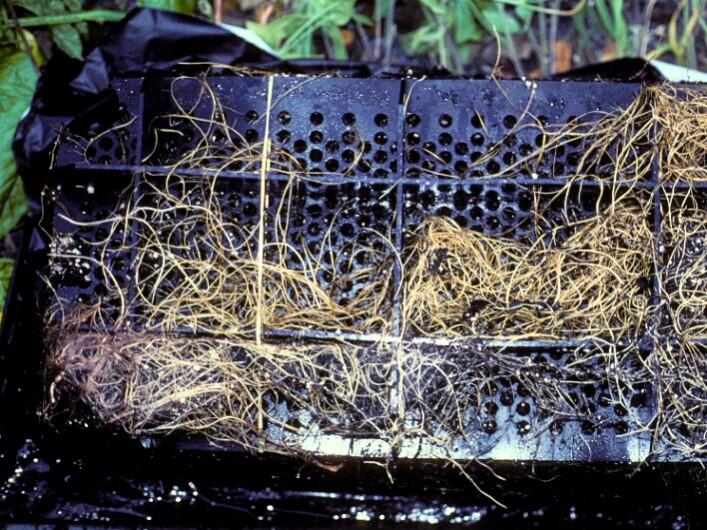
Unlike the roots of plants growing in garden soil, containerized plant roots cannot grow around obstacles or mine the soil indefinitely for nutrients and water. Your choice of potting mix (growing media) is important because container plant roots rely on a limited amount of space.

Growing media has three main functions: to supply roots with nutrients, air, and water; to allow for maximum root growth; and to physically support or anchor the plant.

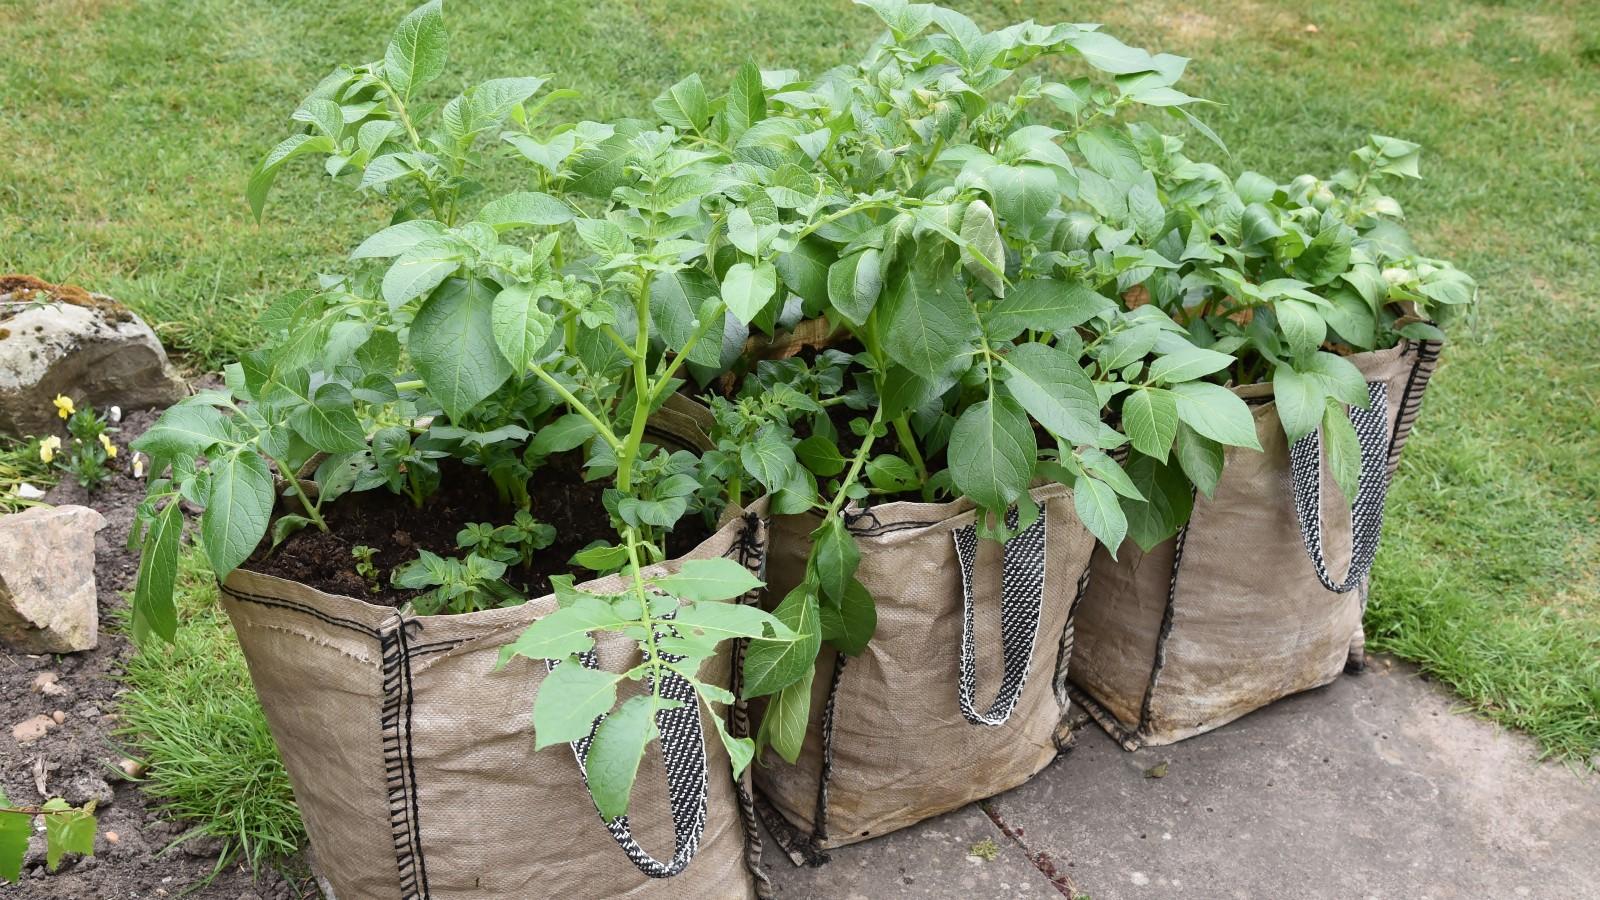
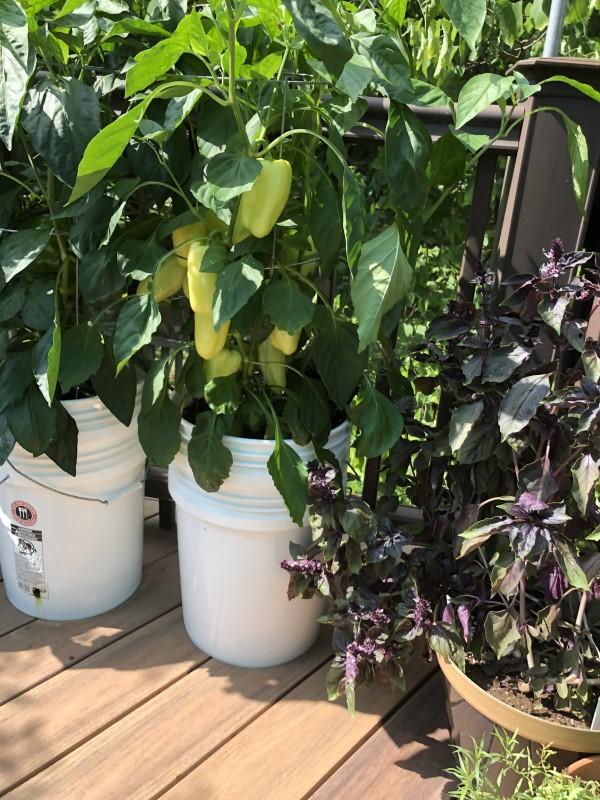
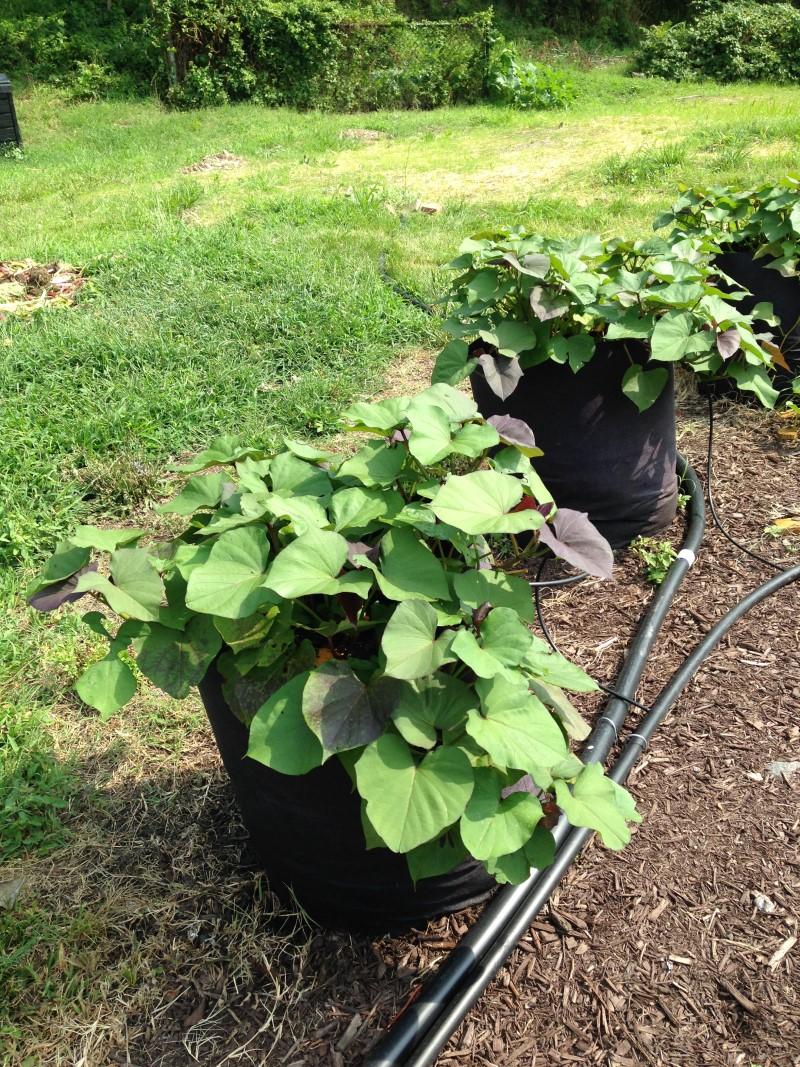
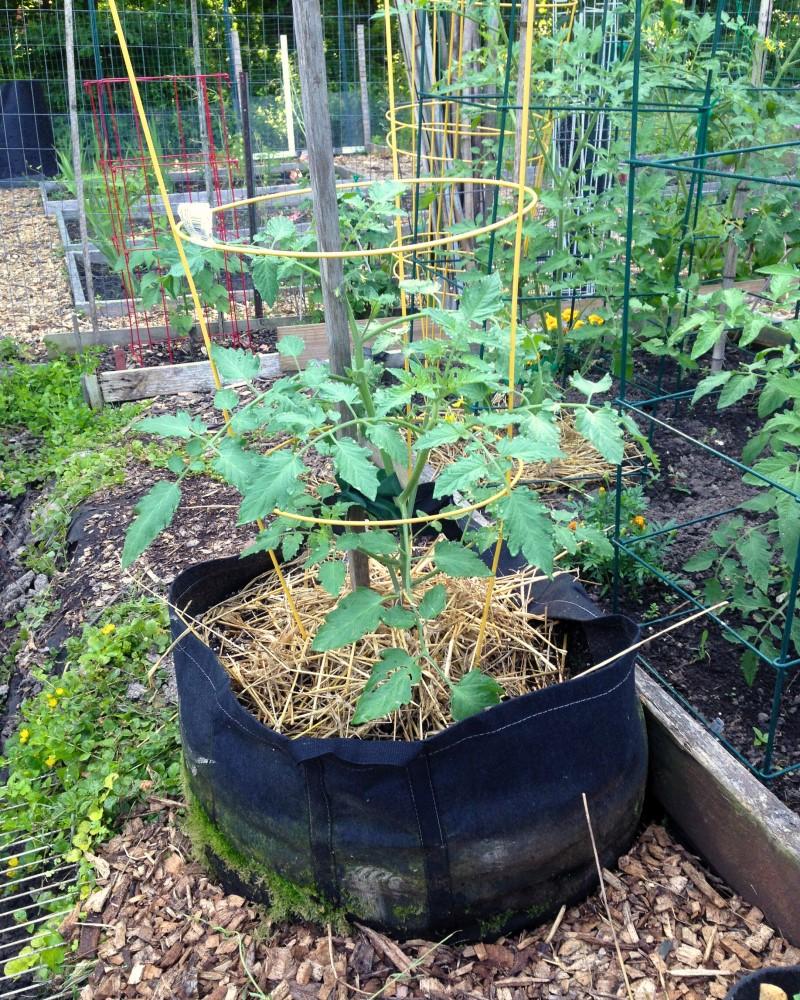
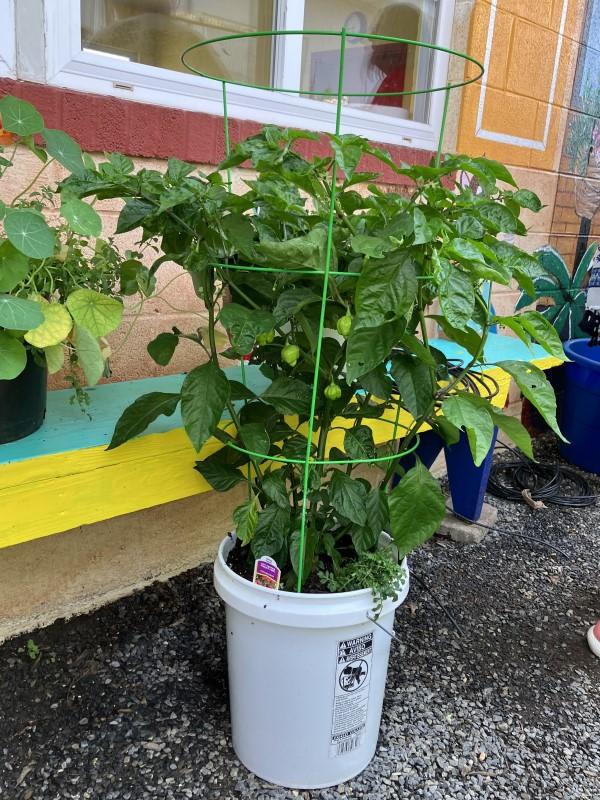
The labels on packaged growing media may state how many pots of a certain size the bag can fill. As a guideline, a 2-cubic-foot bag of potting mix will fill three 5-gallon buckets or grow bags.

Porosity for plant health

Container growing media should have large particles with large pore spaces (good porosity) between the particles. This makes it well aerated (light, fluffy, and resistant to compaction) and well drained, which encourages rapid seed germination and strong root growth.

Roots, air, and water occupy the pore spaces between individual particles of the growing media. Water from rain or irrigation moves down through the pore spaces, pushing out the air. Water carries nutrients that plants need to fuel their growth, and air is needed for root growth and the health of soil microbes that help make nutrients available to plant roots. If excess water cannot drain easily, roots can suffocate because fresh air cannot enter pore spaces as the water moves out. High-quality potting mixes have a pore space volume of 50% to 80%.

Soilless growing media

Growing media have many alternate names, such as “potting soil,” “planting/potting mix,” and “container substrate.” Media should not be confused with true soil, which contains mineral components like sand, silt, or clay. Since container media do not contain soil (despite “potting soil” being a widely-used product label), they are categorized as “soilless.”

Soil is too dense (approximately 75 pounds per cubic foot) to allow for good air and water movement around roots when used in a container garden. Soil also may contain weed seeds and plant pests or pathogens. Soils hold water very well in their small pore spaces, which can drown roots, especially in shallow containers. If topsoil is added to a potting mix, it should only be used for very large containers and not exceed 10% of the volume of the ingredient mix.

Soilless media are lightweight (approximately 10 pounds per cubic foot) and drain well. They hold water and nutrients, and when fresh are generally free of weeds, insects, and pathogens. A potting mix combines several ingredients; common components include sphagnum peat moss, perlite, vermiculite, composted bark, compost, and coconut coir.

  • Manufacturers may add small amounts of fertilizer to support initial growth, and add lime to bring the pH closer to a multi-purpose level of about 6.2. Lime offsets the strong natural acidity of sphagnum peat moss, a very common potting mix component. (Media pH influences how accessible nutrients are to the roots.)
  • If any media ingredients naturally repel water when dry (such as hydrophobic peat moss), the product may also contain a wetting agent to improve water absorption.
  • Avoid container media products that feel heavy or gritty, that appear very dusty or clumped, or that contain sedge peat (which compacts too easily and doesn’t retain moisture well).
  • Certified organic potting soil products do not contain synthetic wetting agents or synthetic fertilizers, and meet standards set by USDA’s National Organic Program and the Organic Materials Review Institute (OMRI). Otherwise, little difference exists between organic and conventional products.

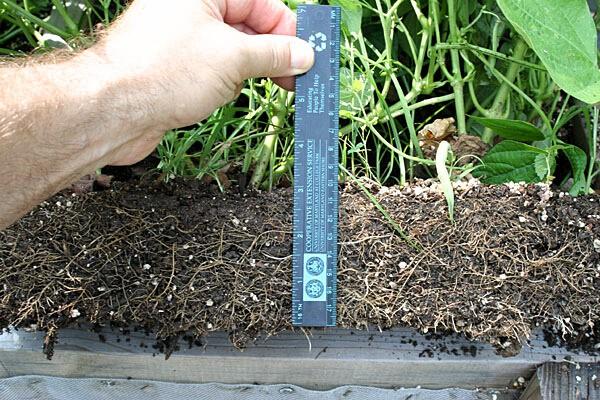
Soilless potting mixes are mostly composed of organic materials that decompose and physically break down over time. This degradation reduces the volume of the growing media as particles become finer and settle closer together, shrinking the pore spaces. Smaller pore spaces reduce water-holding capacity and aeration.

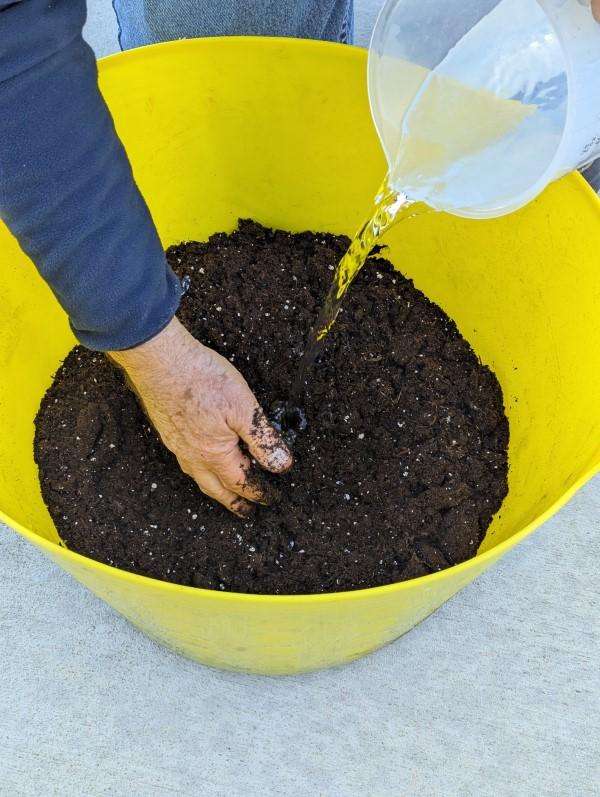
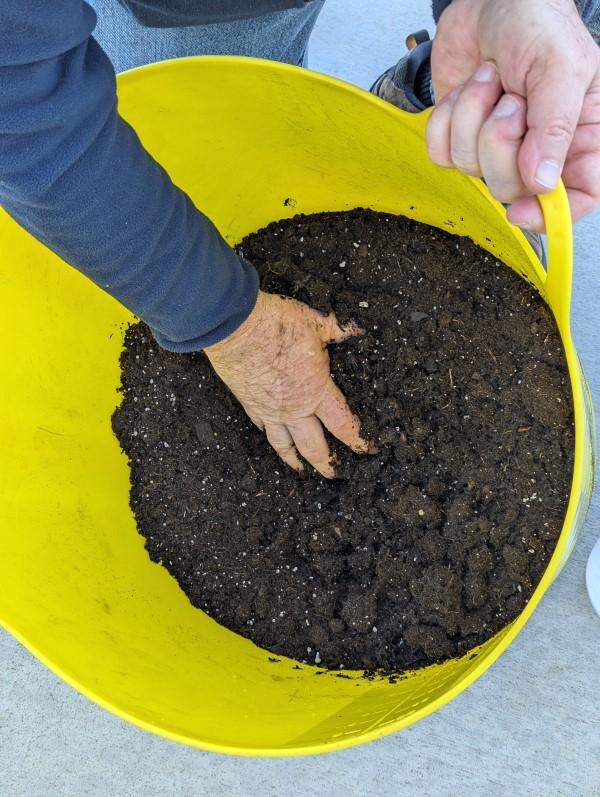
Moisten dry media before use

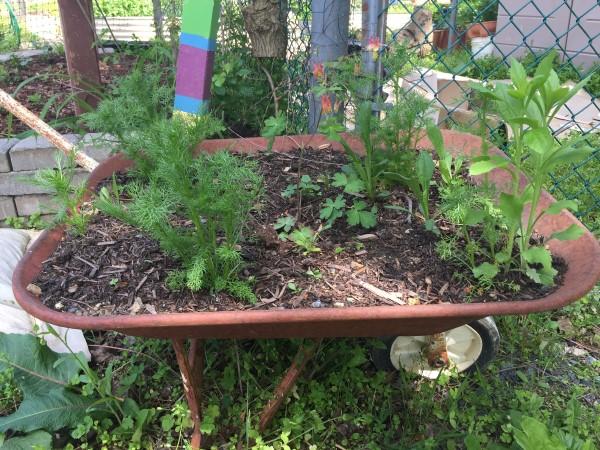
When working with hydrophobic materials like peat moss, gradually work water into the media with your hands until it is thoroughly moistened- as wet as a wrung-out sponge. This is easier to do in a tub or wheelbarrow before you fill the container.

Water is poured from a pitcher into a garden tub holding potting mix. One hand is used to churn potting mix into the stream to wet it.
Add water to a container large enough to allow for mixing.
Photo: Miri Talabac, University of Maryland Extension
Using fingers to comb through and stir the potting mix to distribute the wet areas with dry mix until it’s uniformly moist.
Stir the potting mix to evenly distribute moisture throughout the media.
Photo: Miri Talabac, University of Maryland Extension
Scooping potting media by hand from a mixing tub into an empty container.
Moistened media is ready to be put into containers.
Photo: Miri Talabac, University of Maryland Extension

Compost as growing media

Microbes decompose organic matter into compost. Ready-to-use finished compost has a dark brown-black color, a uniform and crumbly texture, and an earthy smell. Leaves, grass clippings, wood waste (tree trimmings, wood chips, etc.), kitchen produce scraps, and farm animal manure are among the common ingredients used in composting. They are moistened with water, piled or windrowed, and gradually digested by large populations of oxygen-loving microorganisms. LeafGro™ is a well-known commercially available compost made from yard waste that is produced in Central Maryland.

  • Compost contains major and minor plant nutrients and adds beneficial microbes to the container, enhancing plant health. It is a suitable substitute for sphagnum peat moss in potting mixes. However, fertilizing is still necessary because the nutrients in compost are released slowly and are usually not sufficient for an entire season.
  • Vegetable plants generally grow best when the pH of the root zone is between 5.5 and 7.0. Many composts have a pH between 7.0 and 7.5, but research shows that there is no benefit to lowering the pH to a more desirable level, as nutrients in compost are available over a wide pH range.
  • Properly made compost is turned (mixed to maintain aeration) multiple times before it is finished. This oxygen-rich active composting process generates hot temperatures that kill weed seeds and plant and human pathogens.
  • Compost can be 50% to 100% of the total container volume. Like other media ingredients, aging compost can disintegrate over time, compressing and losing porosity. Sphagnum peat moss and coir hold water better than compost, so mixes that are high in compost will need more frequent watering.
  • Do not use animal manure in container gardens unless it has been composted to U.S. FDA standards.

Reusing growing media next season

To save money by reusing potting mix, empty the container's media after the year's harvest is finished. Remove and discard plant tags and all plant residues (dead leaves and stems). Store the media in a trash can, storage tub, or heavy-duty trash bags. (Don't save the media if root diseases were a problem.)

Since media breaks down, loses nutrients, and becomes less porous over time, amend it with fresh ingredients before reuse. Mix last year’s growing media in equal amounts (50:50) with fresh growing media and/or compost. Fertilize regularly to compensate for depleted nutrients.

Crops for containers

Broccoli seed packet for the variety ‘De Cicco.’ The packet’s labeling notes that it is a good container variety.
Example of seed packet labeling for a variety that can grow well in containers.

Popular vegetable crops grown in containers include salad greens, peppers, eggplant, tomatoes, beans, chard, beets, radish, squash, and cucumbers. Many herbs also do well in containers. More challenging vegetables for container growing include melons, corn, potatoes, and sweet potatoes.

In catalogs or on seed packet labels, look for “bush” or “dwarf” varieties of the crops you want to grow. For example, quite a few tomato and cucumber varieties are bred for small-space gardening.

Over two dozen garlic plants growing in a large fabric grow bag in spring.
Fall-planted garlic growing in the spring in a large fabric grow bag.
Photo: Jon Traunfeld, University of Maryland Extension

Grow crops you frequently eat and cook with, or which are expensive or hard to find. Experiment with varieties, spacing, and container location.

Three potato plants growing in a 5-gallon fabric bag.
Three potato plants started from three seed potato pieces, growing in a 5-gallon fabric bag.
Photo: Jon Traunfeld, University of Maryland Extension
Three potato plants lifted out of a 5-gallon fabric grow bag and laid on the ground to harvest the tubers.
Potato plants were removed from a fabric grow bag to harvest the tubers.
Photo: Jon Traunfeld, University of Maryland Extension
Eight potatoes of various sizes are placed on top of the potting mix, removed from the container.
Potatoes were harvested from three plants grown in a 5-gallon fabric bag.
Photo: Jon Traunfeld, University of Maryland Extension

Herbs for containers

Several herbs grow well in containers, such as basil, dill, rosemary, thyme, sage, lavender, parsley, mint, chives, oregano, tarragon, and cilantro. To promote good growth:

  • Use clay pots and potting media that drain well. Unglazed terra cotta wicks moisture and helps prevent the center of the container from staying wet for too long.
  • Group herbs with similar growing needs together. Basil, mint, parsley, and cilantro need more consistent root moisture than rosemary, thyme, oregano, and lavender, which prefer to dry out more between waterings.
  • Move containers around to find the right amount of sunlight.
  • Pinch or cut off flowers and shoot tips to stimulate new growth.
A variety of herbs growing in a small wooden Salad Table. One end of the table has wheels mounted to the legs.
Herbs growing in a Salad Table. Wheels mounted to one set of legs make repositioning easy.
Photo: Jon Traunfeld, University of Maryland Extension

Planting container gardens

Vegetables and herbs can be planted in containers as seed sown directly into the media or as transplants (young plants between the seedling stage and a few weeks old). Sow seeds indoors under grow lights or in a home greenhouse to produce your own transplants, or buy them from a nursery.

Planting into containers is similar to planting in the ground: sow seed at the recommended spacing, depth, and time of year for that crop; and loosen the roots if an older transplant has become pot-bound (developed tangled or matted roots due to crowding in the pot) before putting it into the container. Container media warms up more quickly than garden soil, which may affect when seeds or transplants can be planted and how vulnerable they are to temperature swings and late-spring frosts.

  1. Cover large-diameter drain holes with a porous material to prevent the media from falling out as you fill the container. (The media mostly sticks to itself when moist and doesn’t fall out of smaller drain holes.) The material must allow water to drain; options include a mesh-like fiberglass window screening, untreated burlap, a paper towel, or a coffee filter. Although biodegradable materials will disintegrate over time, by that point, the media is sufficiently held in place by roots.
  2. Do not add gravel, rocks, or ceramic pot shards to the bottom of the container; they take up space needed for root growth and can worsen drainage. An exception would be when added weight is needed to stabilize light containers prone to tipping over.
  3. Thoroughly moisten dry media before filling pots, especially if the media contains peat moss.
  4. Do not pack media tightly into the container; fill containers loosely so the media remains airy. Fill the containers within an inch or so of the rim to leave room for water to sit while it soaks in. This avoids overflow and media loss when watering.
  5. Follow the seed packet directions for sowing, such as seed spacing and depth. After seeding or transplanting, water gently so the seeds or transplants don’t shift, tip over, or have their roots exposed or buried too deeply. After germination, thin out extra seedlings as needed to give the plants room to mature.
  • calendar of when to plant vegetables

    Vegetable Planting Calendar

    Vegetable Planting Calendar

    Find planting and harvest times for a range of vegetables. Available in English and Spanish.

Container garden plant care

Plants growing in containers often require more monitoring and maintenance than the same plants growing in the ground. They have limited space to grow and limited access to nutrients and water compared to plants in garden soil. Soil is insulating; since the entire root system of a container-grown plant is above ground, it can experience greater temperature fluctuations throughout the year, and the media will dry out more quickly.

Watering containers

Monitor container plants the same way you would for plants in the ground: feel the media below the surface to judge whether it is moist enough before deciding when to water. For lightweight containers (not ceramics), getting used to how light or heavy they feel when lifted can be a useful shortcut to probing the media; compare their need-water and freshly-watered weights to judge dryness in the future.

  • Each watering should thoroughly re-moisten the entire container, and excess water should freely drip out of the bottom drain holes (or an overflow hole in a self-watering container). A large container may require several gallons of water.
  • Apply water to the potting mix at the base of the plant, not on the leaves. Wetting leaves can spread disease, and water may not reach the roots.
  • “Water breaker” attachments for watering can spouts and garden hoses make the water flow more gently and rain-like, rather than a forceful flood or spray. This avoids knocking over seedlings or young plants with tender stems and spraying or flooding media out of the pot.

How often to water

In general, container plants need frequent watering, though their moisture needs vary with the plant’s stage of growth and the weather, and different media mixes dry out at different rates. To reduce the risk of over- or under-watering, avoid watering containers on a set schedule without first checking them. Until you get accustomed to how often certain containers tend to dry out, check containers DAILY to see if they need water, especially in summer.

Watering frequency varies based on several factors:

  • Container material: Plastic and metal containers retain moisture longer than porous materials like unglazed terra cotta and wood.
  • Container size: Small containers dry out faster than large containers.
  • Container location: Containers in full sun will dry out faster than those in shade; breezes dry out container media faster than areas sheltered from wind; and containers under an overhang, near a tree, or close to a building or solid fence may not receive much rain.
  • Plant maturity and size: Young plants have small root systems, and the environment (sun, warmth, wind) will be the main factor drying out the media. Larger, well-established plants whose roots fill more of the container will dry the media out faster than freshly-planted containers.
  • Weather: Hot temperatures dry containers out quickly; dry winter air also desiccates media (important for perennials overwintering in pots, such as several types of herbs).
  • Plant type: Some plants (rosemary and thyme, for example) prefer to get drier between waterings than others (basil, lettuce) that should stay more evenly moist.

Clustering plants together can make watering more convenient if several containers need watering with similar frequency. To water less often overall, try:

  • Grouping containers together to slow evaporation by increasing humidity around the plants, particularly if the location is out of the wind
  • Mulching around the plants to reduce evaporation; options include fine pine bark, straw, shredded leaves, or grass clippings. Let seeds germinate and grow for a few weeks before applying mulch, so they aren’t smothered.
  • Planting in self-watering containers, which lack drain holes and store water in a reservoir below the potting mix that roots can reach

How to avoid under- and over-watering

Under- and over-watering stresses plants and can cause stunted or malnourished growth, premature leaf and fruit loss, opportunistic pest or disease outbreaks, and partial or total plant death.

  • Wilting is not a reliable indicator of dryness: plants can wilt if they are too dry and if they have been kept too wet. Check containers regularly to determine when to water before the plants get too stressed, and avoid watering when roots still have enough moisture.
  • If containers go too long without water, the media can shrink inward, creating a gap between the media and the container's edge. When you next water the container, most of the water will flow through the gap and out of the drain holes, rather than being absorbed. Repeat watering will be needed to rehydrate dry media. One rehydration technique is to immerse the container halfway in a bucket or tub of water and let it soak up moisture from below until the surface is moist.
  • Watering too often keeps the media’s pore spaces saturated with water and depleted of air, depriving roots of oxygen. This can lead to diseases like root rot that cannot be cured.
  • Saucers catch excess water so it can be reused or prevent stains on decking or pavement, but this extra moisture could seep back into the container if not emptied after watering. Detached saucers are easier to empty than saucers fused to the pot (as is sometimes the case with smaller ceramic containers). Mosquitoes can breed in the saucer water if it’s not regularly emptied.
  • To encourage the free flow of excess water from the pot, prop the containers a few inches above the ground on sturdy supports, such as ceramic “pot feet” or bricks. Position the supports so they don’t obstruct drain holes.
Micro-irrigation tubing and dripper watering herbs growing in a container.
Micro-irrigation tubing and dripper for watering containers. A battery-powered timer can automate watering.
Drip irrigation tubing laid throughout a planted Salad Table.
Watering a Salad Table of salad greens with ¼-inch drip irrigation tubing with emitters.
Photo: Jon Traunfeld, University of Maryland Extension
Sweet potato plants growing in fabric bags sitting on garden soil, watered by drip irrigation tubing.
Sweet potato plants growing in fabric bags. Plant roots grow through the bag into the soil below, where they pick up water and nutrients. Drip irrigation tubing with emitters provides needed water.
Photo: Jon Traunfeld, University of Maryland Extension
A large fabric grow bag with a young tomato plant. The growing media surface is covered with a straw mulch.
Straw mulch is used on a large fabric grow bag to reduce evaporation, maintain even growing media temperatures, and reduce weeds.
Photo: Jon Traunfeld, University of Maryland Extension

Fertilizing containers

Regardless of the growing media used, plants need to be fertilized regularly to replace nutrients that drain out with frequent watering. The amount of fertilizer needed will depend on the plants being grown, the container size, how often it's watered, and the type of fertilizer used.

  • Look for fertilizers with a 3-1-2 ratio of nitrogen (N), phosphorus (P), and potassium (K). The exact N-P-K ratio is not critical, but it reflects the relative proportions of each major nutrient used by the plant. (Nitrogen is the nutrient used most heavily by plants.)
  • Liquid fertilizers will need to be applied more frequently than dry (slow-release) fertilizers. Slow-release fertilizers can provide nutrients for 2 to 3 months.
  • Long-season vegetable crops such as tomatoes, cucumbers, eggplant, and peppers may need to be lightly fertilized every two weeks to produce a continuous harvest.
  • If the growing mix contains 50% compost, reduce the fertilizer amount by half and don’t apply fertilizer until plants are growing.
  • To prevent leaf burn, don't apply fertilizer when leaves are wet (where a dry formulation may stick) and rinse off any fertilizer that lands on leaves.
  • Always read and follow the label on the fertilizer product you are using. Using too much can damage the plant and cause excessive salts to build up in the container, which can stress or kill roots. Over-fertilizing can also make plants more vulnerable to pests and diseases.

Supporting plants

Tall or vining plants need support to bear the weight of growth, along with the ripening crop. Otherwise, stems may break or arch over onto the ground, where they may be more susceptible to infections or damage from being stepped on.

A pepper plant growing in a 5-gallon plastic bucket and supported by a wire cage consisting of several tiers of rings on stakes.
A ‘Carolina Reaper’ pepper plant supported by a tomato cage.
Photo: Jon Traunfeld, University of Maryland Extension
  • Vertical supports, such as stakes and fencing panels, make good use of space. Install stakes and other supports when plants are young. Be careful not to damage roots when anchoring the support into the media.
  • A commonly used vegetable support structure is the “tomato cage.” Product designs can be round, square, triangular, stackable, or collapsible for easier storage.
  • Tall, top-heavy, or long-stemmed vegetables that benefit from support include cucumbers, pole beans, green peas, okra, Brussels sprouts, Malabar spinach, peppers, tomatoes, and eggplants. Squash and sweet potato stems grow long and can be tied to a trellis, wire panel, or arch as they grow.

Plant and pest problems

Vegetables and herbs grown in containers can have similar problems to those grown in the ground.

  • Not enough sunlight: Insufficient direct sunlight can reduce plant vigor and productivity, resulting in a poorer-quality harvest.
  • Overcrowding: Planting too densely raises the risk of leaf infections due to reduced air circulation. Leaves compete for light, limiting productivity, and roots compete for moisture, nutrients, and growing space. It is important to give root crops (carrots, beets, potatoes, etc.) enough room to mature.
  • Undersized container: Pots that are too small restrict root growth, which in turn limits the productivity of top growth (fewer leaves or fruits to harvest). Small pots fill with roots faster and will fluctuate in temperature and dry out more quickly than larger pots.
  • Overwatering: Root rots can kill roots deprived of oxygen when the media does not dry out enough between waterings. Frequent leaf wetting with a hose or sprinkler can predispose the foliage to infection.
  • Underwatering: Roots can die from prolonged dryness between waterings. When foliage shading fruits wilts, the greater sun exposure can scald (sunburn) and damage the fruit. Drought stress can also scorch leaves, resulting in brown edges or bleached patches.
  • Too many or too few nutrients: Malnutrition prevents plants from growing normally and producing a high-quality harvest. Applying extra nutrients when they are not needed can stress or damage plants and worsen a pest or disease outbreak.
  • Slow-draining potting soil: Heavy, dense growing media can become saturated with water and kill plants by depriving their roots of oxygen.
  • Chilling injury: Seedlings started indoors and greenhouse-grown vegetable transplants need time to acclimate to outdoor conditions. Cold temperatures and overnight frosts can injure tissues, and cold-sensitive species will have difficulty absorbing needed nutrients if the media is too cool. (For example, tomatoes planted too early may develop a temporary phosphorus deficiency.)
  • Animal and disease damage: Feeding by wildlife (such as rabbits, groundhogs, and deer), insect and mite pests, and infections (fungi, bacteria, and viruses) can weaken plants or cause harvest losses. Some degree of damage is generally unavoidable, but since containers are easier to shield with netting, plants usually have fewer pest problems than in-ground food gardens.
A large container of vegetable plants, supported on wooden legs, is snugly covered by see-through fine white netting.
Insect netting keeps pests off of vegetable plants in a large elevated container.
Photo: Jon Traunfeld, University of Maryland Extension
  • A cluster of ripening tomato fruits on a tomato plant.

    Vegetable Profiles

    Vegetable Profiles

    Find crop-specific cultivation tips and get help diagnosing problems.

Author: Jon Traunfeld, Extension Specialist (retired), Home/Community Food Gardening, March 2026.

Reviewed by Miri Talabac, Lead Horticulture Coordinator, HGIC. March 2026.

Copy editing by Nancy Klein, Maryland Master Gardener, March 2026.

Still have a question? Contact us at Ask Extension.