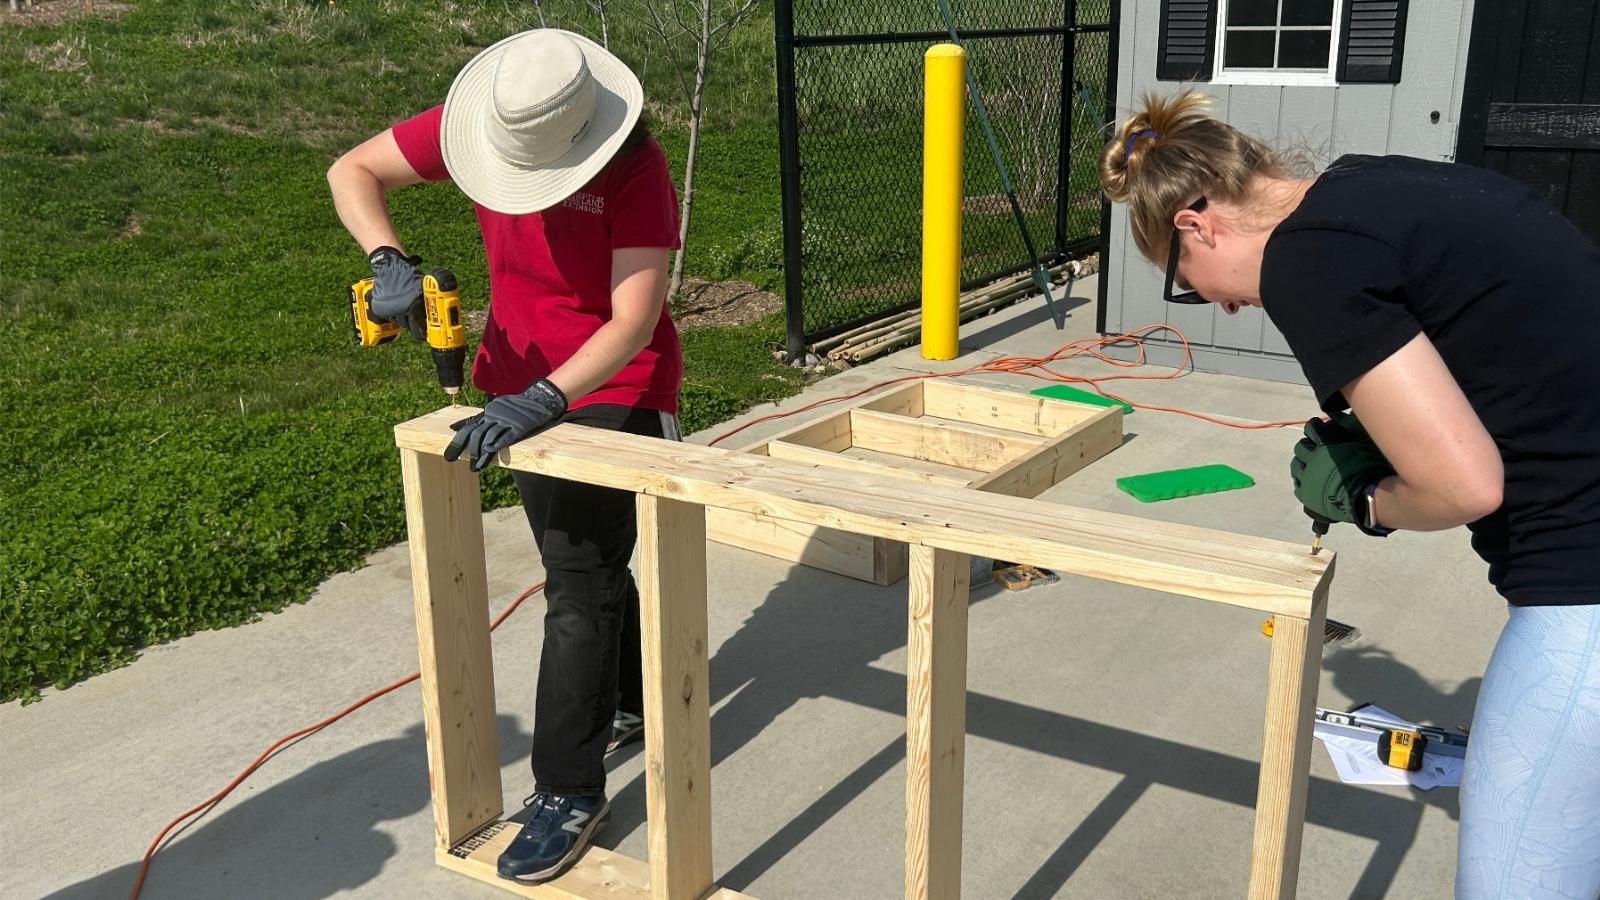
Two people use cordless drills to screw together pieces of a wooden table frame.

HGIC and Master Gardener program personnel build a demonstration Salad Table.
Photo: David Clement, University of Maryland Extension

Updated: September 10, 2026

The University of Maryland Salad Table, developed by University of Maryland Extension in 2009 and adopted by many gardeners nationwide, lets you grow flavorful greens close to your back door without digging in the ground.

A Salad Table is essentially a shallow frame with a large surface area and a mesh bottom that allows water to drain. The frame is filled with potting mix and planted, and as roots begin to grow through the mesh, the exposure to open air stops their growth (called "air root pruning"). In response to the limited depth, the plants produce more roots within the potting mix; a larger root system can support more leaf growth. A Salad Box is a smaller-scale version of a Salad Table designed to sit on flat surfaces.

Salad Tables are typically made from readily available lumber and have four legs. You can attach legs of any length, or set a legless table top or Salad Box on top of sawhorses or other supports. They are portable, versatile, inexpensive to build, and work for gardeners of all ages and abilities.

The Salad Table can be positioned to give plants enough direct sun in spring and fall, and moved to avoid too much direct sun and high heat in summer. Best of all, you can garden comfortably at a height that works for you and avoid problems with rabbits and groundhogs.

Learn how to build a standard Salad Table and Salad box in the following instructions. For information about choosing which plants to grow, selecting the media to use to fill the table/box, and caring for the plants after planting, visit Growing Vegetables in Containers and Salad Tables
 

Building the original Salad Table

Finished dimensions: 58 inches long, 33 inches wide, 36 inches tall
Materials

  • Untreated framing lumber
    • three 2x4s, each 10 feet long
    • one 2x4, 12 feet long
  • 2½-inch galvanized deck screws
  • ⅜-inch staples
  • 1 pound of 1-inch roofing nails
  • 3-foot x 5-foot roll of aluminum window screen
  • 3-foot x 5-foot roll of ½-inch mesh hardware cloth (galvanized wire mesh that comes in a roll); ¼-inch mesh hardware cloth is more expensive but easier to manipulate

Tools

  • Hand saw
  • Wood rasp
  • Woodworking/carpenter square
  • Hammer
  • Tin snips
  • Drill with ⅛-inch drill bit
  • Staple gun
  • #2 Phillips-head screw bits
  • Tape measure
  • Leather gloves
  • Safety goggles

Cut the wood to size

Wooden boards laid on the ground in a group of different lengths, ready for assembly and into a finished table frame.
Wood cut for assembly into the frame of a Salad Table.
Photo: Jon Traunfeld, University of Maryland Extension
  • To make the long sides of the table, cut (2) 58-inch sections from a 10-foot 2x4. There will be 4 inches of leftover (scrap) wood.
  • To make the cross pieces, cut (4) 30-inch sections from a 10-foot 2x4. This cuts the 2x4 into four even pieces; there will be no leftovers.
  • To make the inside support part of the legs, cut (4) 29 ½-inch sections from a 10-foot 2x4, which will leave 2 inches of leftover wood.
  • To make the outside support part of the legs, cut (4) 33-inch sections from the 12-foot 2x4, which will leave 12 inches of leftover wood.
  • Use a wood rasp to smooth any rough edges after cutting your wood pieces.

Assemble the pieces

  1. Assemble the frame for the table top.
    1. Attach the 58-inch-long frame sides to the 30-inch frame crosspieces using 2 screws per crosspiece. Drill pilot holes with the drill bit before driving in the galvanized screws.
    2. The two interior cross pieces are attached on center at 19 9/16 inches from each end of the long pieces. This divides the table into three equal sections, each measuring 30 inches by 17 5/16 inches.
  2. Attach the window screen to the table top's underside.
    1. Center the window screen on the outside bottom of the frame.
    2. Have two people stretch it taut and staple it to the frame's bottom and sides with a staple gun.
  3. Attach the hardware cloth over the window screen.
    1. Center the hardware cloth on top of the window screen, pull it taut, and staple it to the bottom of the frame.
    2. Nail roofing nails along the wire edges around the frame for added support – the wide nail head can help secure the wire mesh.
    3. Use tin snips to make a diagonal cut from each corner of the hardware cloth to the table frame. This enables you to fold the excess material up and onto the ends of the frame, where it can be stapled and nailed. (It will be difficult to attach the legs properly if the hardware cloth and window screen are folded and bunched on the sides where the legs attach.)
  4. Assemble the legs.
    1. Each leg is made from two pieces of wood: a long and a short piece attached to each other.
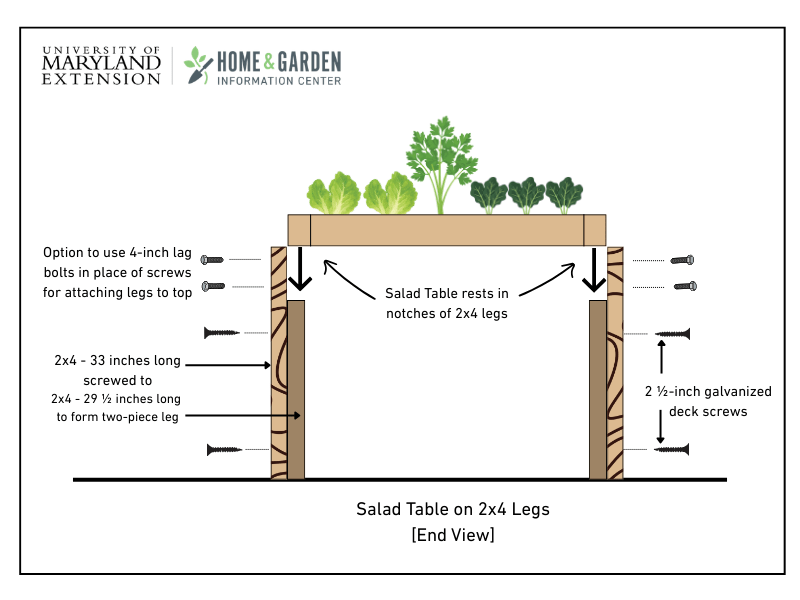
    2. Build the four legs by screwing each 29 ½-inch leg piece to a 33-inch leg piece, lining up the ends so they are even. This flush end is what sits on the ground or where you can later attach a wheeled caster.
  5. Attach the legs to the table frame.
    1. The tabletop will rest on the shorter inner portion of each 2-piece leg.
    2. Attach each leg, 8 inches inset from each of the four corners, by driving three 2 ½-inch screws through the top of each leg and into the long side of the frame.
  6. Coat the Salad Table with latex paint or an acrylic stain to resist decay.
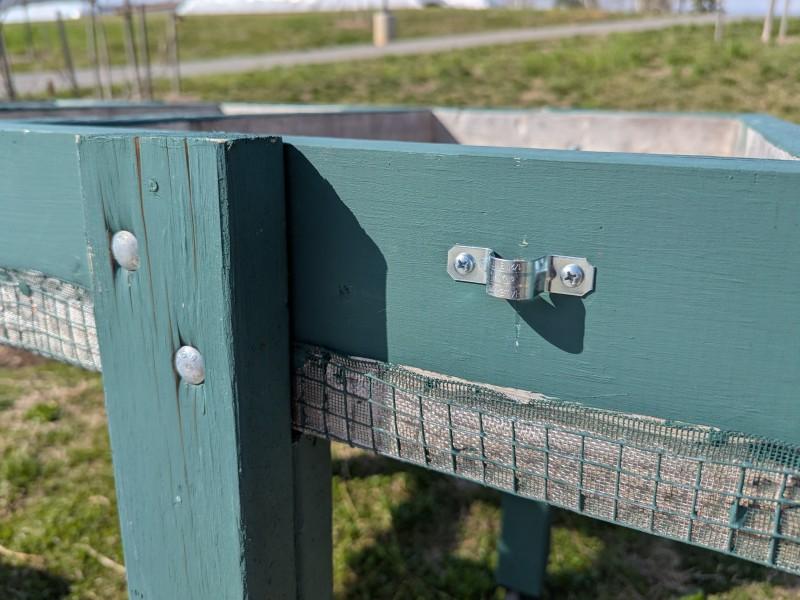
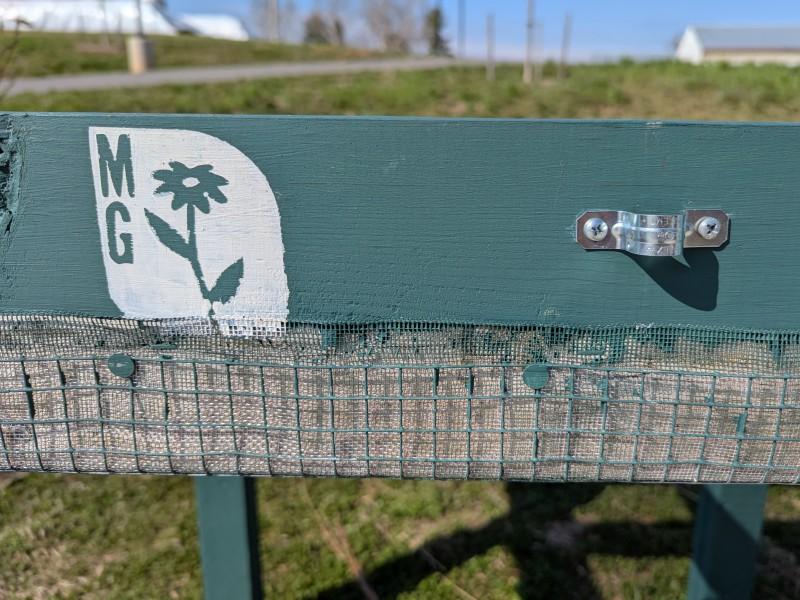
Close-up of the outside of a Salad Table frame, showing two bolts attaching the leg and a bracket used to anchor a piece of pipe.
Removable bolts attaching a leg to a Salad Table frame. A pipe bracket is an optional feature used to anchor an arch of flexible pipe to support frost cover or insect-blocking mesh to protect the plants.
Photo: Miri Talabac, University of Maryland Extension
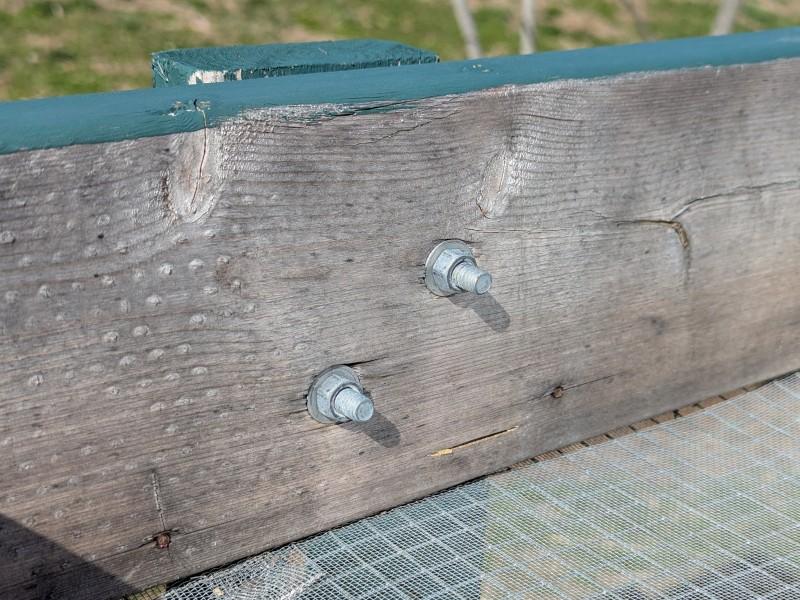
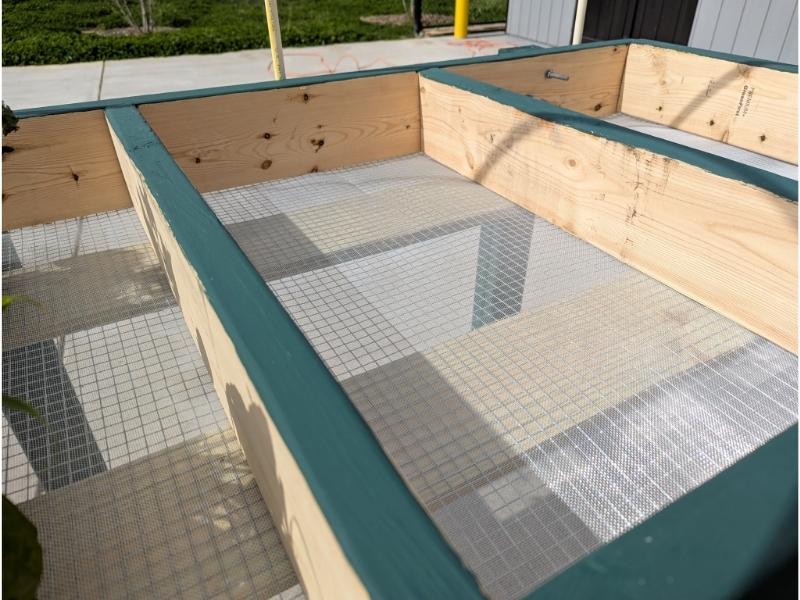
A close-up of bolts anchoring a leg to a Salad Table frame, as seen from inside of the table top.
Removable bolts anchoring a leg to a Salad Table frame. Removable legs helps with out-of-season storage and table transportation.
Photo: Miri Talabac, University of Maryland Extension
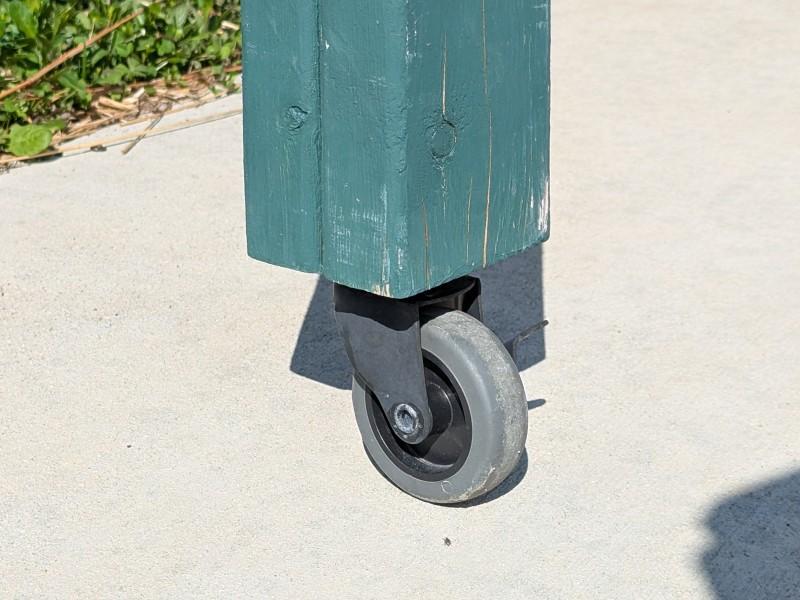
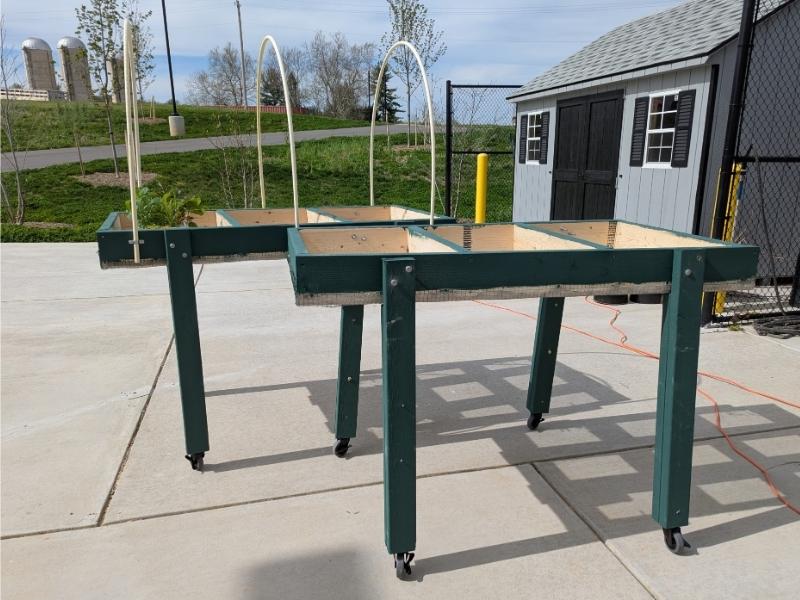
Close-up view of the base of a two-piece Salad Table leg, showing the board ends flush with each other. A lockable wheel is attached to the base of the leg.
The two pieces of wood forming each Salad Table leg are aligned flush with each other at the bottom end, which enables you to attach a wheel underneath.
Photo: Miri Talabac, University of Maryland Extension
Close-up view of a Salad Table frame with an optional pipe bracket and two wide-headed nails anchoring the wire mesh wrapped over the frame's underside.
A painted Salad Table frame with wide-headed nails helping to anchor the wire hardware cloth mesh to the sides of the frame. An optional pipe bracket is also used to anchor arched supports for holding a woven or mesh cover above the plants.
Photo: Miri Talabac, University of Maryland Extension

Alternative Salad Table construction methods

  • A Salad Table can be made any width and length as long as the weight of the moist potting mix and plants can be supported.
  • A lumber yard or hardware store can make the required lumber cuts for you.
  • Substitute 2x6-sized boards for larger-growing salad greens and bush beans, or 2x8 or 2x10 boards for peppers, determinate-type tomatoes, and bush cucumbers.
  • Make legs from 1x4 or 4x4 boards, or set the frame on two sawhorses or other supports instead of fixed legs.
  • Attach sturdy casters to the legs for easier mobility.
  • Substitute 4-inch lag bolts for screws for attaching the legs (2 bolts per leg). This allows the legs to be easily removed if you need to break down the Salad Table for storage or transport.
  • Attach three 1x4 boards, each 58-inches long, over the hardware cloth on the table bottom to prevent it from sagging.
  • Make the frame with one internal division instead of two.
  • Cover the edge of the window screen and hardware cloth on all four sides with molding or batting to prevent fraying and cuts from sharp metal edges.

Examples of customized salad tables

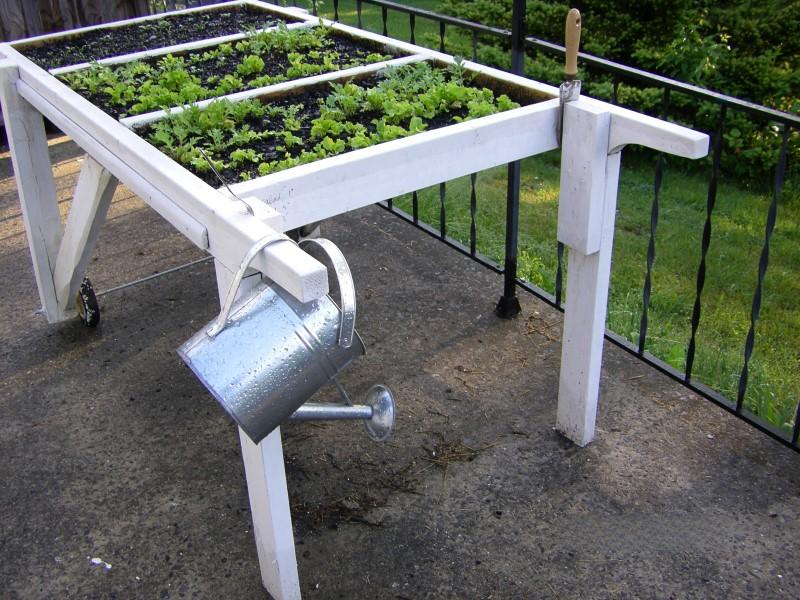
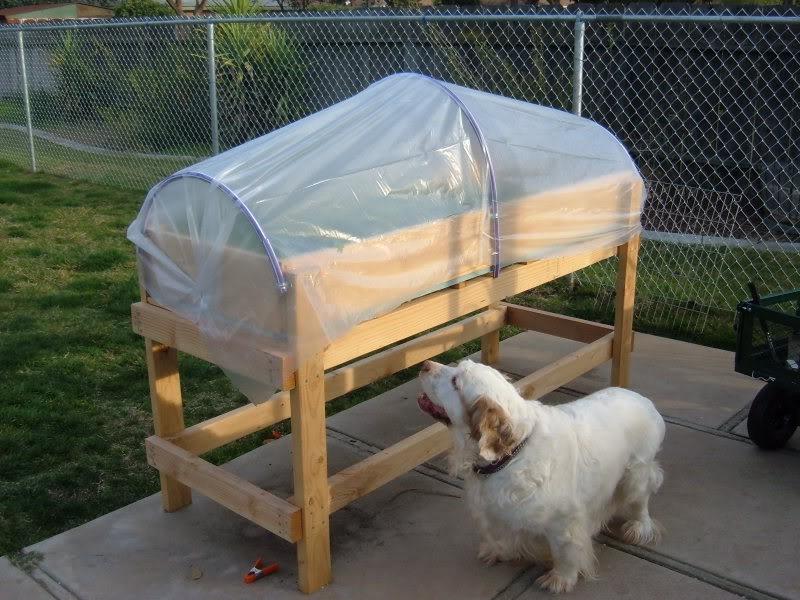
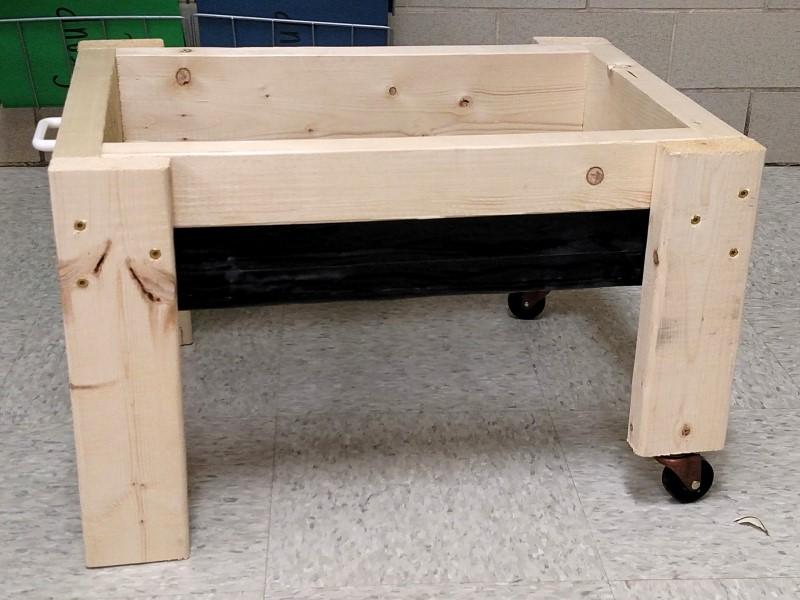
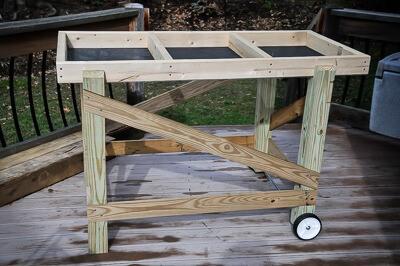
Salad Tables can be customized to make them sturdier or more versatile. Modifications include:

  • Adding wheels or casters
  • Incorporating supports and anchor points for covers (such as clear plastic, row cover, or insect mesh)
  • Adding stabilizing cross braces for the legs
  • Adding handles and tool storage
  • Building the table to a smaller scale
  • Increasing the depth for larger crops

Building the original Salad Box

Finished dimensions: 21 inches long, 15 inches wide

Materials

  • Pine or cedar lumber: one 1x4, 6-feet long
  • 1¼-inch galvanized deck screws
  • ⅜-inch staples
  • Aluminum window screen
  • ¼-inch mesh hardware cloth (galvanized wire mesh that comes in a roll)
  • Handles (optional)

Tools

  • Hand saw
  • Woodworking/carpenter square
  • Hammer
  • Tin snips
  • Drill with ⅛-inch drill bit
  • Staple gun
  • #2 Phillips-head screw bits
  • Tape measure
  • Leather gloves
  • Safety goggles

Cut the wood to size

  • To make the sides of the box, cut the lumber into 4 sections: 2 sections that are 15 inches long and 2 sections that are 21 inches long, which leaves no leftover wood.
  • Use a wood rasp to clean up rough edges after cutting your wood pieces.

Assemble the pieces

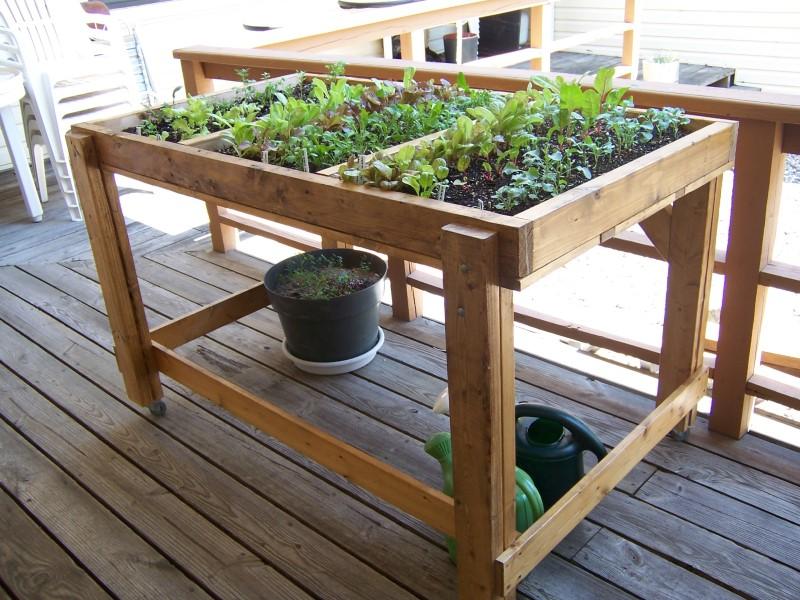
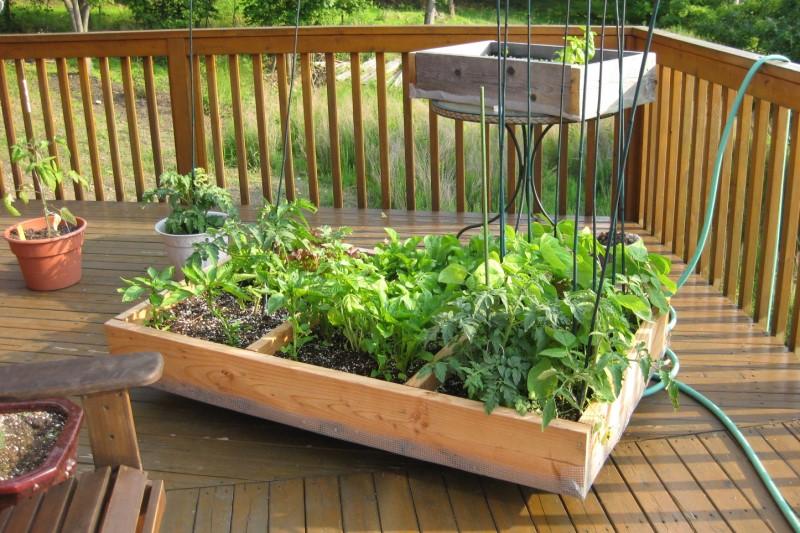
A table-sized Salad Box with casters on its base, sitting on a large sunny deck near a garden hose.
Large Salad Box with casters on the bottom. The gardener can move the box to different deck locations depending on the plants’ sunlight needs.
Photo: anonymously shared with UME
  1. Use the screws to attach the 21-inch long sides to the 15-inch short sides to form a rectangle. Drill pilot holes with the drill bit before driving in the galvanized screws.
  2. Lay the window screen over the box with a bit of overlap along the long sides. Cut the screen so that it is even with the short sides and extends 3 inches beyond the edges of each long side. Staple it securely to the frame's bottom and sides using a staple gun.
  3. Repeat the same procedure with the hardware cloth, except cut it so it extends only 2 inches up each long side. Staple it to the frame's bottom and sides. Fold the window screen overhang down over the hardware cloth edge to create a seam and staple it securely.
  4. Coat the Salad Box with latex paint or an acrylic stain to resist decay.

Alternative Salad Box construction methods

  • Use finishing nails instead of screws to build the box, or use a combination of the two.
  • Add handles to the ends for easy lifting and moving. (The box weighs about 12 to 15 pounds when filled with moist potting mix and plants.)
  • Nail or screw two 21-inch pieces of wood to the long sides of the bottom of the box to raise it off the ground.
  • Use 1x6 wood for a deeper box and greater rooting area. This increases the box’s expense and weight, but allows crops to grow larger.
  • Cover the edge of the window screen and hardware cloth on all four sides of the frame with wood molding, batting, duct tape or another material to prevent fraying and cuts from sharp metal edges.

Author: Jon Traunfeld, Extension Specialist (retired), Home/Community Food Gardening, March 2026.

Reviewed by Miri Talabac, Lead Horticulture Coordinator, HGIC. March 2026.

Copy editing by Nancy Klein, Maryland Master Gardener, March 2026.

Still have a question? Contact us at Ask Extension.