Key Steps for Optimum Forage Establishment
Last month we discussed strategies for assessing pasture stands and some initial considerations when beginning to think about pasture renovations. Now that August has arrived, if you have decided to proceed with some form of pasture renovation this fall it will soon be time for planting. Whether you are overseeding or doing a complete renovation, there are several steps you should follow to make sure the seeding process goes smoothly. Below is an overview of the key steps necessary for optimum forage establishment.
Step 1: Correct Soil Fertility
Poor soil fertility is one of the most common causes of poor stand establishment and poor stand persistence over time. Acidic conditions (low soil pH) will reduce nutrient availability and impair root growth and development, and essential nutrients like phosphorus are critical for proper seedling development. Because of these effects on plant nutrient availability and utilization, ensuring adequate soil pH and fertility is essential for optimum stand establishment and to obtain persistent, high-yielding stands for years to come. Soil fertility testing should be done prior to renovation so that lime and fertilizer can be applied according to soil test recommendations. Complete this step as early as possible to give lime and fertilizer time to move into the soil profile and react with the soil.
Step 2: Control Weeds
Weeds compete with desirable forages for light, nutrients, moisture, and space and can shade out or outcompete new seedlings. For best results, ensure weeds are controlled prior to seeding. Proper weed identification is a must to achieve effective control; if you need help with identification and control options consult with your local Extension office or agricultural agency (NRCS, SCD, etc.). Be sure to always follow the label, and remember that while herbicides can be a useful tool for weed management, they are not the only option for weed control. An integrated weed management approach that combines various cultural, mechanical, and chemical control practices will be the most successful.
Step 3: Select Adapted Species
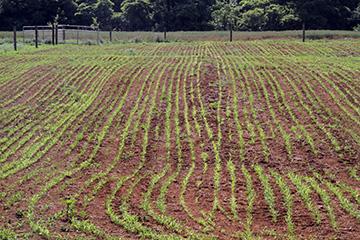
Not all forages will perform equally on different sites, so be sure to select forages that are well suited for your soil and site characteristics. Many factors must be considered when selecting suitable grass and/or legume species, including variables such as soil type, drainage, moisture holding capacity, soil pH, fertility, and topography. For example, species like orchardgrass or alfalfa require a higher level of fertility and will not thrive in systems with low soil pH or poor soil fertility. Be sure to select forage species that will match your soil/site characteristics along with your intended use (hay vs. pasture, perennial vs. annual forage, time of year, length of grazing season, management system) and livestock requirements (species, age, and life stage). Certified seed should be used to ensure purity and high seed quality.
Step 4: Inoculate Legume Seeds
If you plan to incorporate a legume as part of your forage mix, be sure the seed is properly inoculated with nitrogen-fixing bacteria. Some legume seeds come pre-inoculated, which saves time and helps to ensure inoculation. If not, be sure to select the appropriate inoculant strain for the legume species and inoculate the seed with fresh inoculant prior to seeding. Use an effective adhesive material to hold the inoculant on the seed; various commercial products are available or something like sugar water can be used (2 cups sugar per 1 quart of water). Inoculants are living organisms and will only work if the bacteria are alive when applied, so be sure to use proper storage and handling (keep inoculant cool) and check expiration dates.
Step 5: Graze and/or Clip Close
Grazing or clipping a pasture close to ground level prior to seeding will help eliminate residue and assist in suppressing competition from existing vegetation, giving new seedlings an opportunity to grow. If using livestock to accomplish this via grazing, be mindful of the potential effects this may have on animal performance, including the consumption of lower quality forage and/or the potential for increased parasite loads as animals graze below the usual minimum height recommendation.
Step 6: Prepare a Proper Seedbed
This step will vary slightly depending on the use of tilled vs. no-till planting. The purpose of tillage is to loosen the soil, eliminate existing vegetation, turn under weed seeds, incorporate lime and fertilizer into the soil, and create a smooth surface to plant into. If using tillage, be sure the seedbed is soft yet firm following tillage. An underworked seedbed will have too much surface residue and will be too rough for good seed placement, while an overworked seedbed will be too fluffy and fine and will dry out quickly. A good rule of thumb is that your boot tracks should be around ¼ inch deep if you walk across the tilled field. No-till plantings do not require tillage and offer advantages in conserving soil moisture, maintaining soil integrity, and reducing the potential for soil erosion. For no-till seedings, it is especially important to suppress or eliminate the existing stand and reduce residue prior to planting to eliminate competition. In addition to close grazing and/or clipping, the existing stand can be further suppressed or eliminated using a nonselective herbicide.
Step 7: Seed at the Proper Time
Cool-season forages can be seeded in either the spring or late summer, but late summer is typically considered the preferred time for seeding. Advantages of late summer seedings generally include reduced weed competition and cooler weather conditions during establishment. The ideal window of time will vary depending on your location and weather conditions but in general, the optimum time for late summer seeding in Maryland occurs from mid-August through mid-September. Soil moisture can be a limiting factor with late summer seedings; if possible, seeding should be timed with rainfall to ensure adequate soil moisture.
Step 8: Seed at the Proper Rate
Seed characteristics vary for different forage species, so seeding rates will vary based on forage species selection as well as planting method (drill vs. broadcast) and site characteristics. Be sure to follow recommendations when making seeding rate decisions. Pasture seeding rates are typically higher than hay seeding rates to provide a denser sod for grazing. Seeding rates can also be adjusted slightly based on conditions at the time of seeding. If conditions are optimum, seed at the lower end of the recommended range. If conditions are poor, seed at the higher end of the recommended range. Either way, calibration of planting equipment is essential to achieve a proper seeding rate.
Step 9: Seed at the Proper Depth
Successful seeding requires proper metering and uniform seed placement. Seeding too deep is one of the most common causes behind establishment failures, especially with no-till plantings. To avoid issues, be sure the seed drill is calibrated appropriately so that seed is placed at the proper depth. Take into account the amount of residue left on the soil surface as well as your soil type, texture, and moisture conditions; in general, seed should be placed slightly shallower in a heavier soil with a higher moisture content and slightly deeper in a lighter soil with lower moisture content. For most cool-season forages, the ideal seeding depth is ¼ to ½ inch, but seed characteristics vary so be sure to determine the optimum depth for your selected species and adjust accordingly prior to planting. The key is to provide good seed to soil contact without placing the seed too deep.
Step 10: Manage New Seedings During Establishment
New seedings are especially sensitive during their establishment year. To maximize success, delay grazing on newly seeded areas until sufficient root systems have been developed to prevent livestock from uprooting newly established plants as they graze. Consider mowing new seedings a time or two or making a hay harvest from new stands (leaving at least 4 inches of residual) prior to grazing to encourage plants to set down good roots and reduce competition from weeds. Avoid grazing new stands during extremely wet periods, be very careful not to overgraze, and continue to scout for weeds or other potential issues that can impair establishment.
Establishment of a new forage stand can be a daunting process. By following these steps, you can help make sure the establishment process goes smoothly. If you have questions or need help along the way, reach out to your local Extension office or agricultural agency (NRCS, SCD, etc.) for assistance.