

Soil Sampling Procedures for Nutrient Management
For Producer Use
1. Define the management units
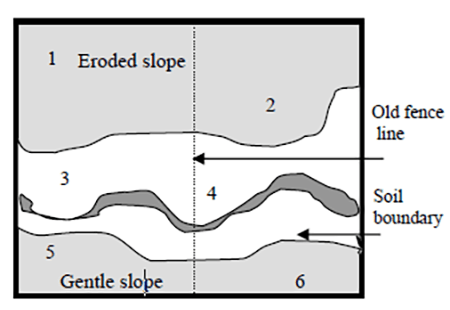
A management area is an area that can and will be managed separately from any other. If different field areas have different soil types, past cropping histories, or different production potentials, these areas should be sampled separately and managed separately (See Figure 1). If it is impossible for a farmer to manage different areas separately, they should be treated as one management unit.
2. Sample the management units.
Each unit should be sampled separately. Follow these steps for each management unit.
- Collect 15 to 20 samples in a clean plastic bucket.
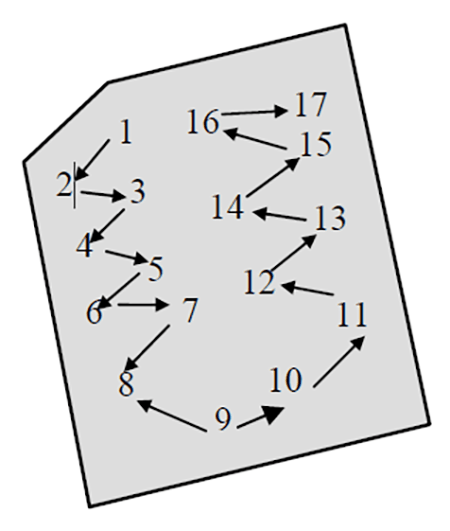
- Take samples from throughout the entire area of the unit.
- Follow a sampling pattern similar to that in Figure 2.
- Avoid sampling unusual areas such as windbreaks, old fence lines, wet areas or areas near lime rock roads.
- Scrape away any surface residues.
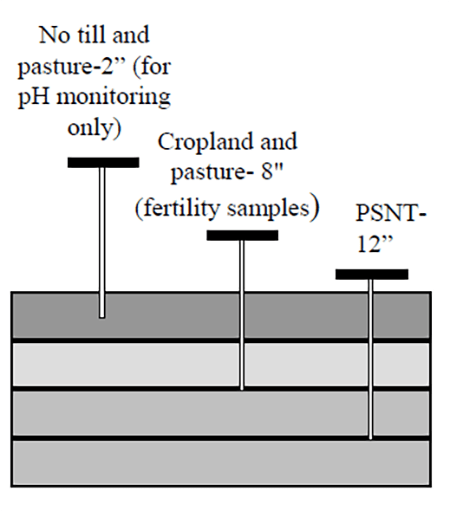
- Sample to the correct depth (See Figure 3).
- 2 inches for monitoring pH on no till cropland and pasture
- 8 inches for fertility samples on cropland and pasture
- 12 inches for PSNT
3. Mix the sample.
- Thorough mixing is essential.
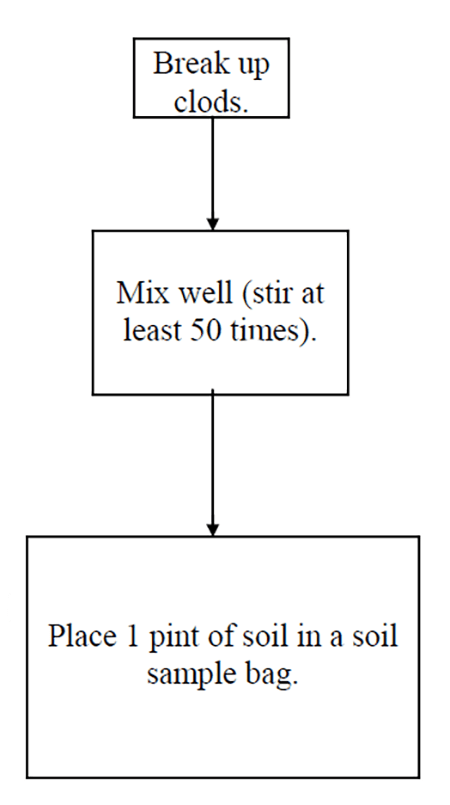
- If the sample is hard or strongly aggregated, break up the soil aggregates.
- Transfer the soil to a bucket. Mix the soil in the bucket at least 50 times. Spread the sample out.
- Take 5 scoops of soil from different parts of the sample to provide a total soil volume of approximately 1 pint.
- Place the soil into the soil sample bag.
4. Drying the sample.
- Spread the sample out in a warm place overnight to air dry it.
- DO NOT HEAT the soil.
5. Label the soil sample bag and place air-dried soil into it.
6. Fill out the information sheet as completely and accurately as possible.
Resources
-
Plan Writing Tools >
Plan Writing Tools > -
ANMP Soil and Tissue Sampling and Testing >
ANMP Soil and Tissue Sampling and Testing >